> ## Documentation Index
> Fetch the complete documentation index at: https://docs.sequencehq.com/llms.txt
> Use this file to discover all available pages before exploring further.
# Stripe
> Integrate with Stripe to automatically collect payments from customers and reconcile invoices.
 **Use the Stripe integration to**:
* Add Stripe payment links to Sequence invoices to provide additional payment methods
* Automatically charge customers when you send invoices (auto-charging can be disabled)
* Automatically mark Sequence invoices as paid once payment is received
**Creating a new Stripe account**
Stripe Connect requires all partner apps to create a separate, ringfenced account within your existing Stripe account. This prevents third party integrations from interacting with each other. If you have customers with payment details in your existing account, you can copy them over in a [few simple steps](#copying-existing-customers-into-your-new-stripe-account).
## Start guide
Follow the below steps to get started:
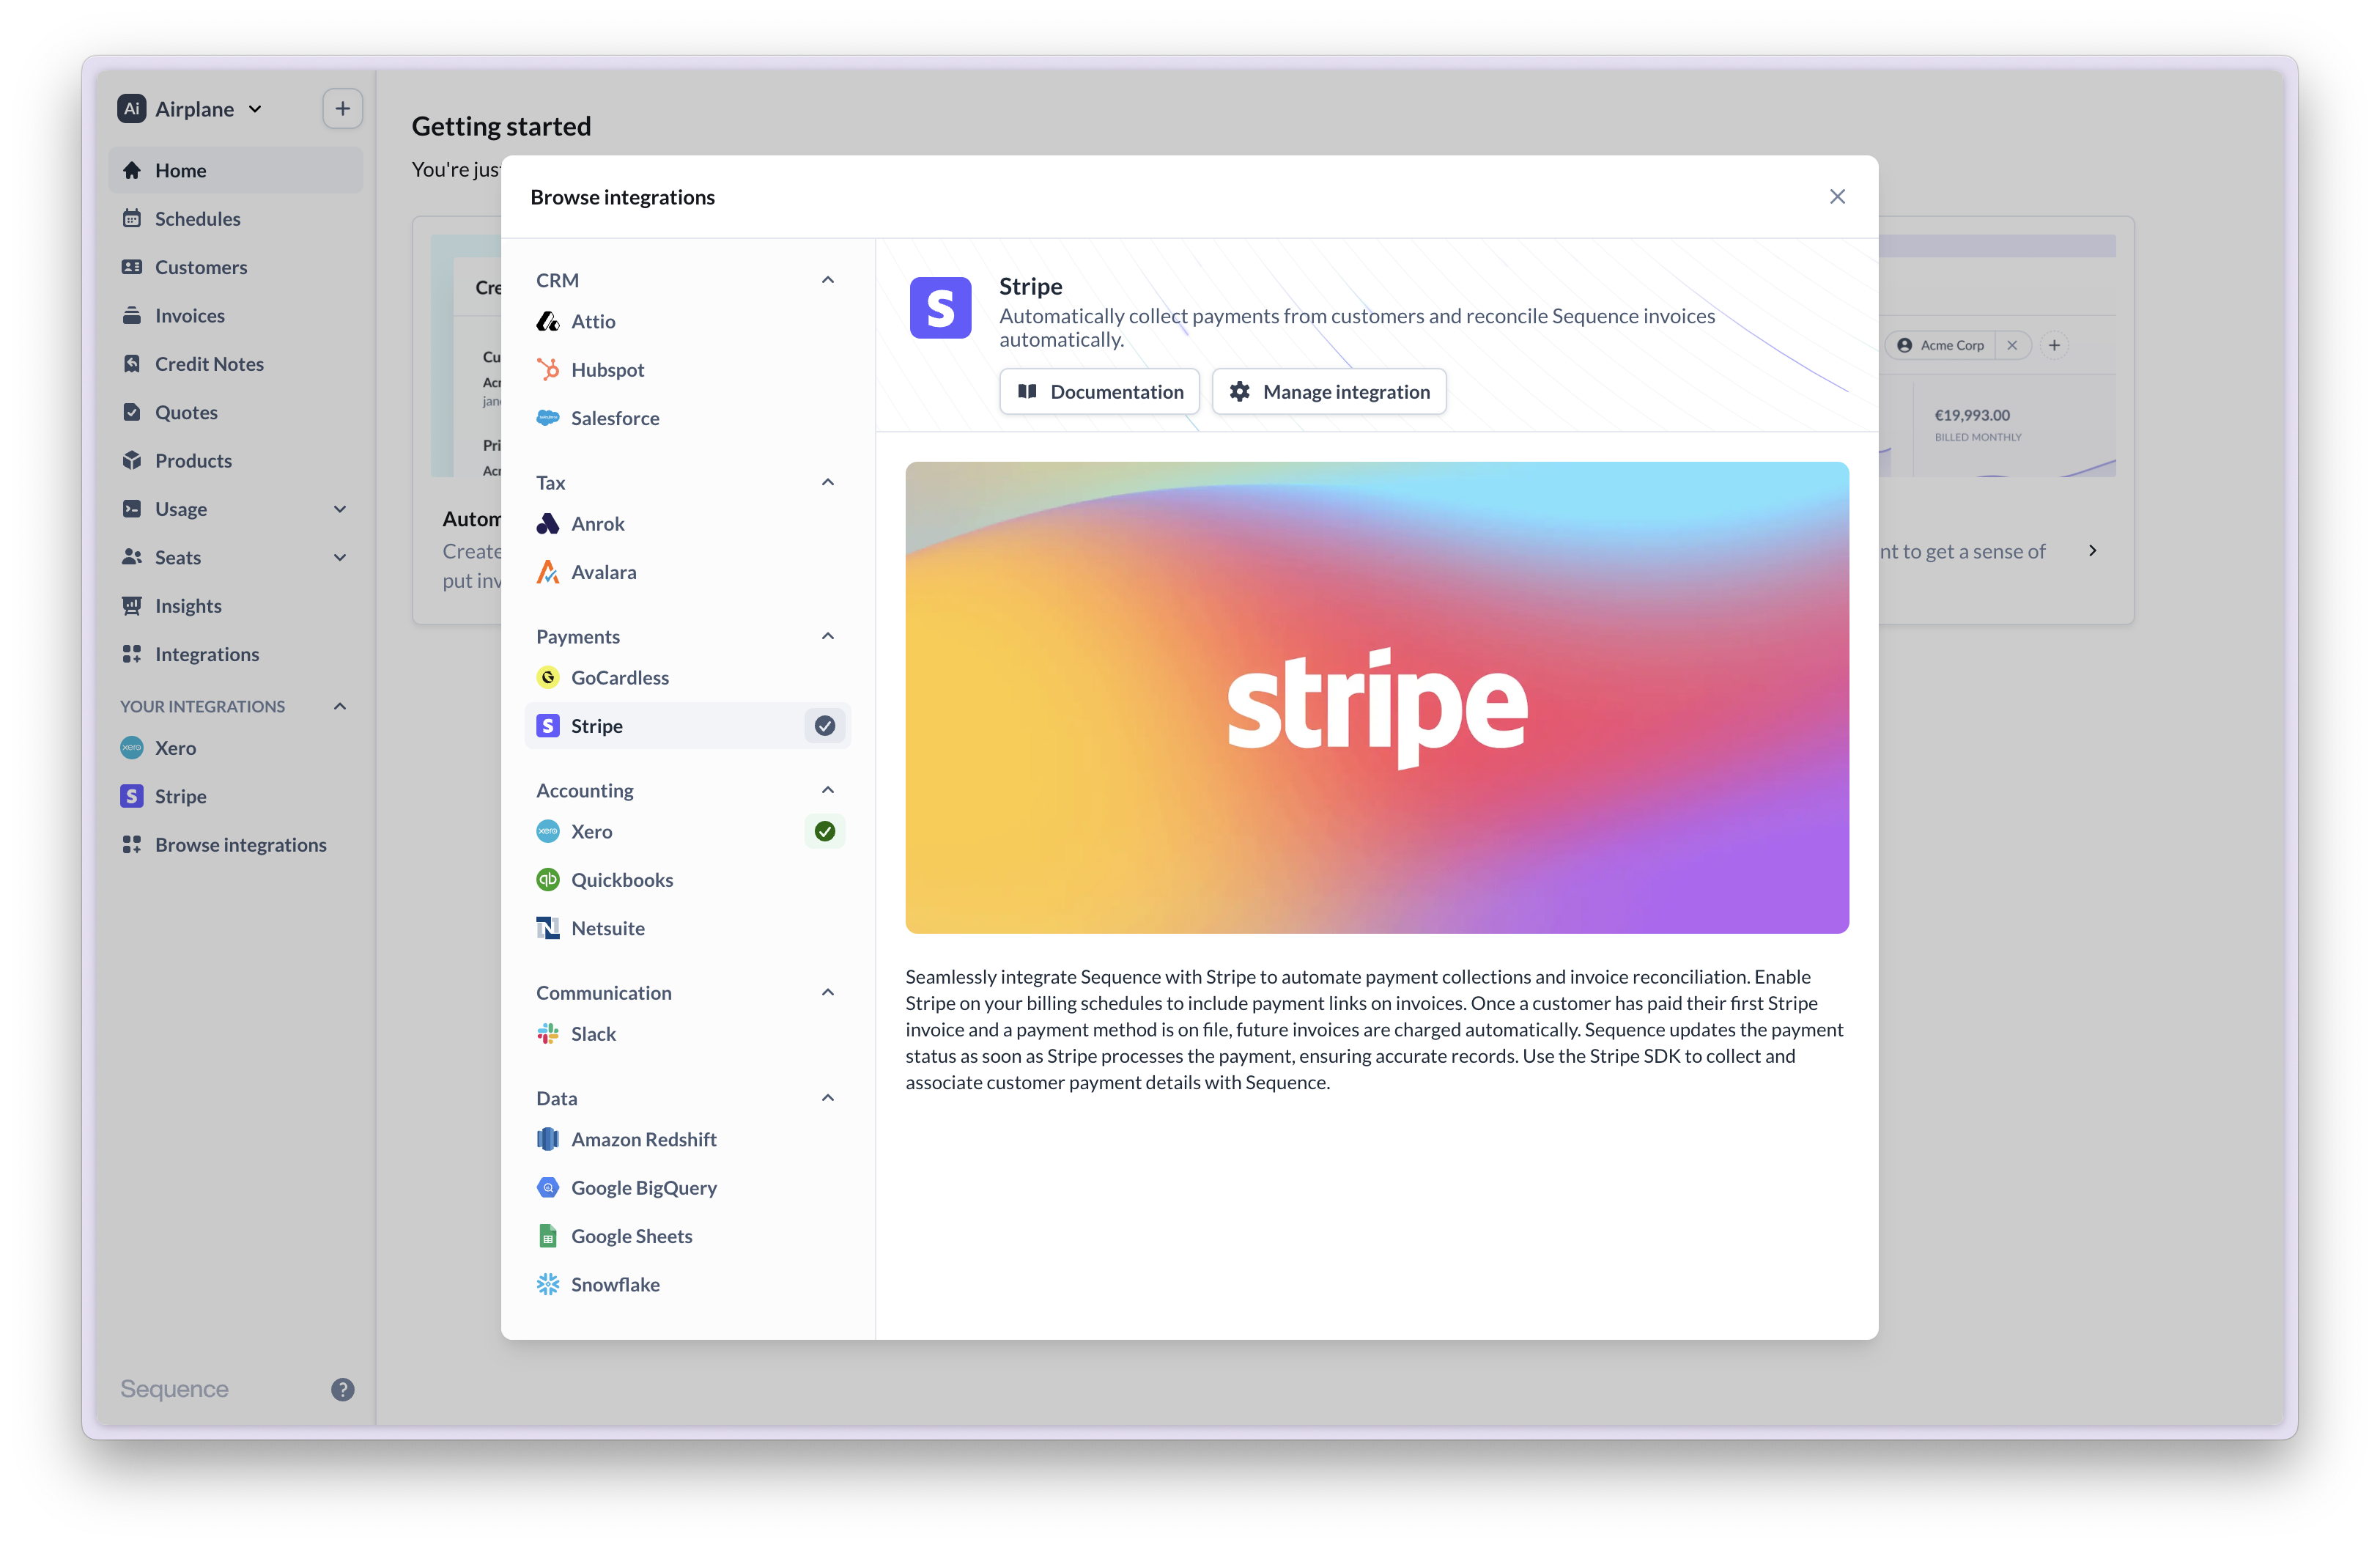
1. Head to the Integrations page to connect to Stripe. This will take you to a Stripe onboarding flow to create a new connected Stripe account. Stripe requires partner apps to create separate ringfenced accounts.
2. If you have an existing Stripe account with customers and payment methods, you can copy them over in a [few steps](#copying-existing-customers-into-your-new-stripe-account).
3. Link your Sequence customers to Stripe customers. Sequence will use the payment method on file to automatically charge your customers when an invoice is sent.
**Use the Stripe integration to**:
* Add Stripe payment links to Sequence invoices to provide additional payment methods
* Automatically charge customers when you send invoices (auto-charging can be disabled)
* Automatically mark Sequence invoices as paid once payment is received
**Creating a new Stripe account**
Stripe Connect requires all partner apps to create a separate, ringfenced account within your existing Stripe account. This prevents third party integrations from interacting with each other. If you have customers with payment details in your existing account, you can copy them over in a [few simple steps](#copying-existing-customers-into-your-new-stripe-account).
## Start guide
Follow the below steps to get started:
1. Head to the Integrations page to connect to Stripe. This will take you to a Stripe onboarding flow to create a new connected Stripe account. Stripe requires partner apps to create separate ringfenced accounts.
2. If you have an existing Stripe account with customers and payment methods, you can copy them over in a [few steps](#copying-existing-customers-into-your-new-stripe-account).
3. Link your Sequence customers to Stripe customers. Sequence will use the payment method on file to automatically charge your customers when an invoice is sent.
 During onboarding, Stripe will request standard information about your business to verify your account. Ensure that you provide complete business information to avoid the risk of suspension or payment interruptions later on.
### Recommended Stripe account setup
Create a transparent payment experience for your customers by enabling payment receipt notifications on Stripe (recommended).
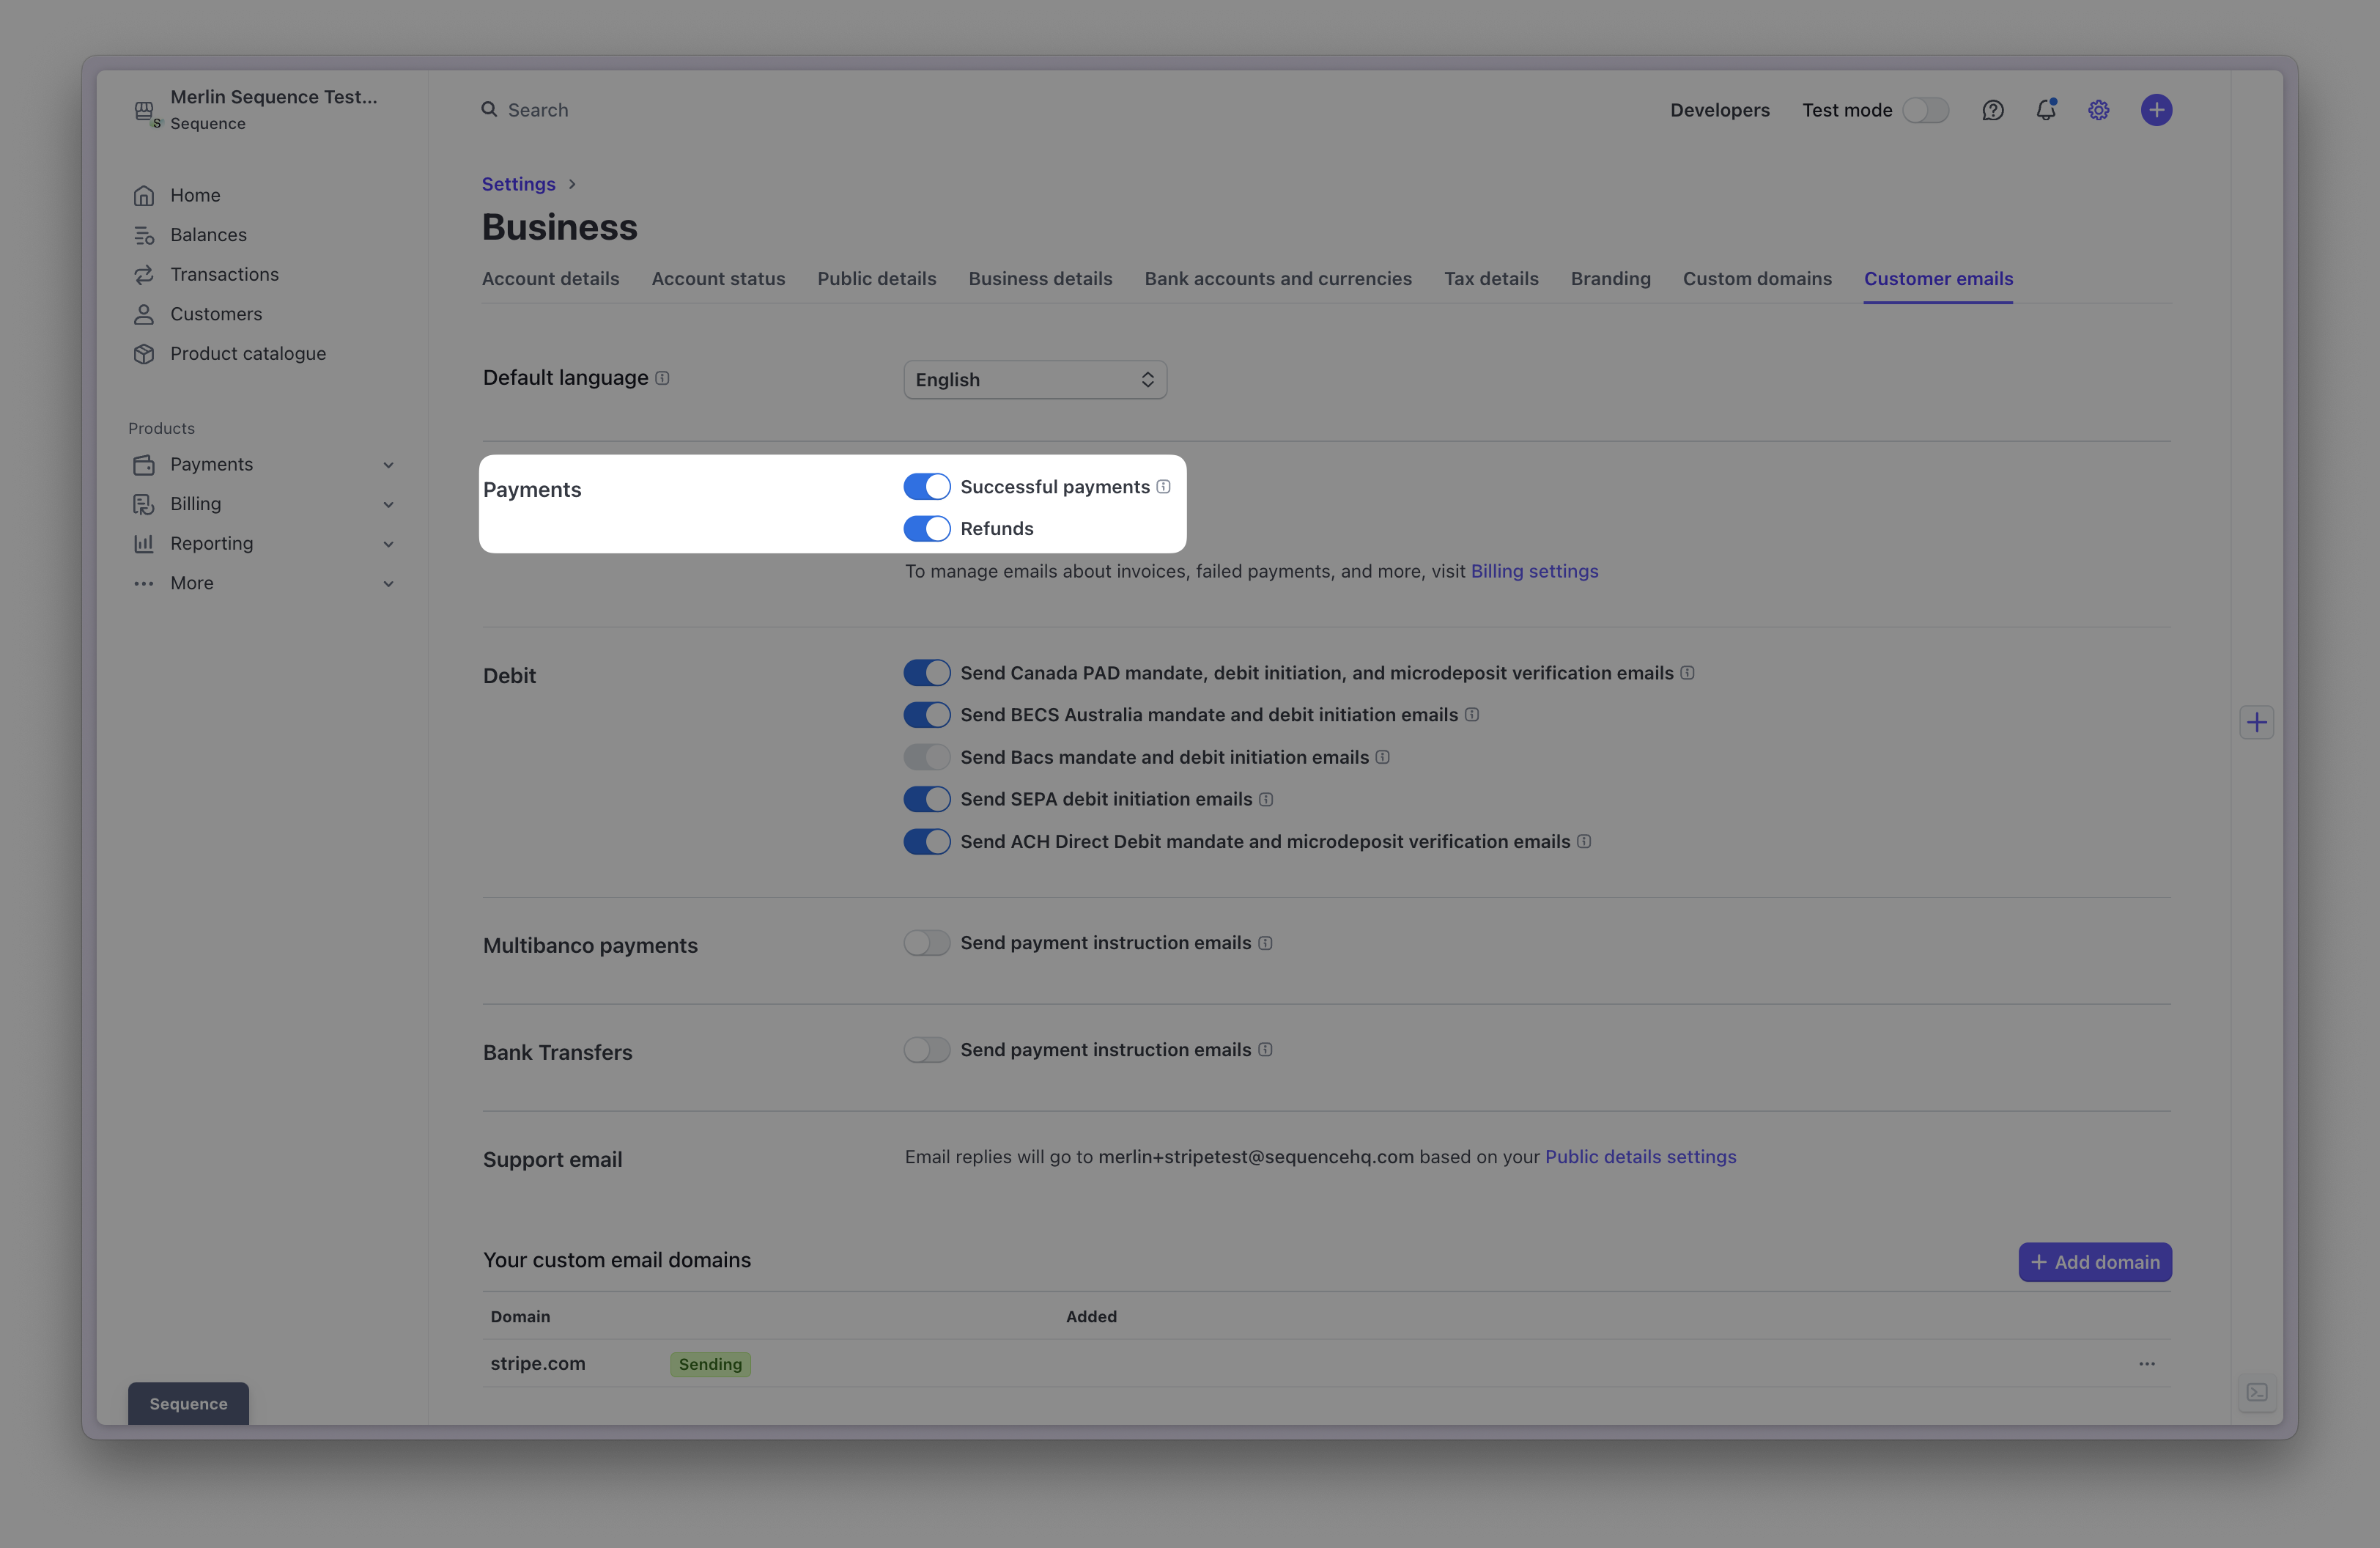
In your Stripe account, go to **Settings > Business > More > Customer emails** and enable email notifications for successful payments and refunds.
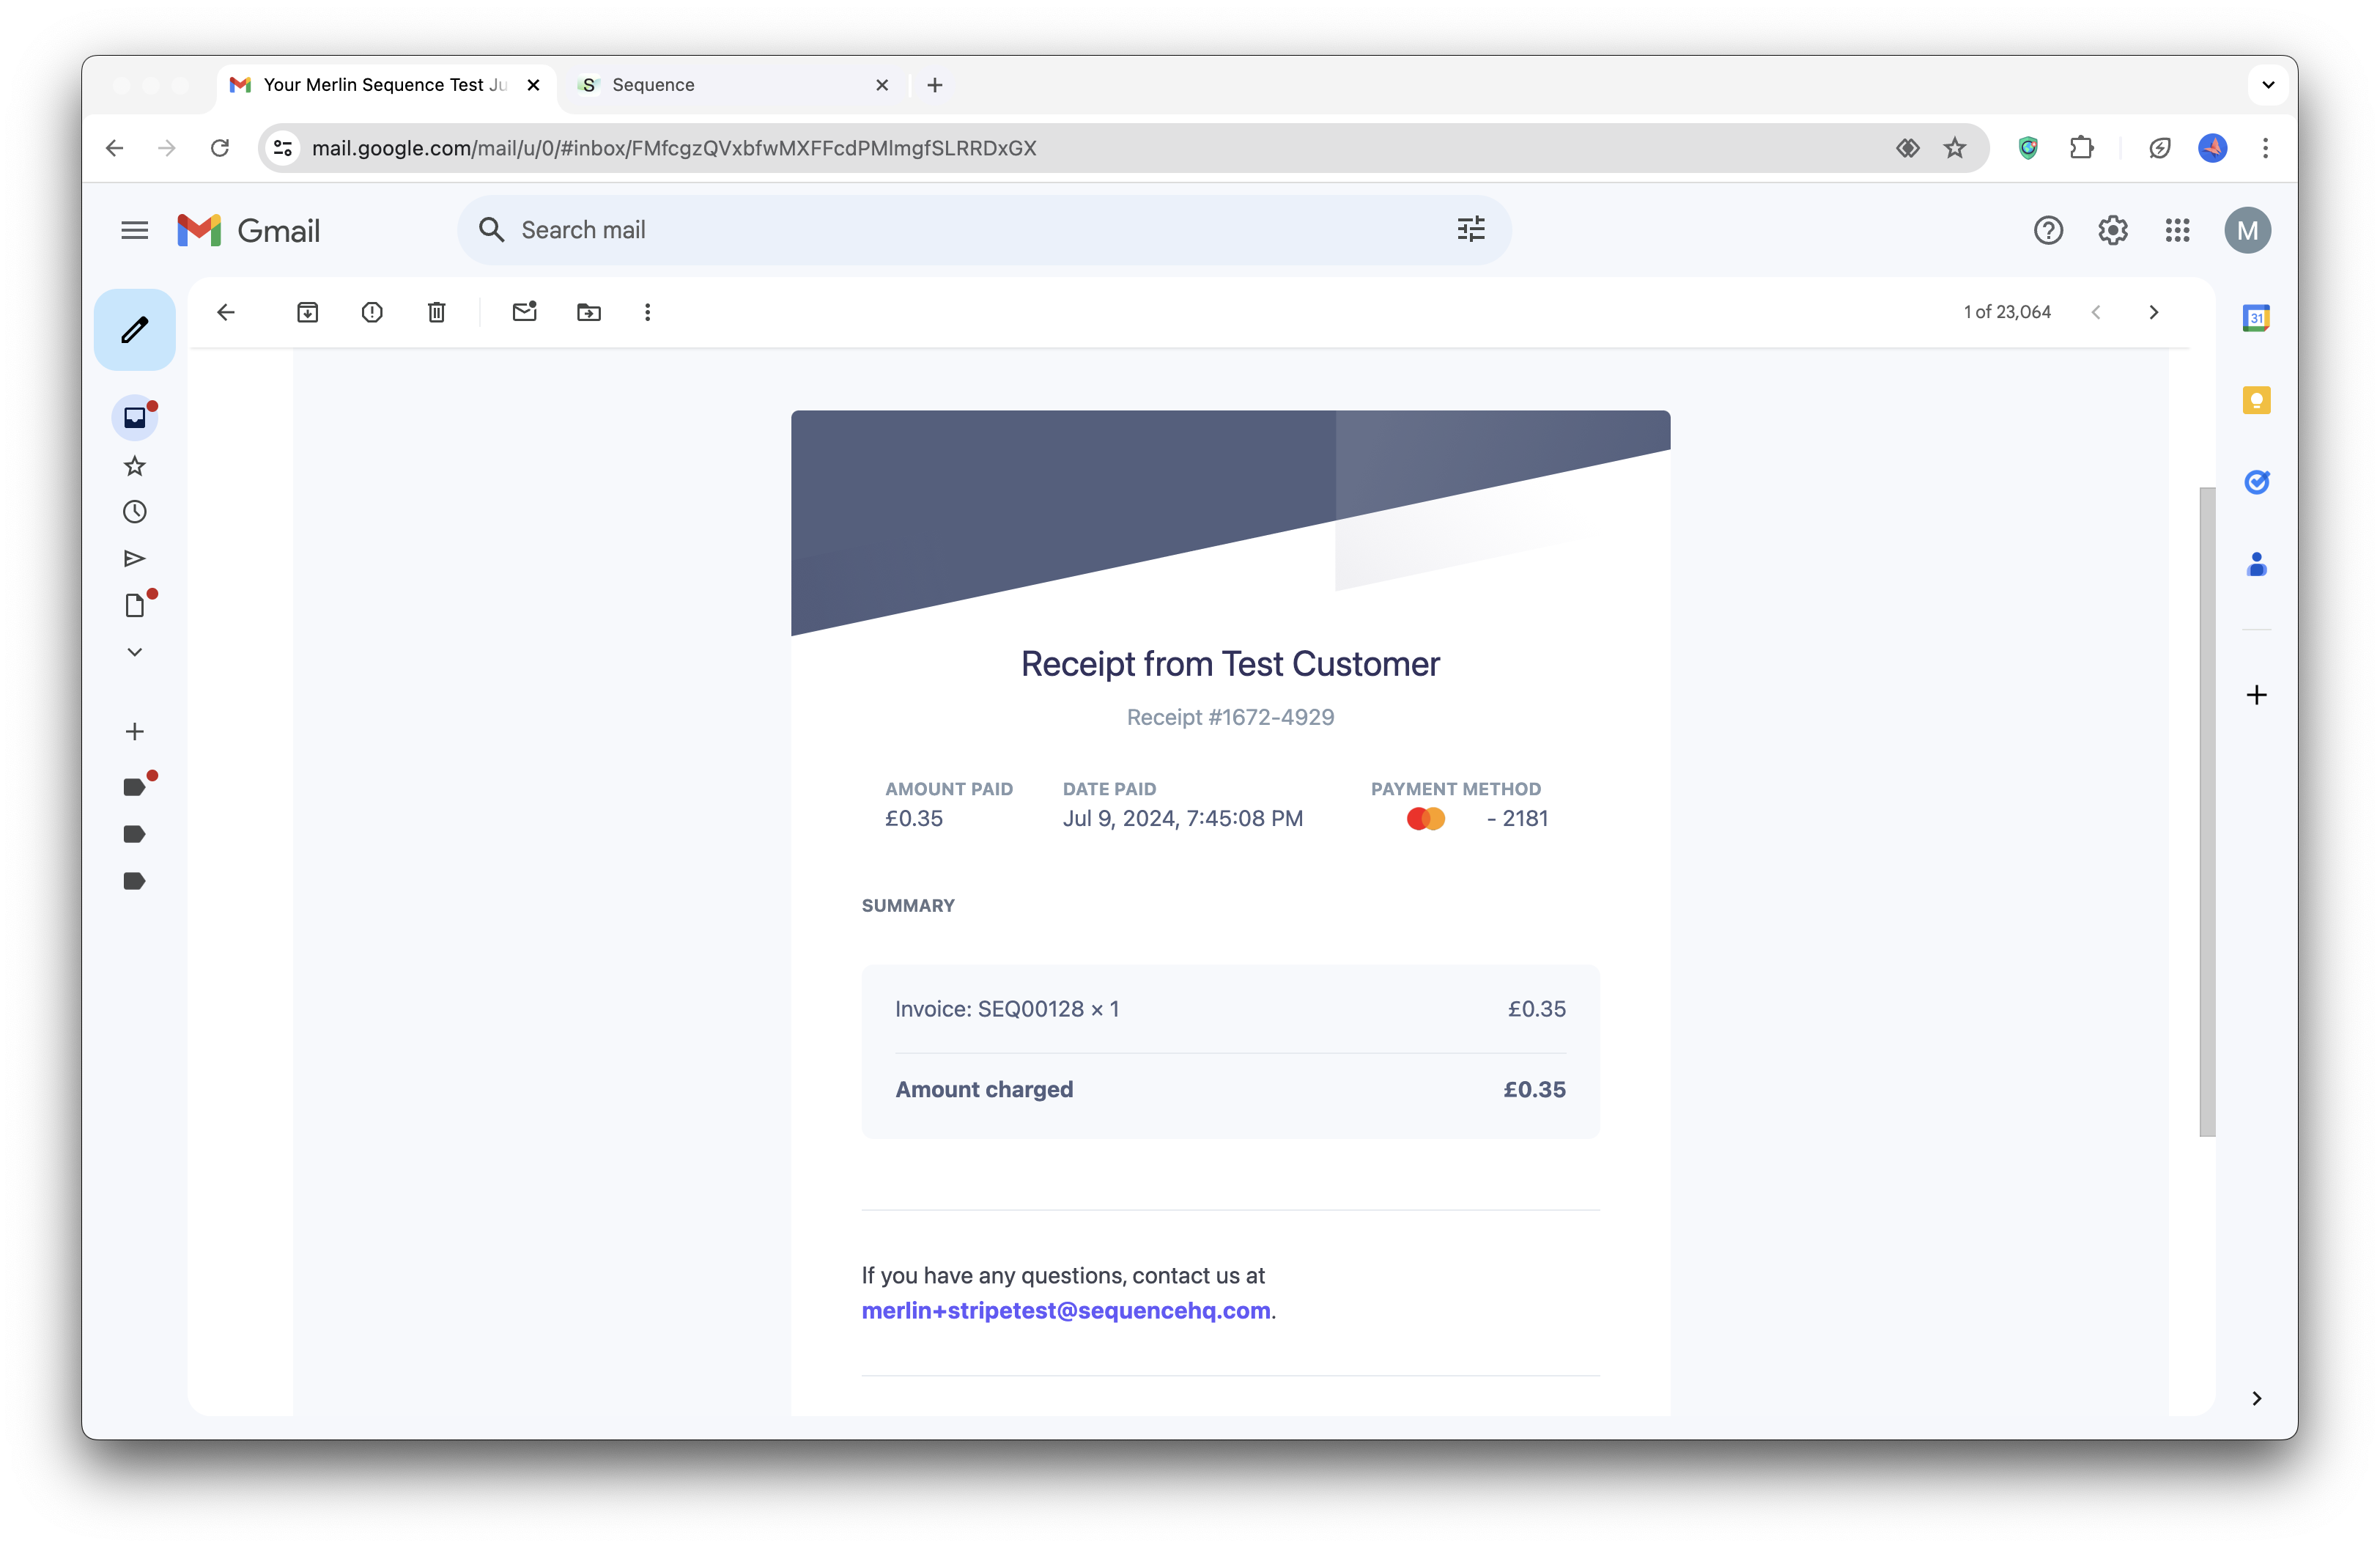
Once enabled, your customers will receive a notification from Stripe each time a payment succeeds (see below). Payment receipts are helpful for customers who are charged automatically.
During onboarding, Stripe will request standard information about your business to verify your account. Ensure that you provide complete business information to avoid the risk of suspension or payment interruptions later on.
### Recommended Stripe account setup
Create a transparent payment experience for your customers by enabling payment receipt notifications on Stripe (recommended).
In your Stripe account, go to **Settings > Business > More > Customer emails** and enable email notifications for successful payments and refunds.
Once enabled, your customers will receive a notification from Stripe each time a payment succeeds (see below). Payment receipts are helpful for customers who are charged automatically.
 Example payment receipt from Stripe
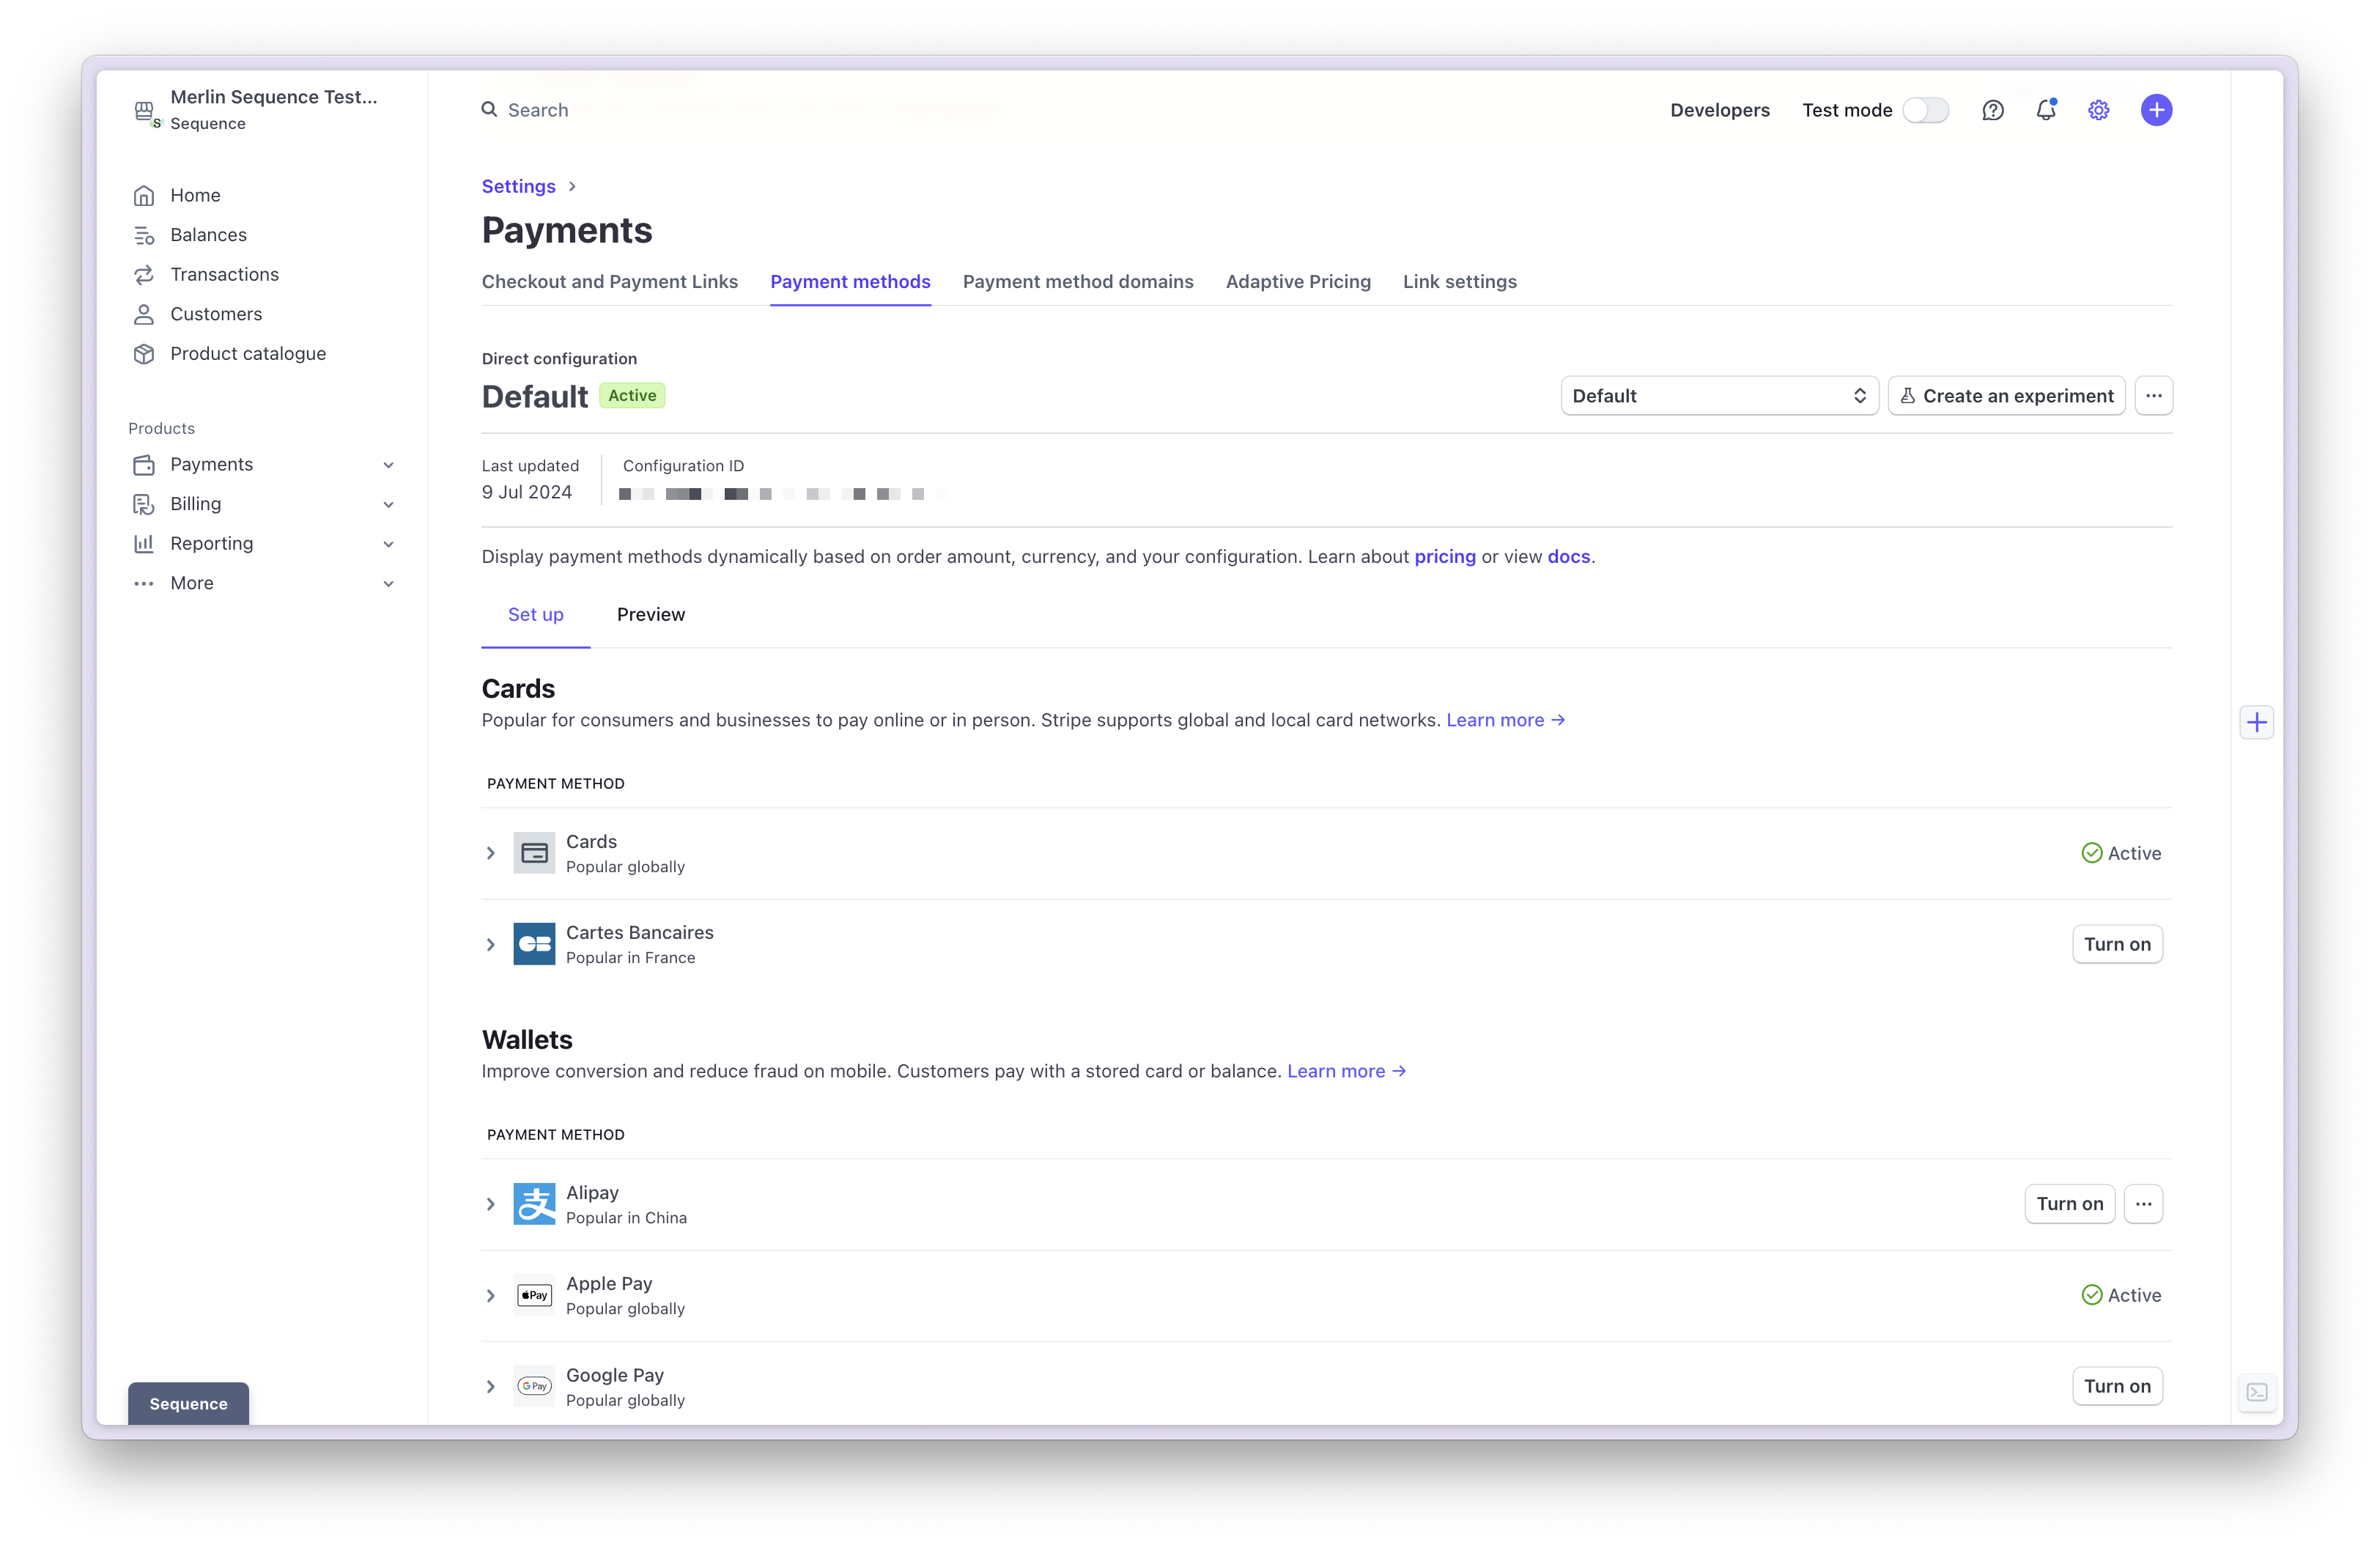
 Provide customers different payment options. In your Stripe account, go to **Settings > Payments > Payment methods**. Payment methods are displayed as options on your Stripe checkout page for each invoice.
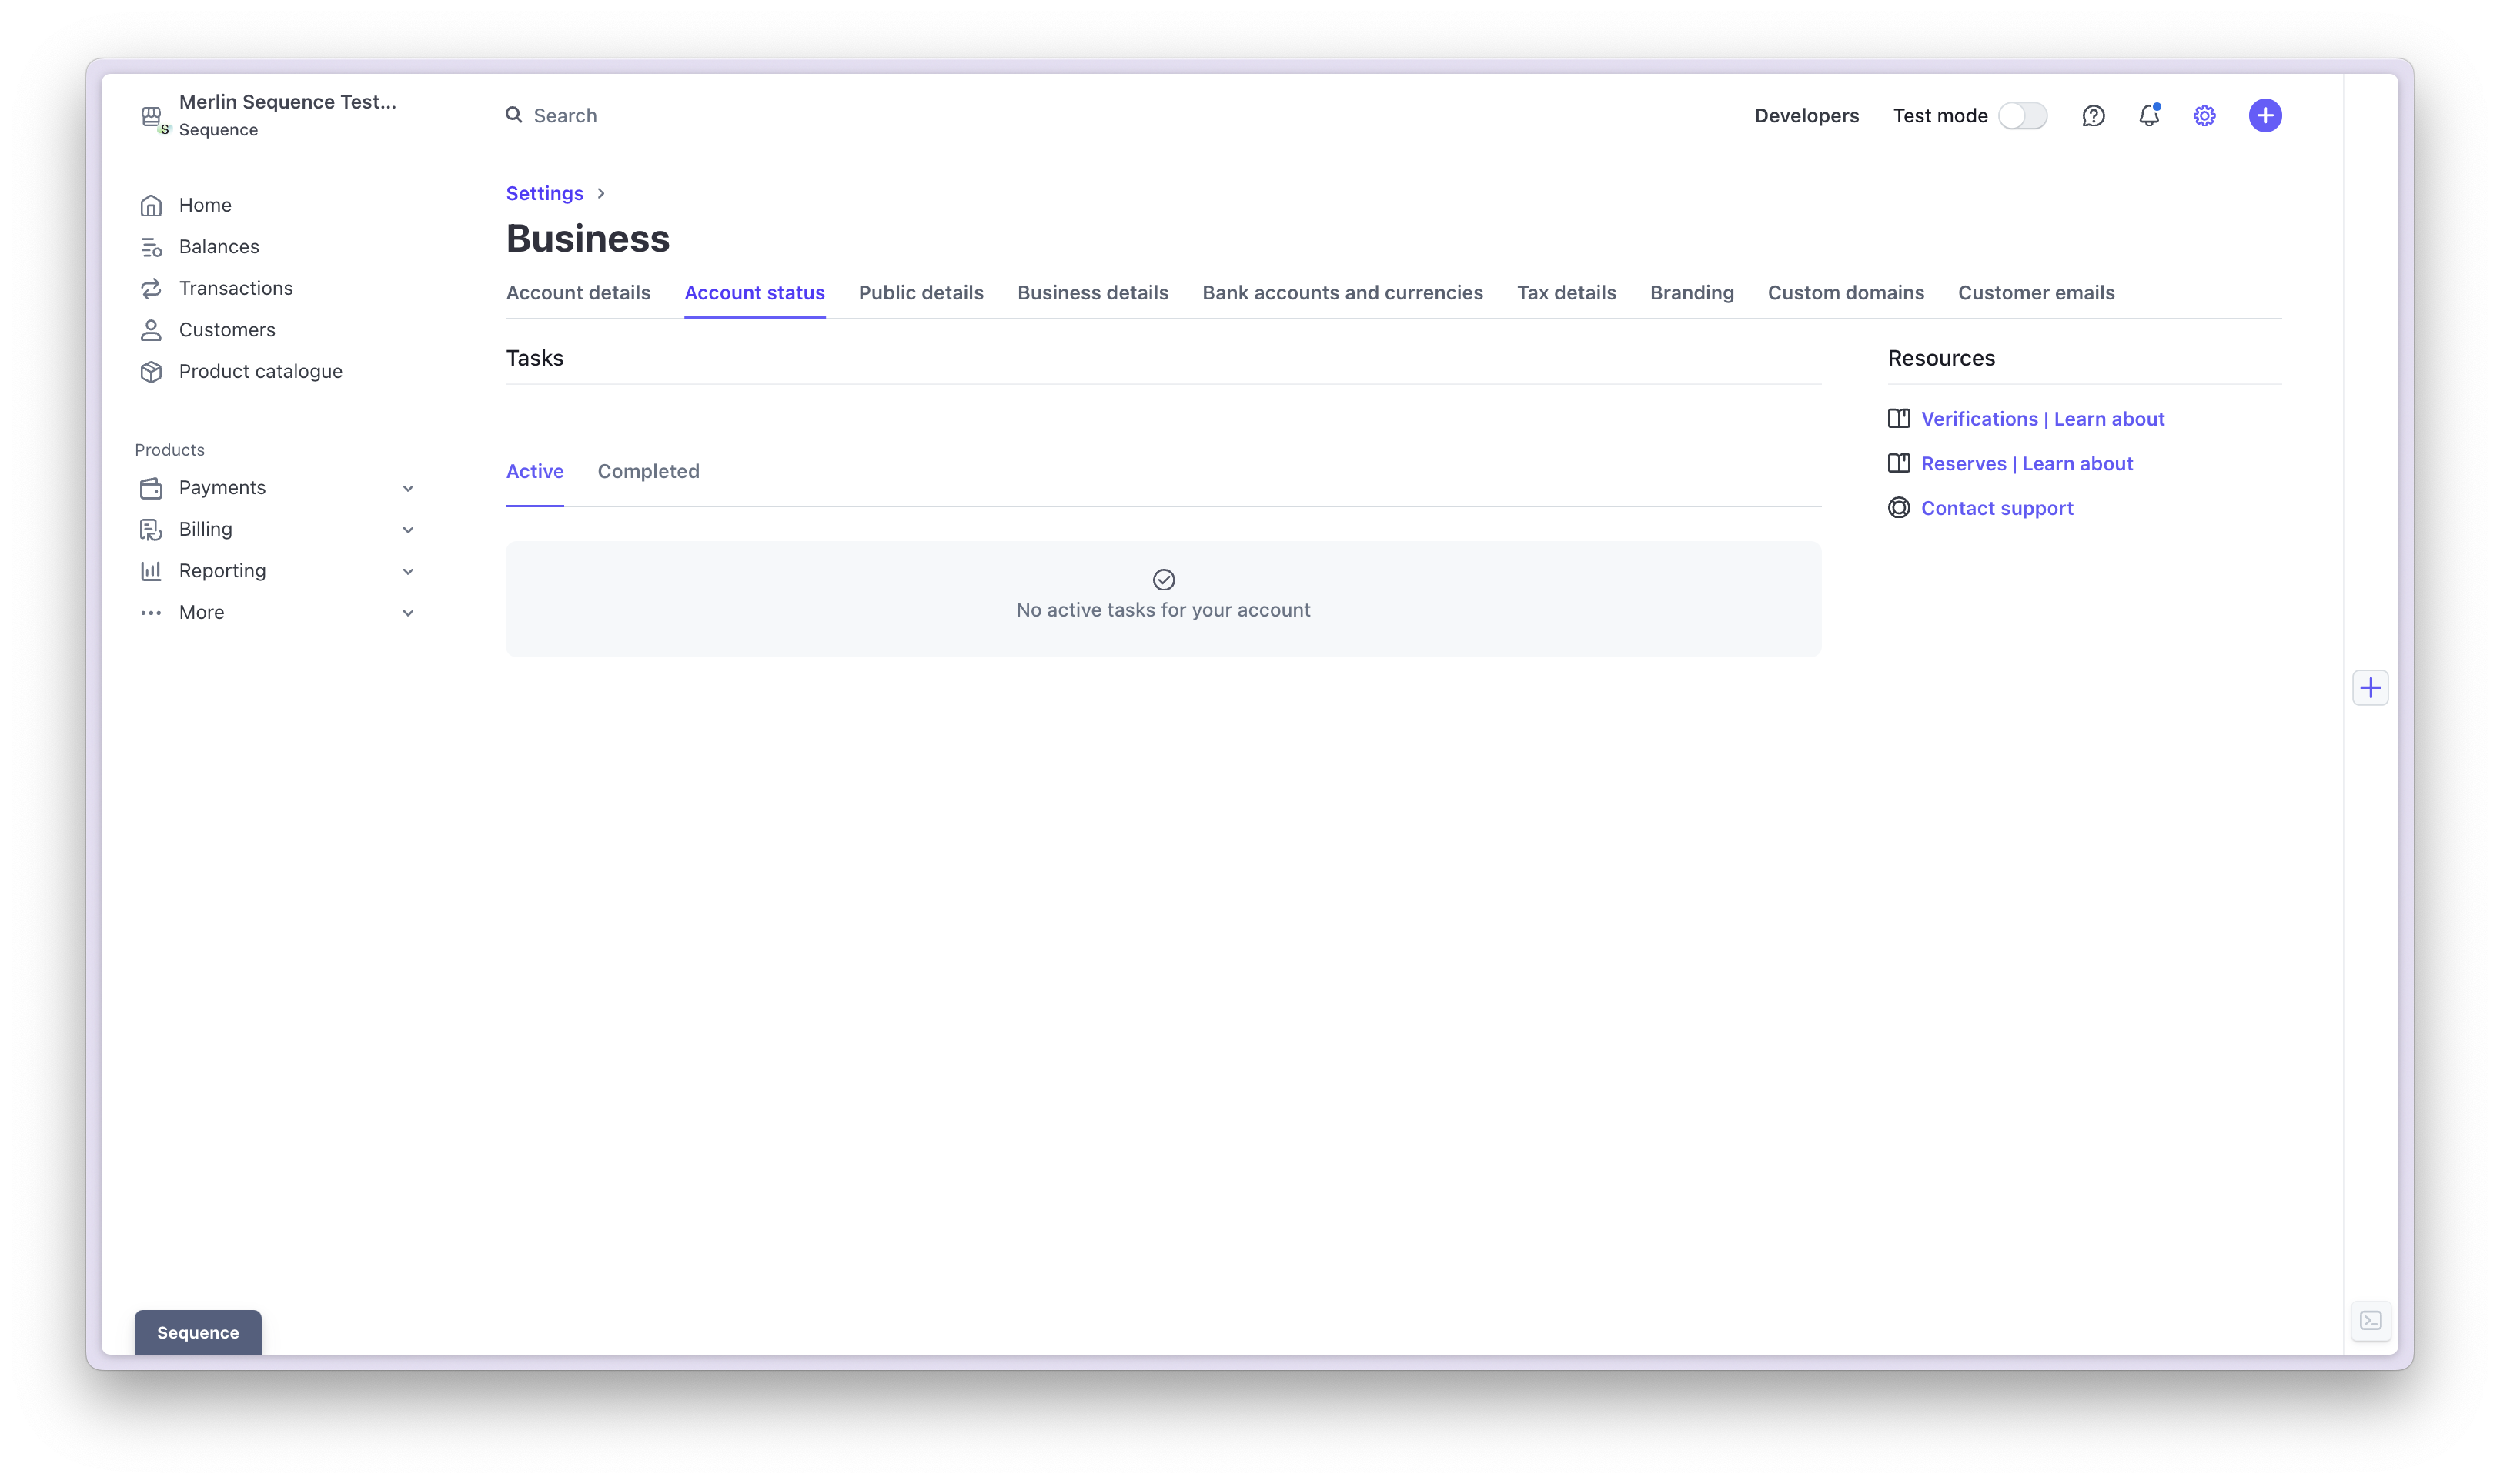
 Check your account status to ensure there are no outstanding tasks to avoid the risk of suspension. In your Stripe account, go to **Settings > Business > Account status**.
 ## Collecting payments with Stripe
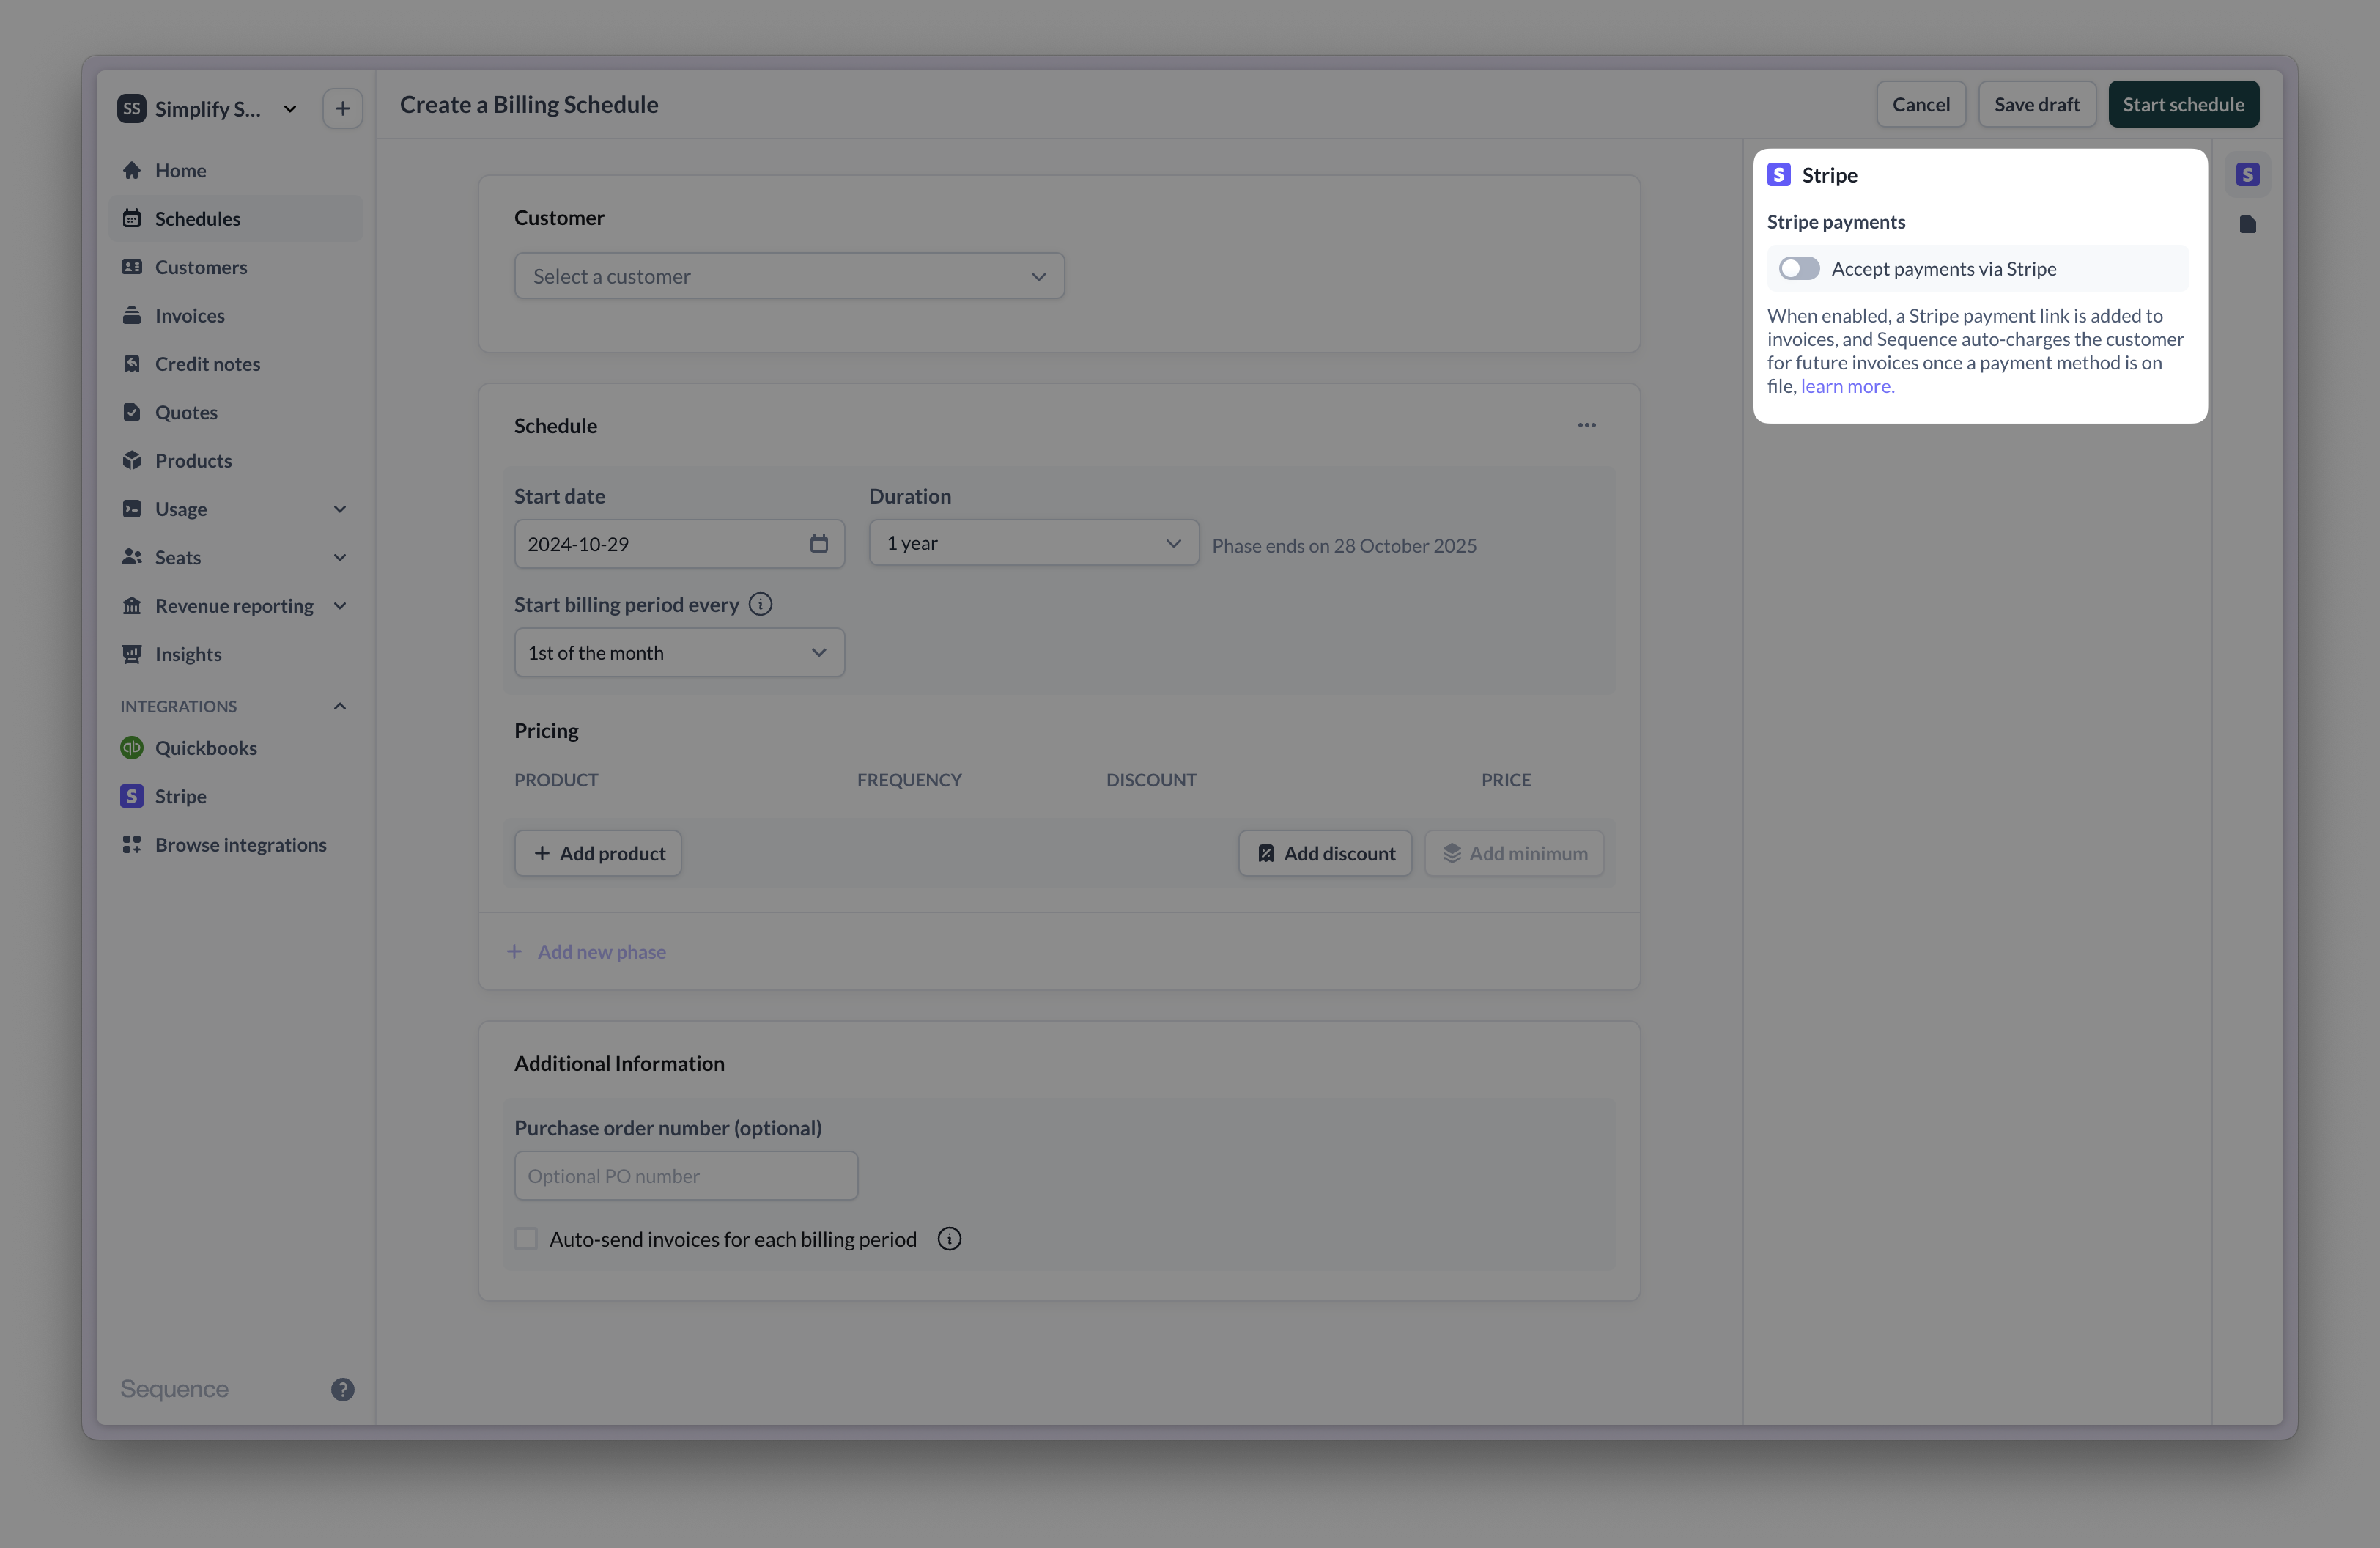
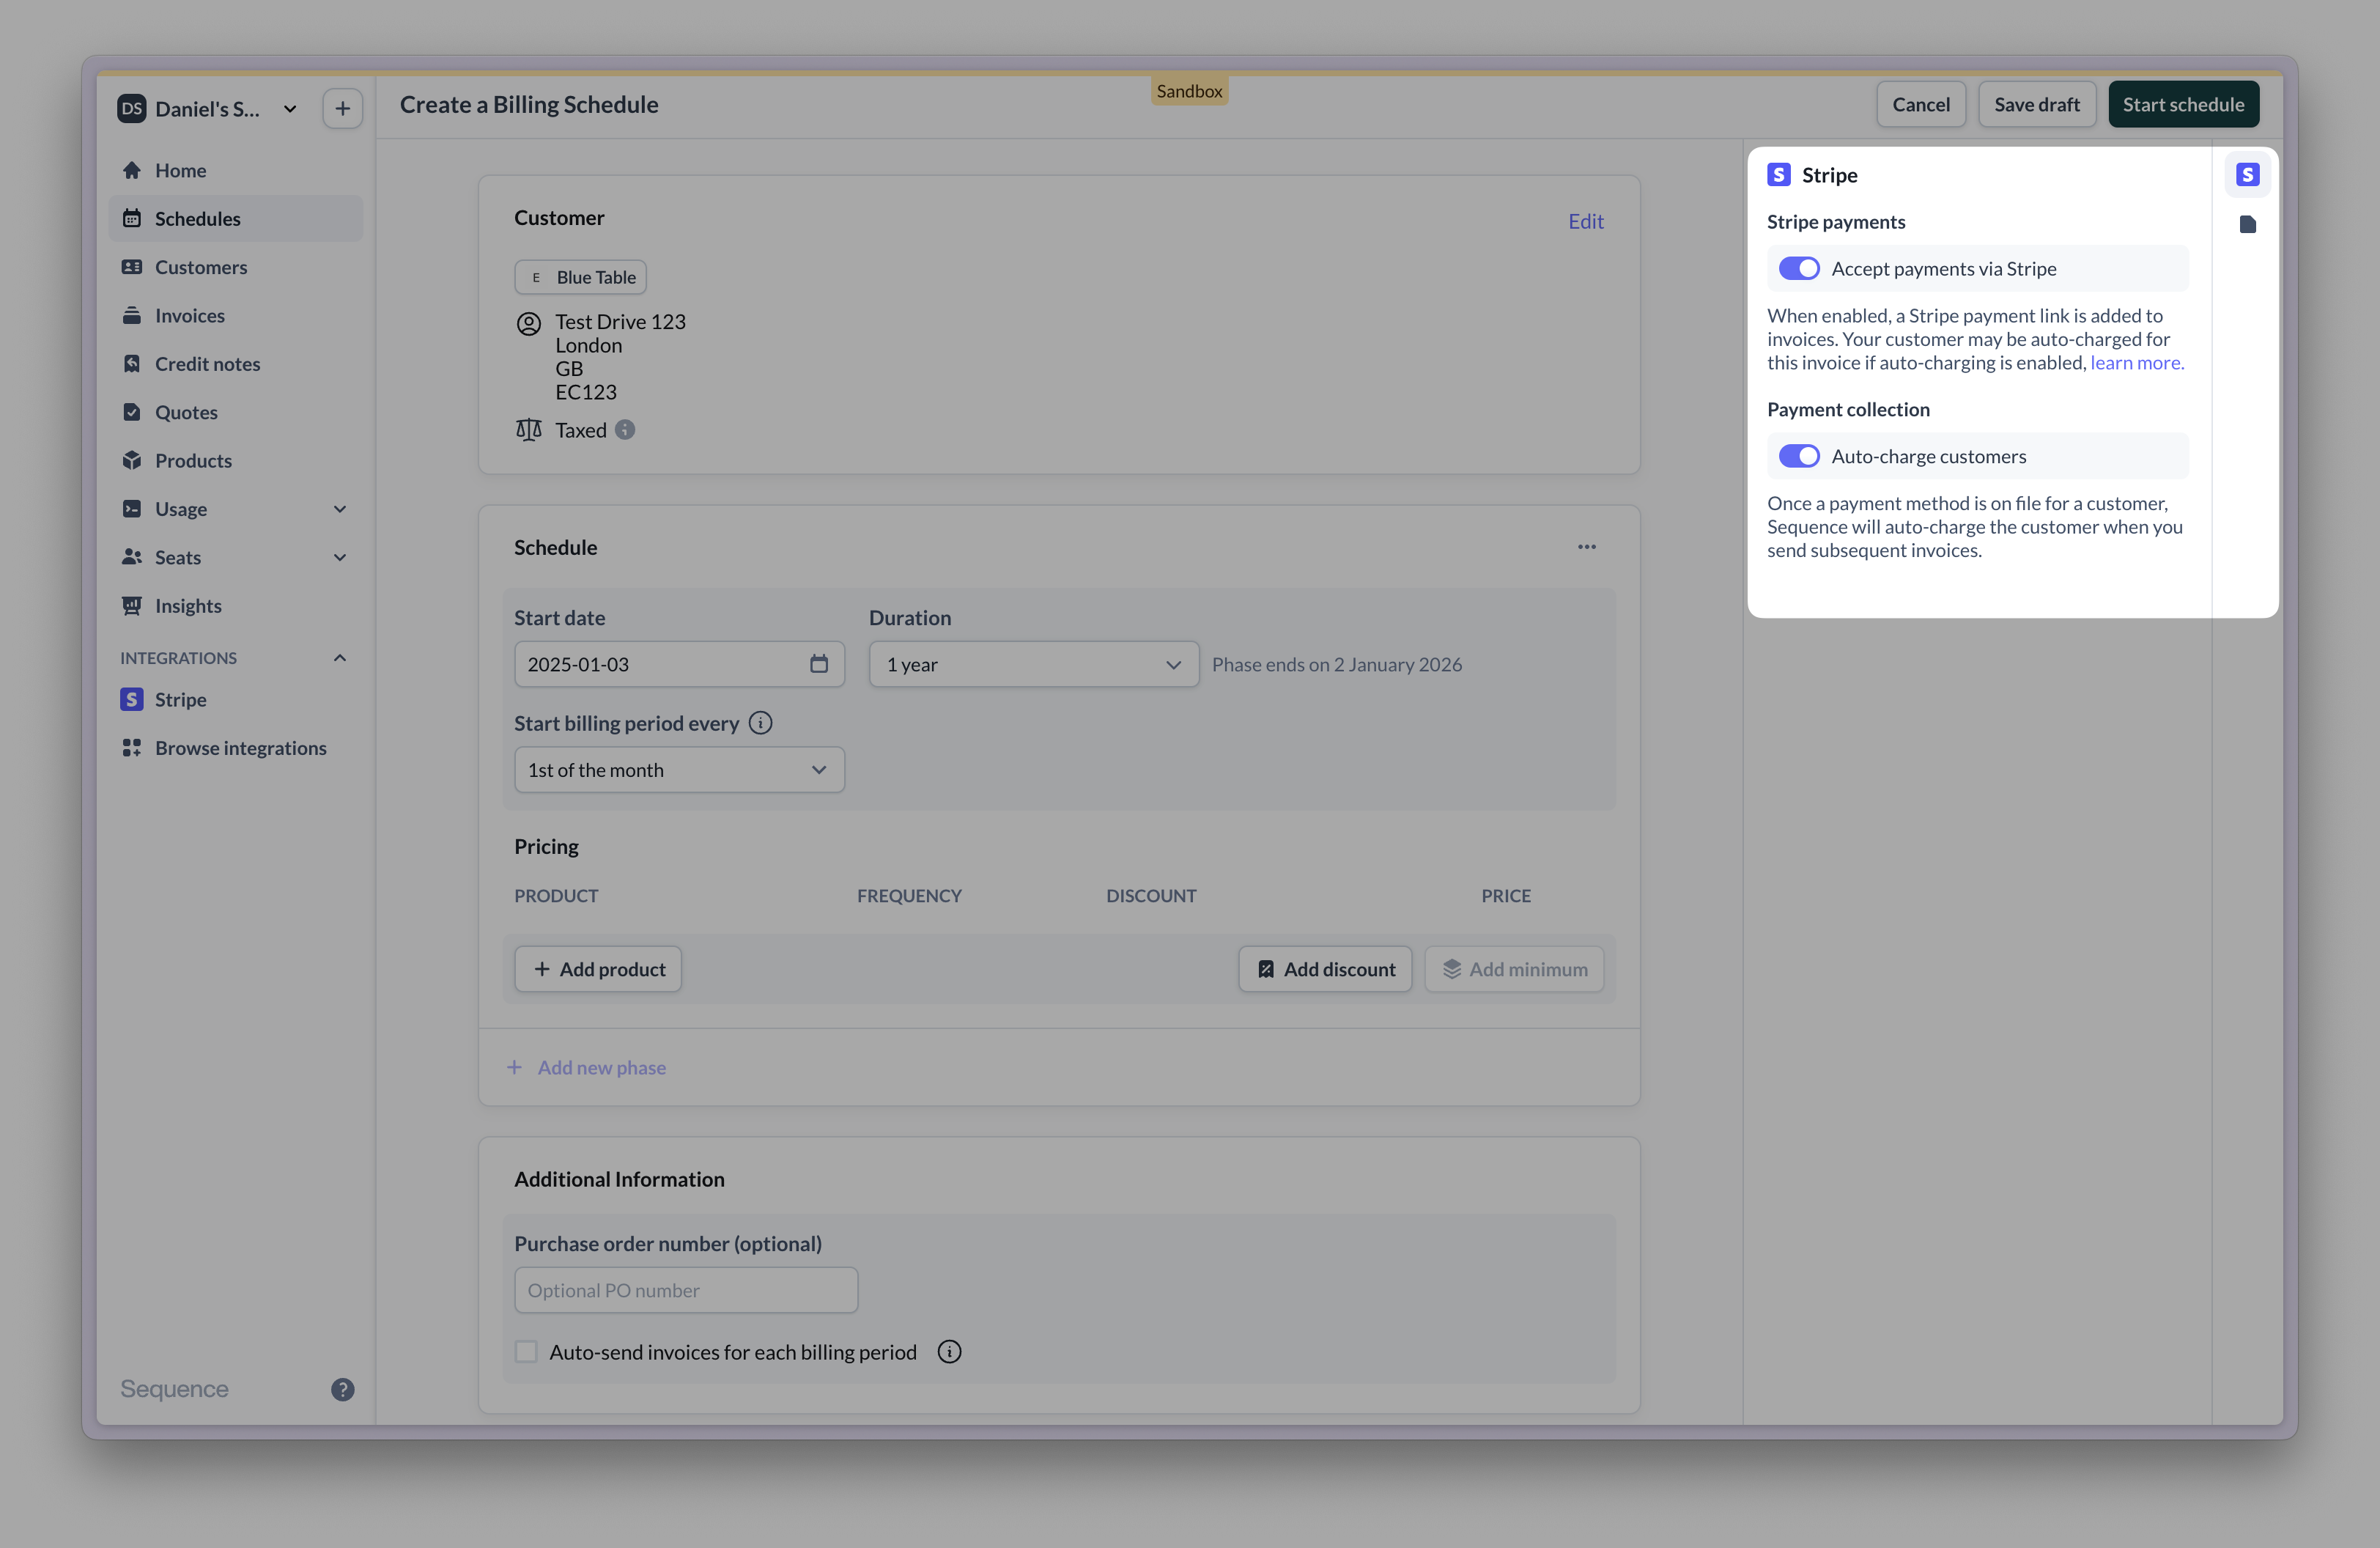
Collecting payments with Stripe is straightforward. To automate collections for a customer, enable Stripe payment links on the customer's billing schedule, create one-time invoices with payment links or add a payment link to an existing draft invoice.
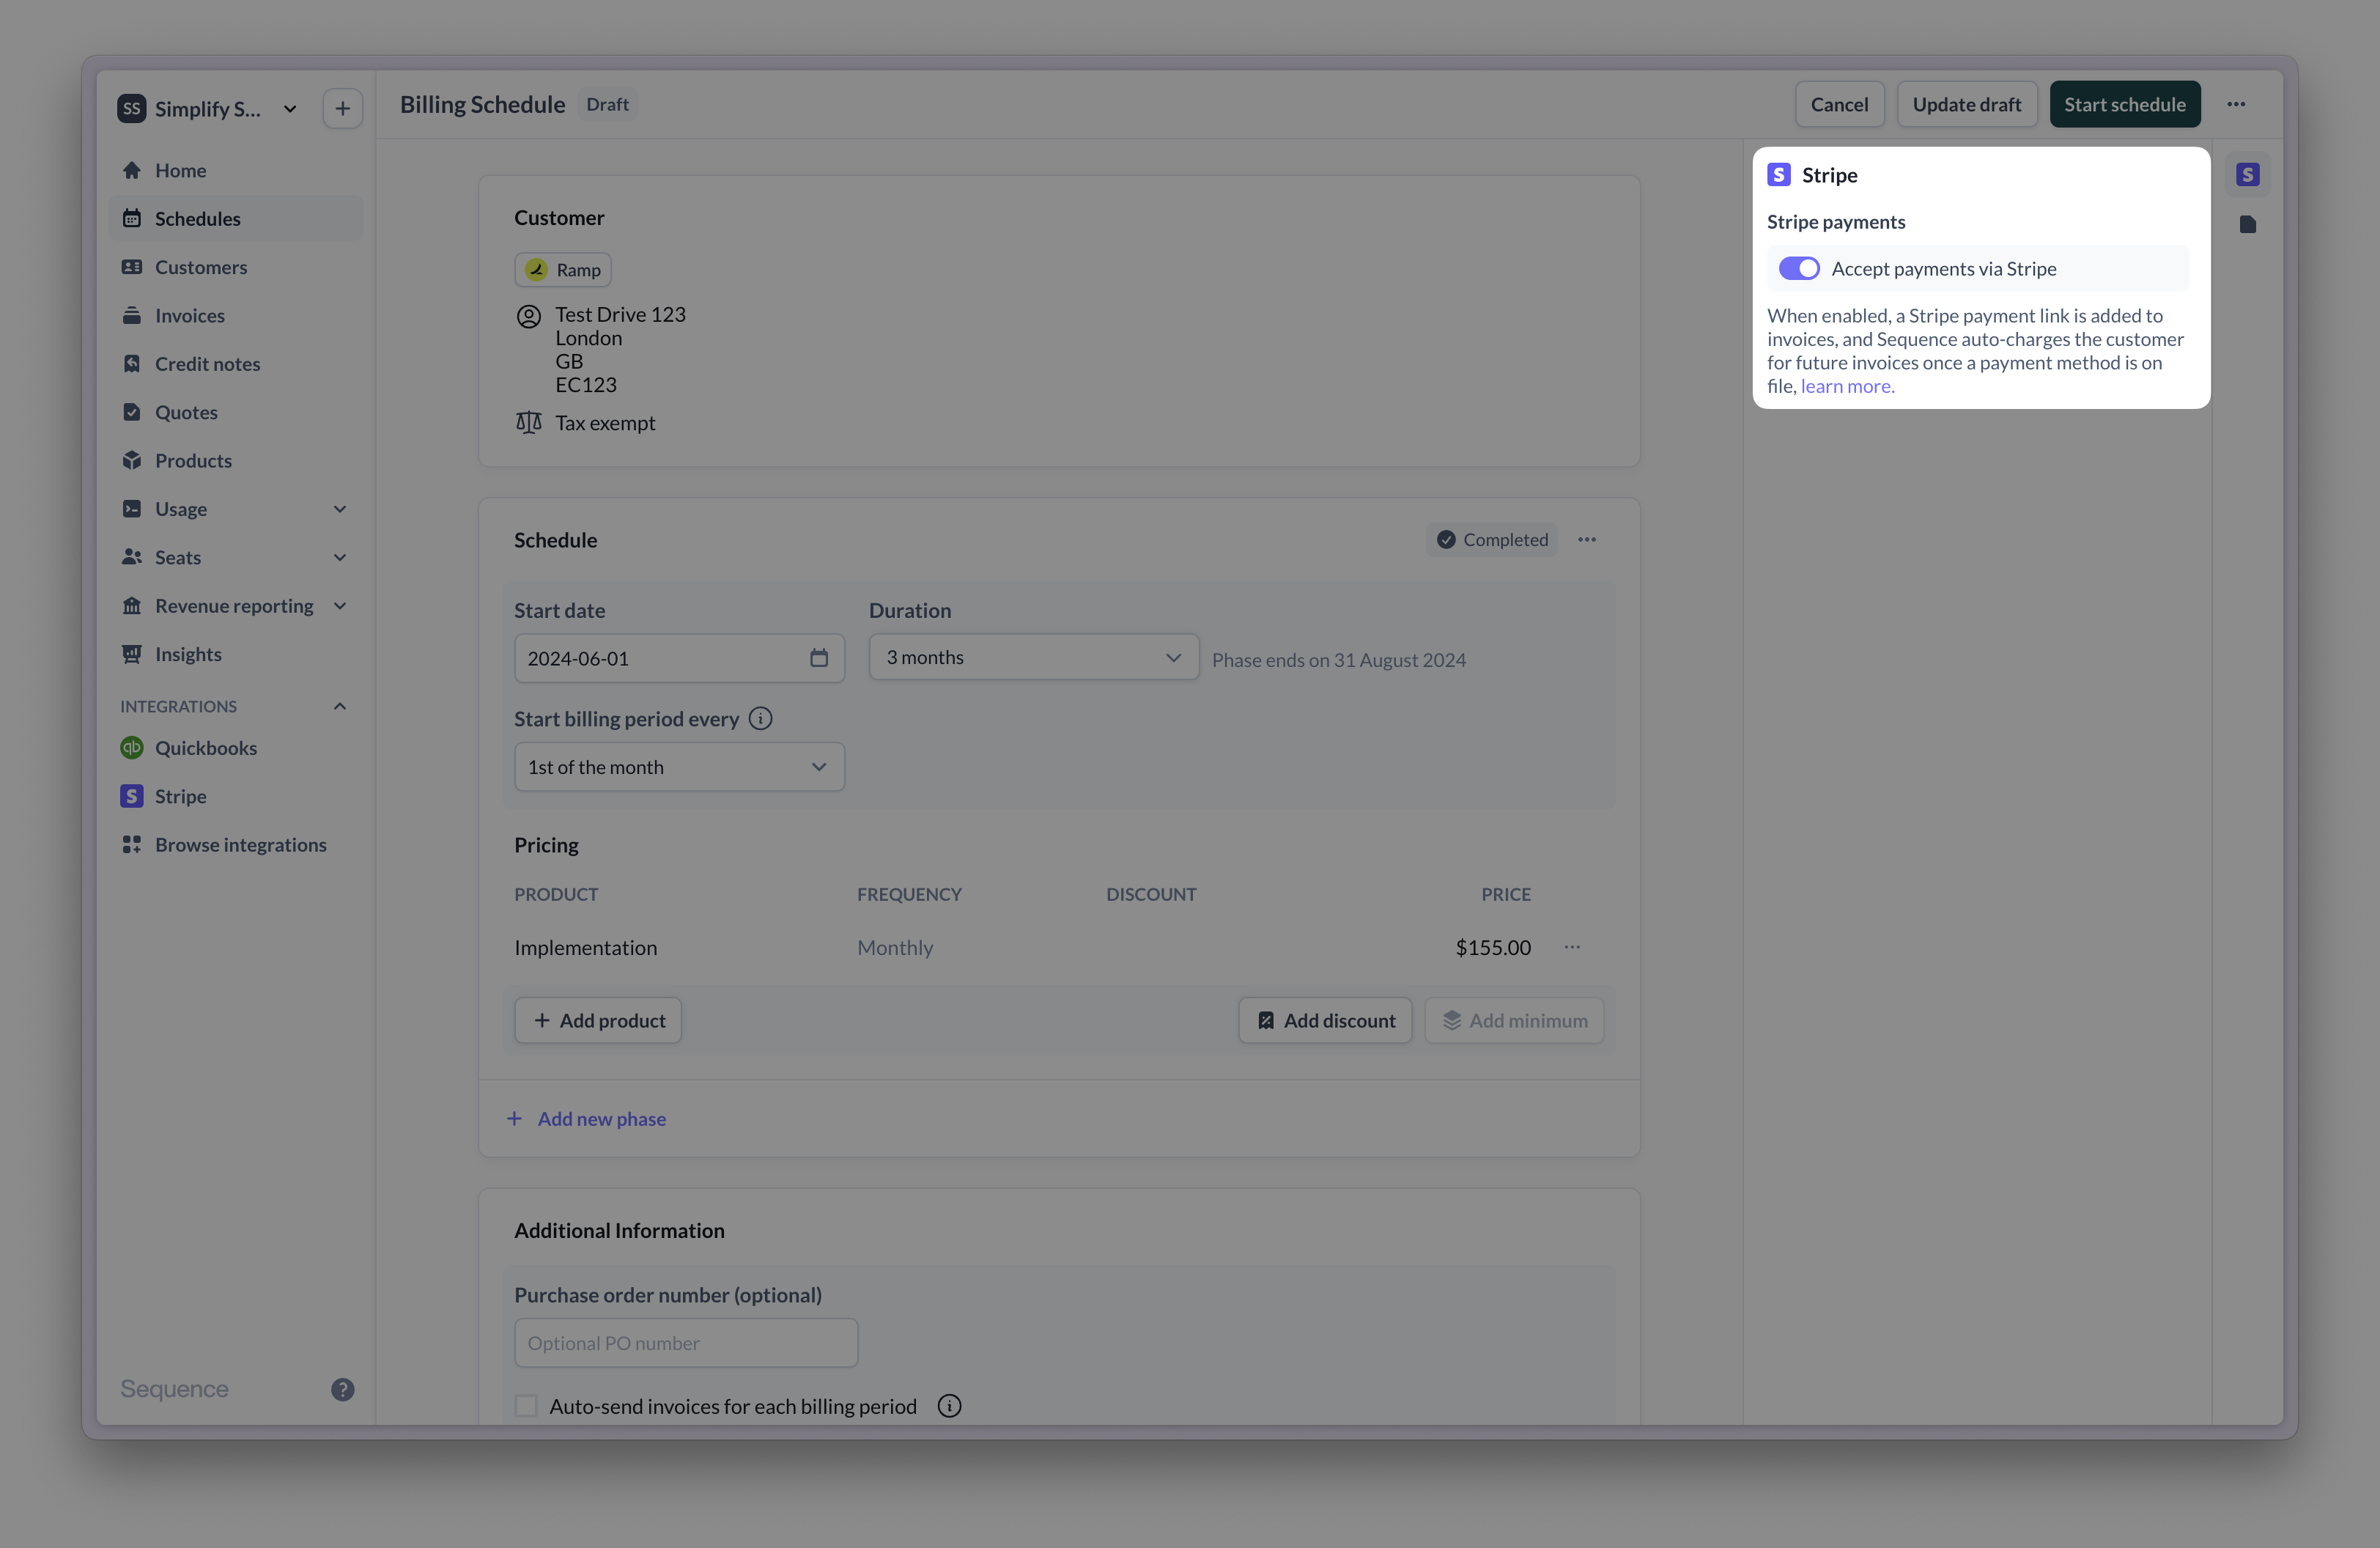
Create a billing schedule and enable Stripe payments to automate collections. Invoices created by the billing schedule will include a Stripe payment link (regular bank details are included as a fallback option).
## Collecting payments with Stripe
Collecting payments with Stripe is straightforward. To automate collections for a customer, enable Stripe payment links on the customer's billing schedule, create one-time invoices with payment links or add a payment link to an existing draft invoice.
Create a billing schedule and enable Stripe payments to automate collections. Invoices created by the billing schedule will include a Stripe payment link (regular bank details are included as a fallback option).
 Create a one-time invoice and enable Stripe as a payment method. Once issued to the customer, the invoice will include a payment link.
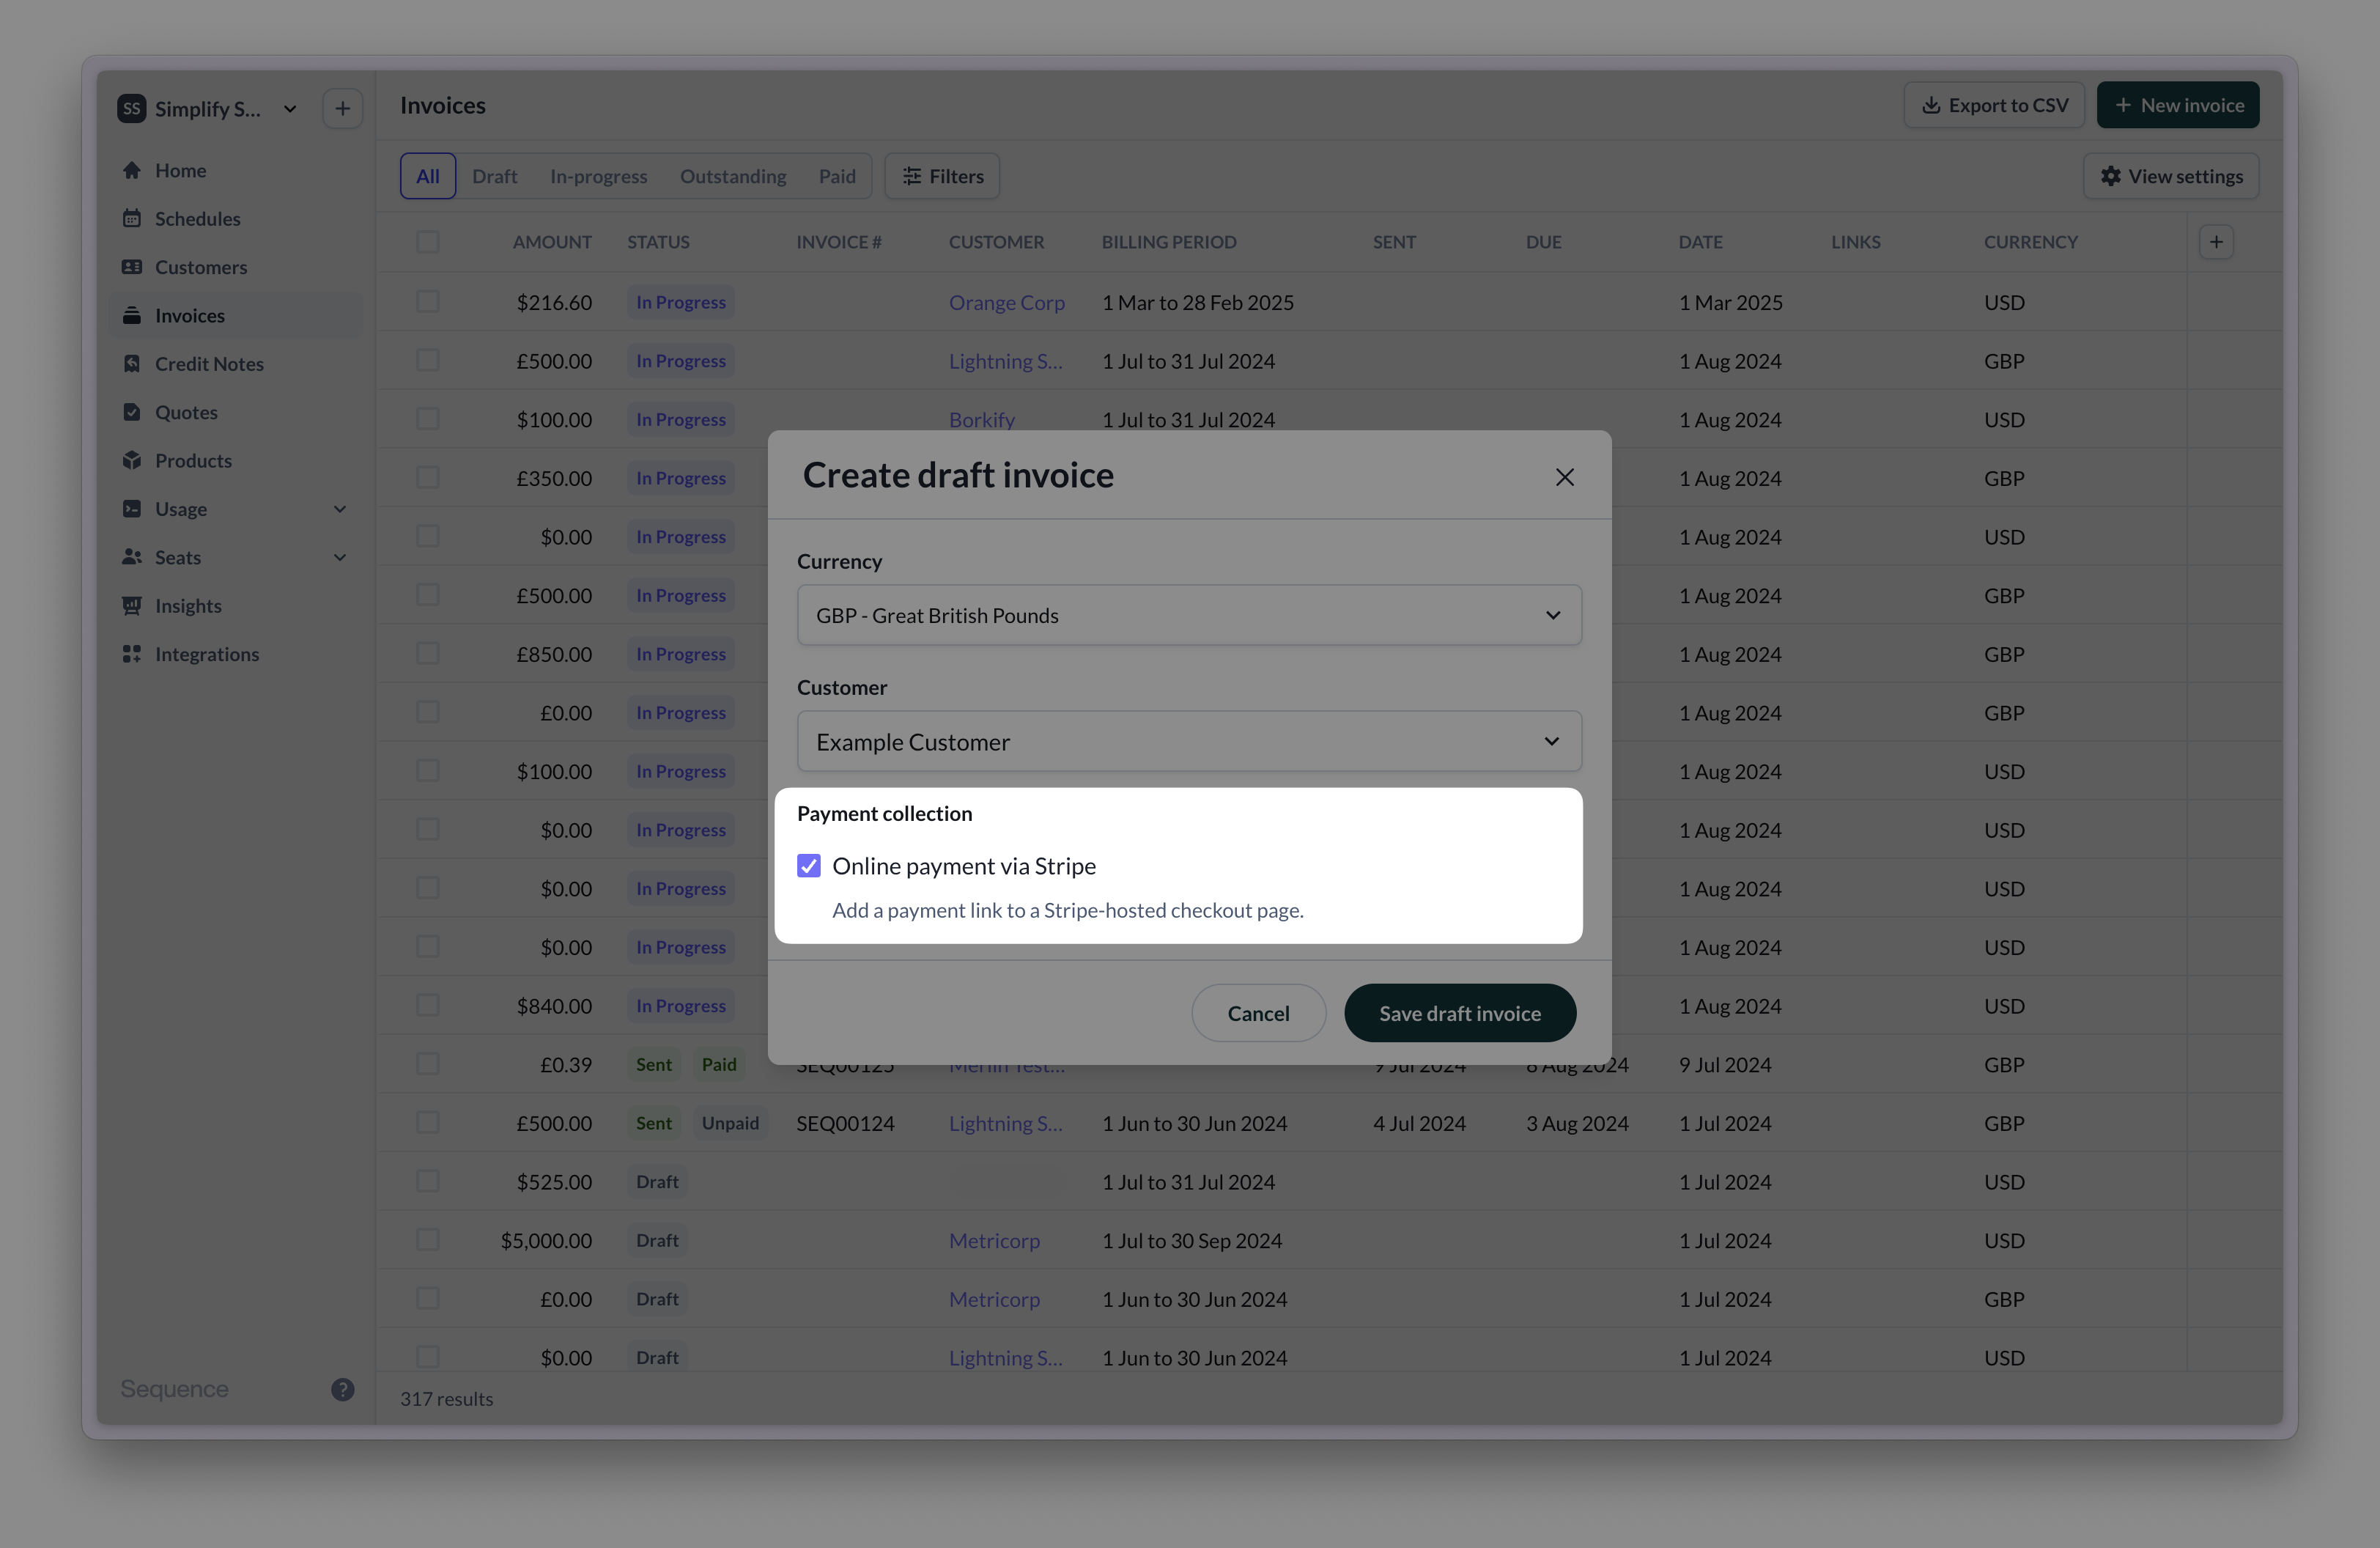 Add a payment link to a draft invoice.
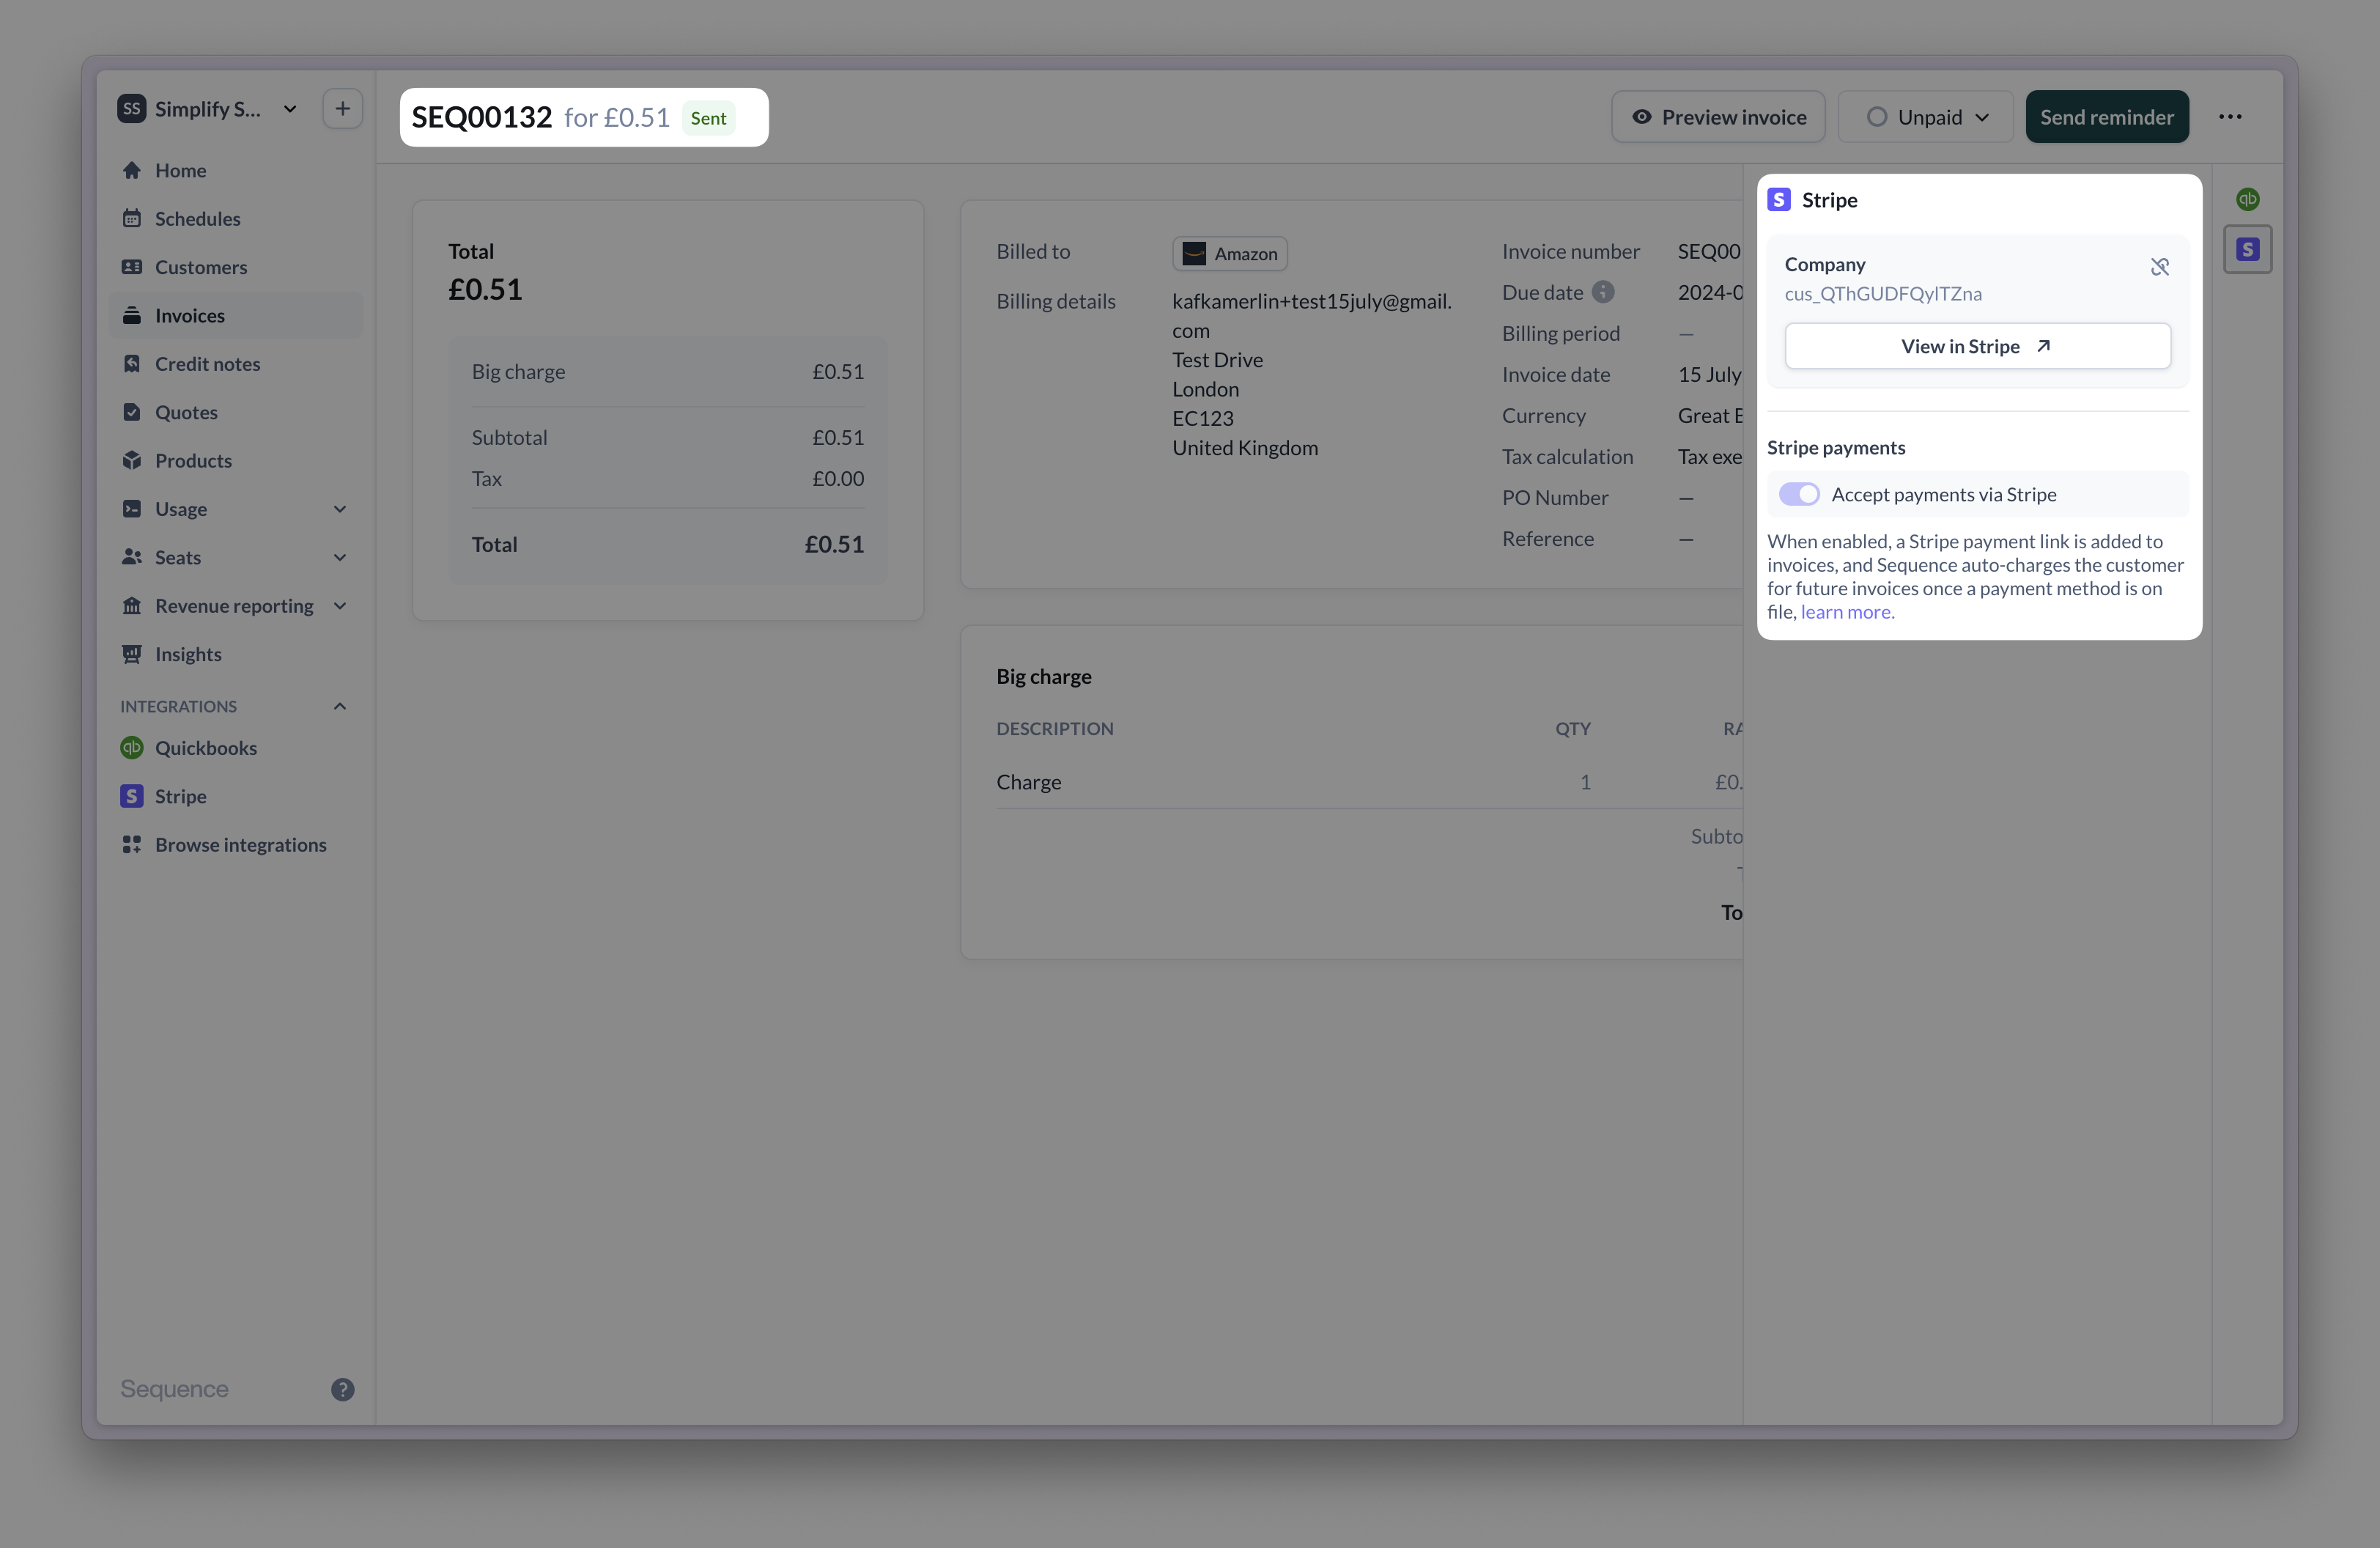
 You can also add a payment link for an already sent invoice (for example if you forgot to add it). This will add a link to a Stripe Checkout page on the hosted invoice page on your customer portal.
 ## Example payment flow
When the invoice is finalized and sent to the customer, a Stripe checkout payment link is generated. If a payment method is already on file, the customer is charged automatically. Talk to our team to disable auto-charging for your account.
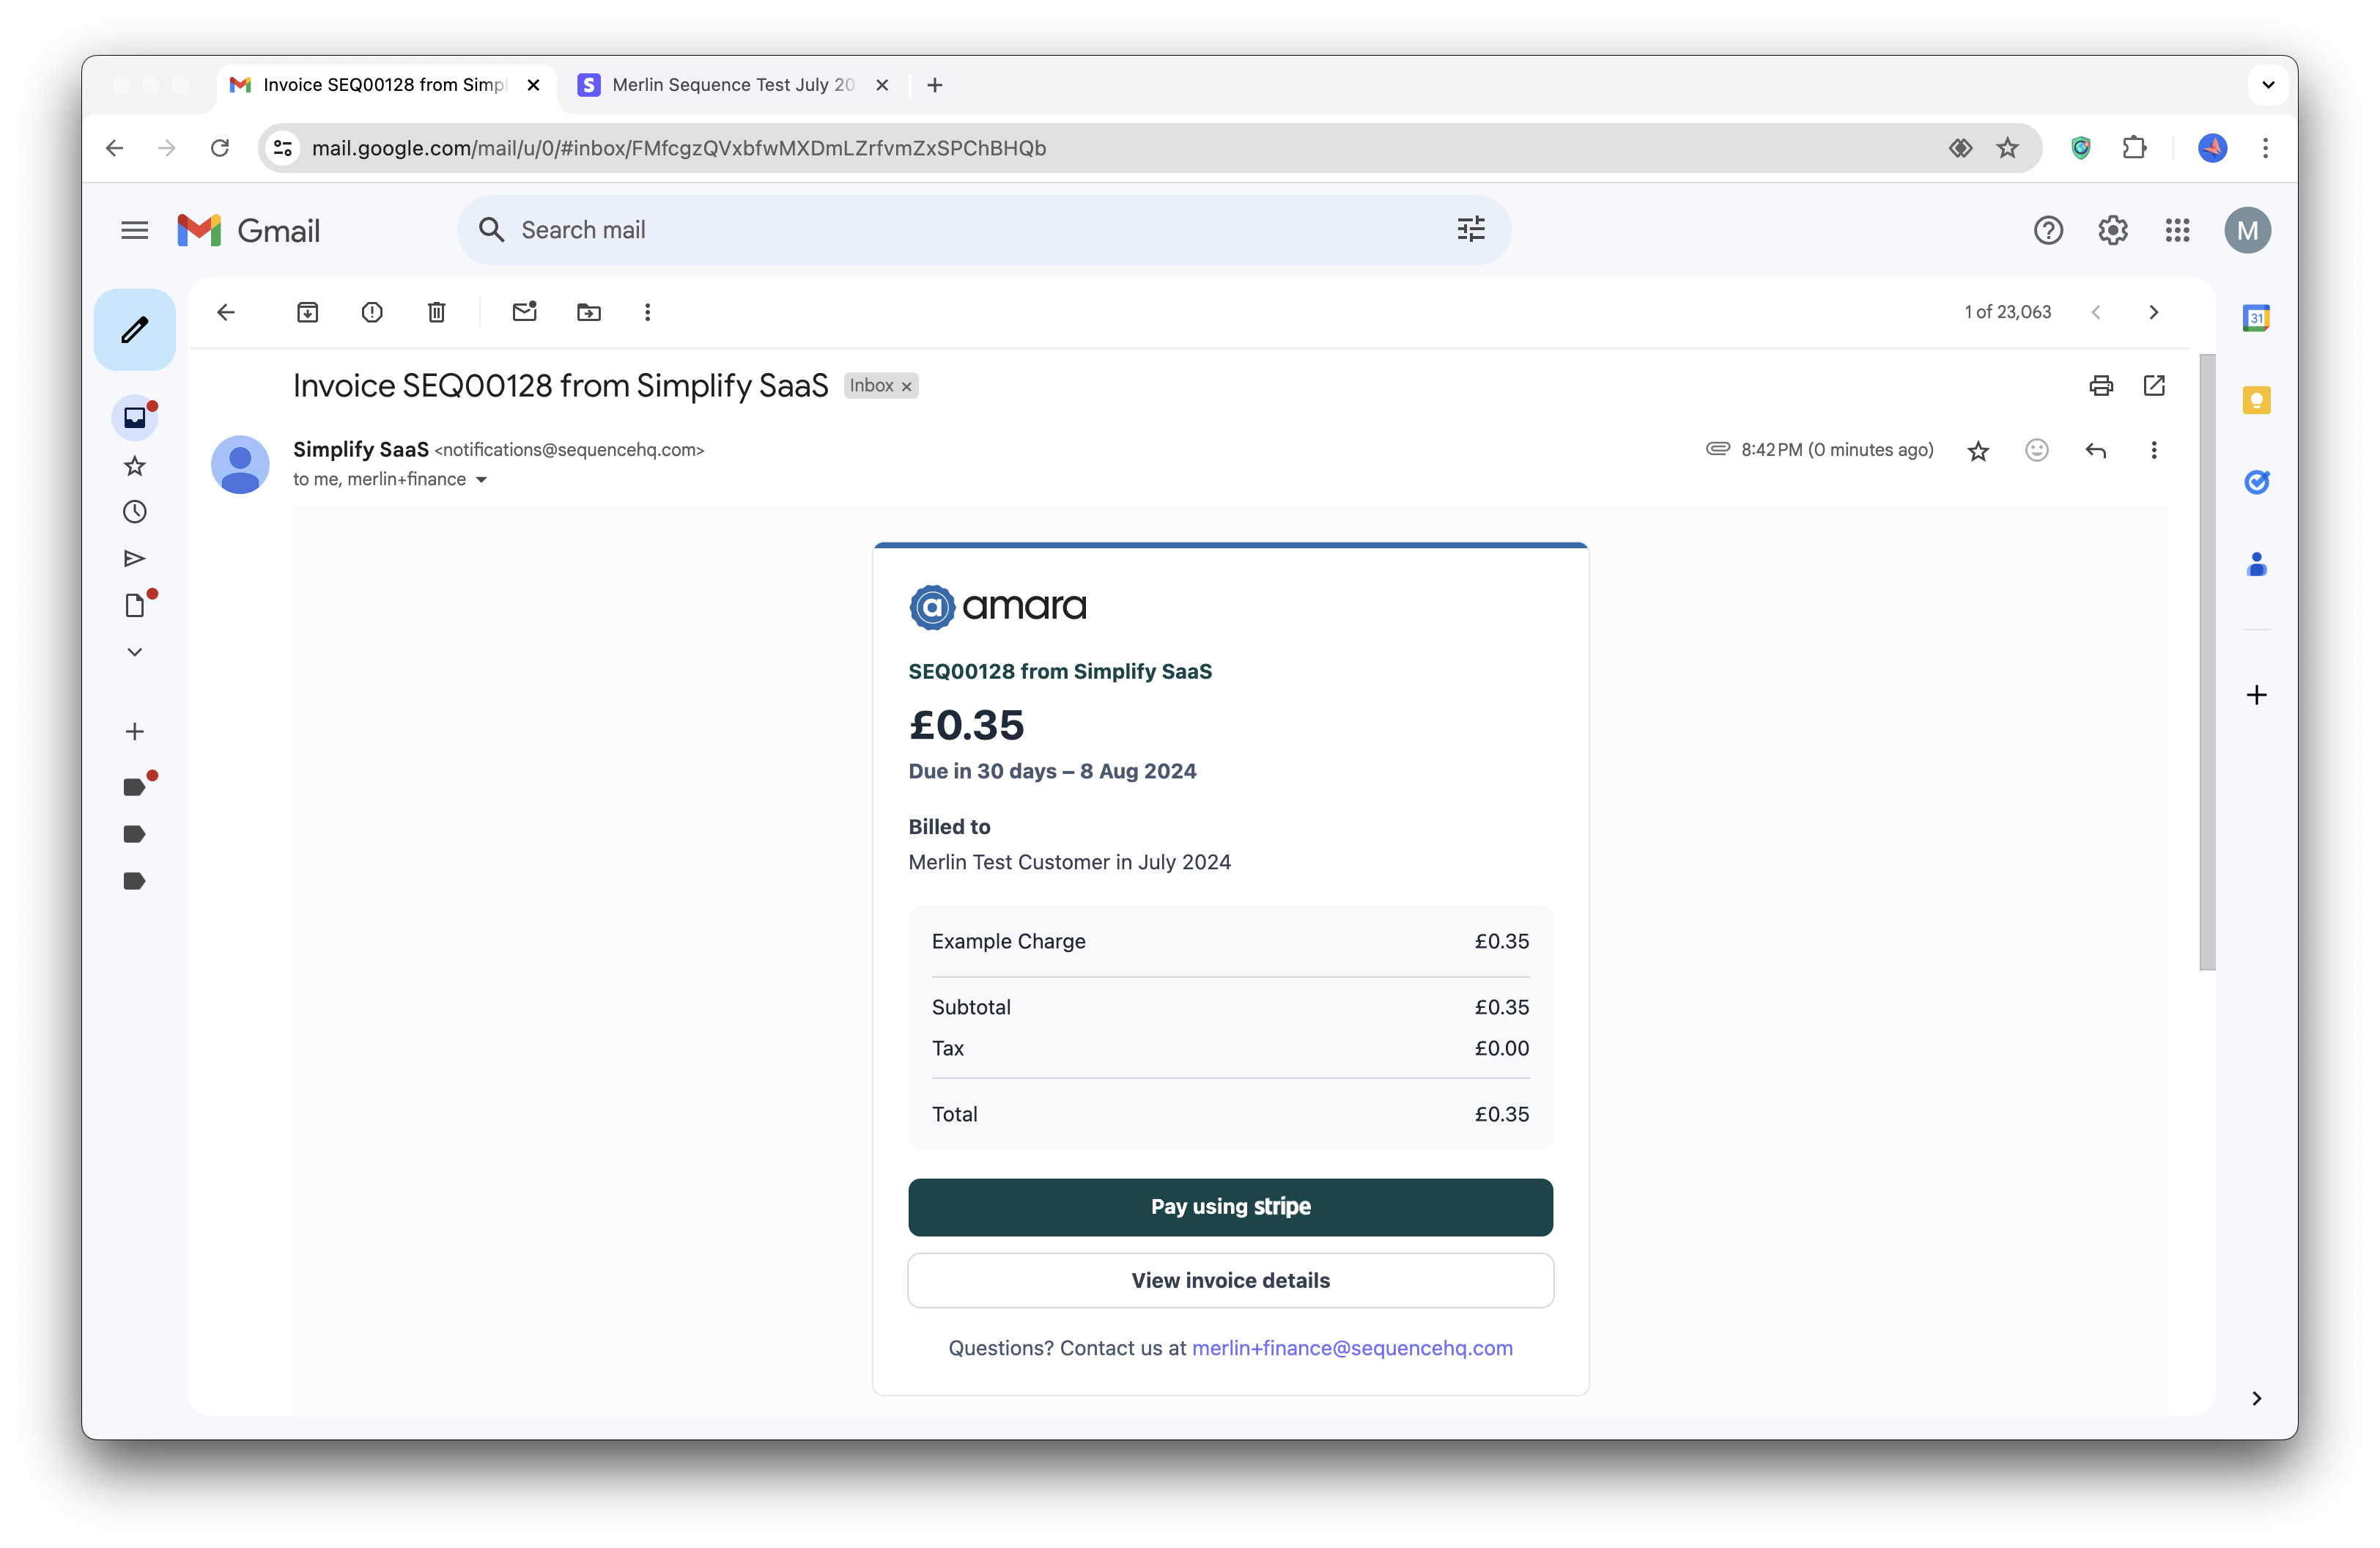
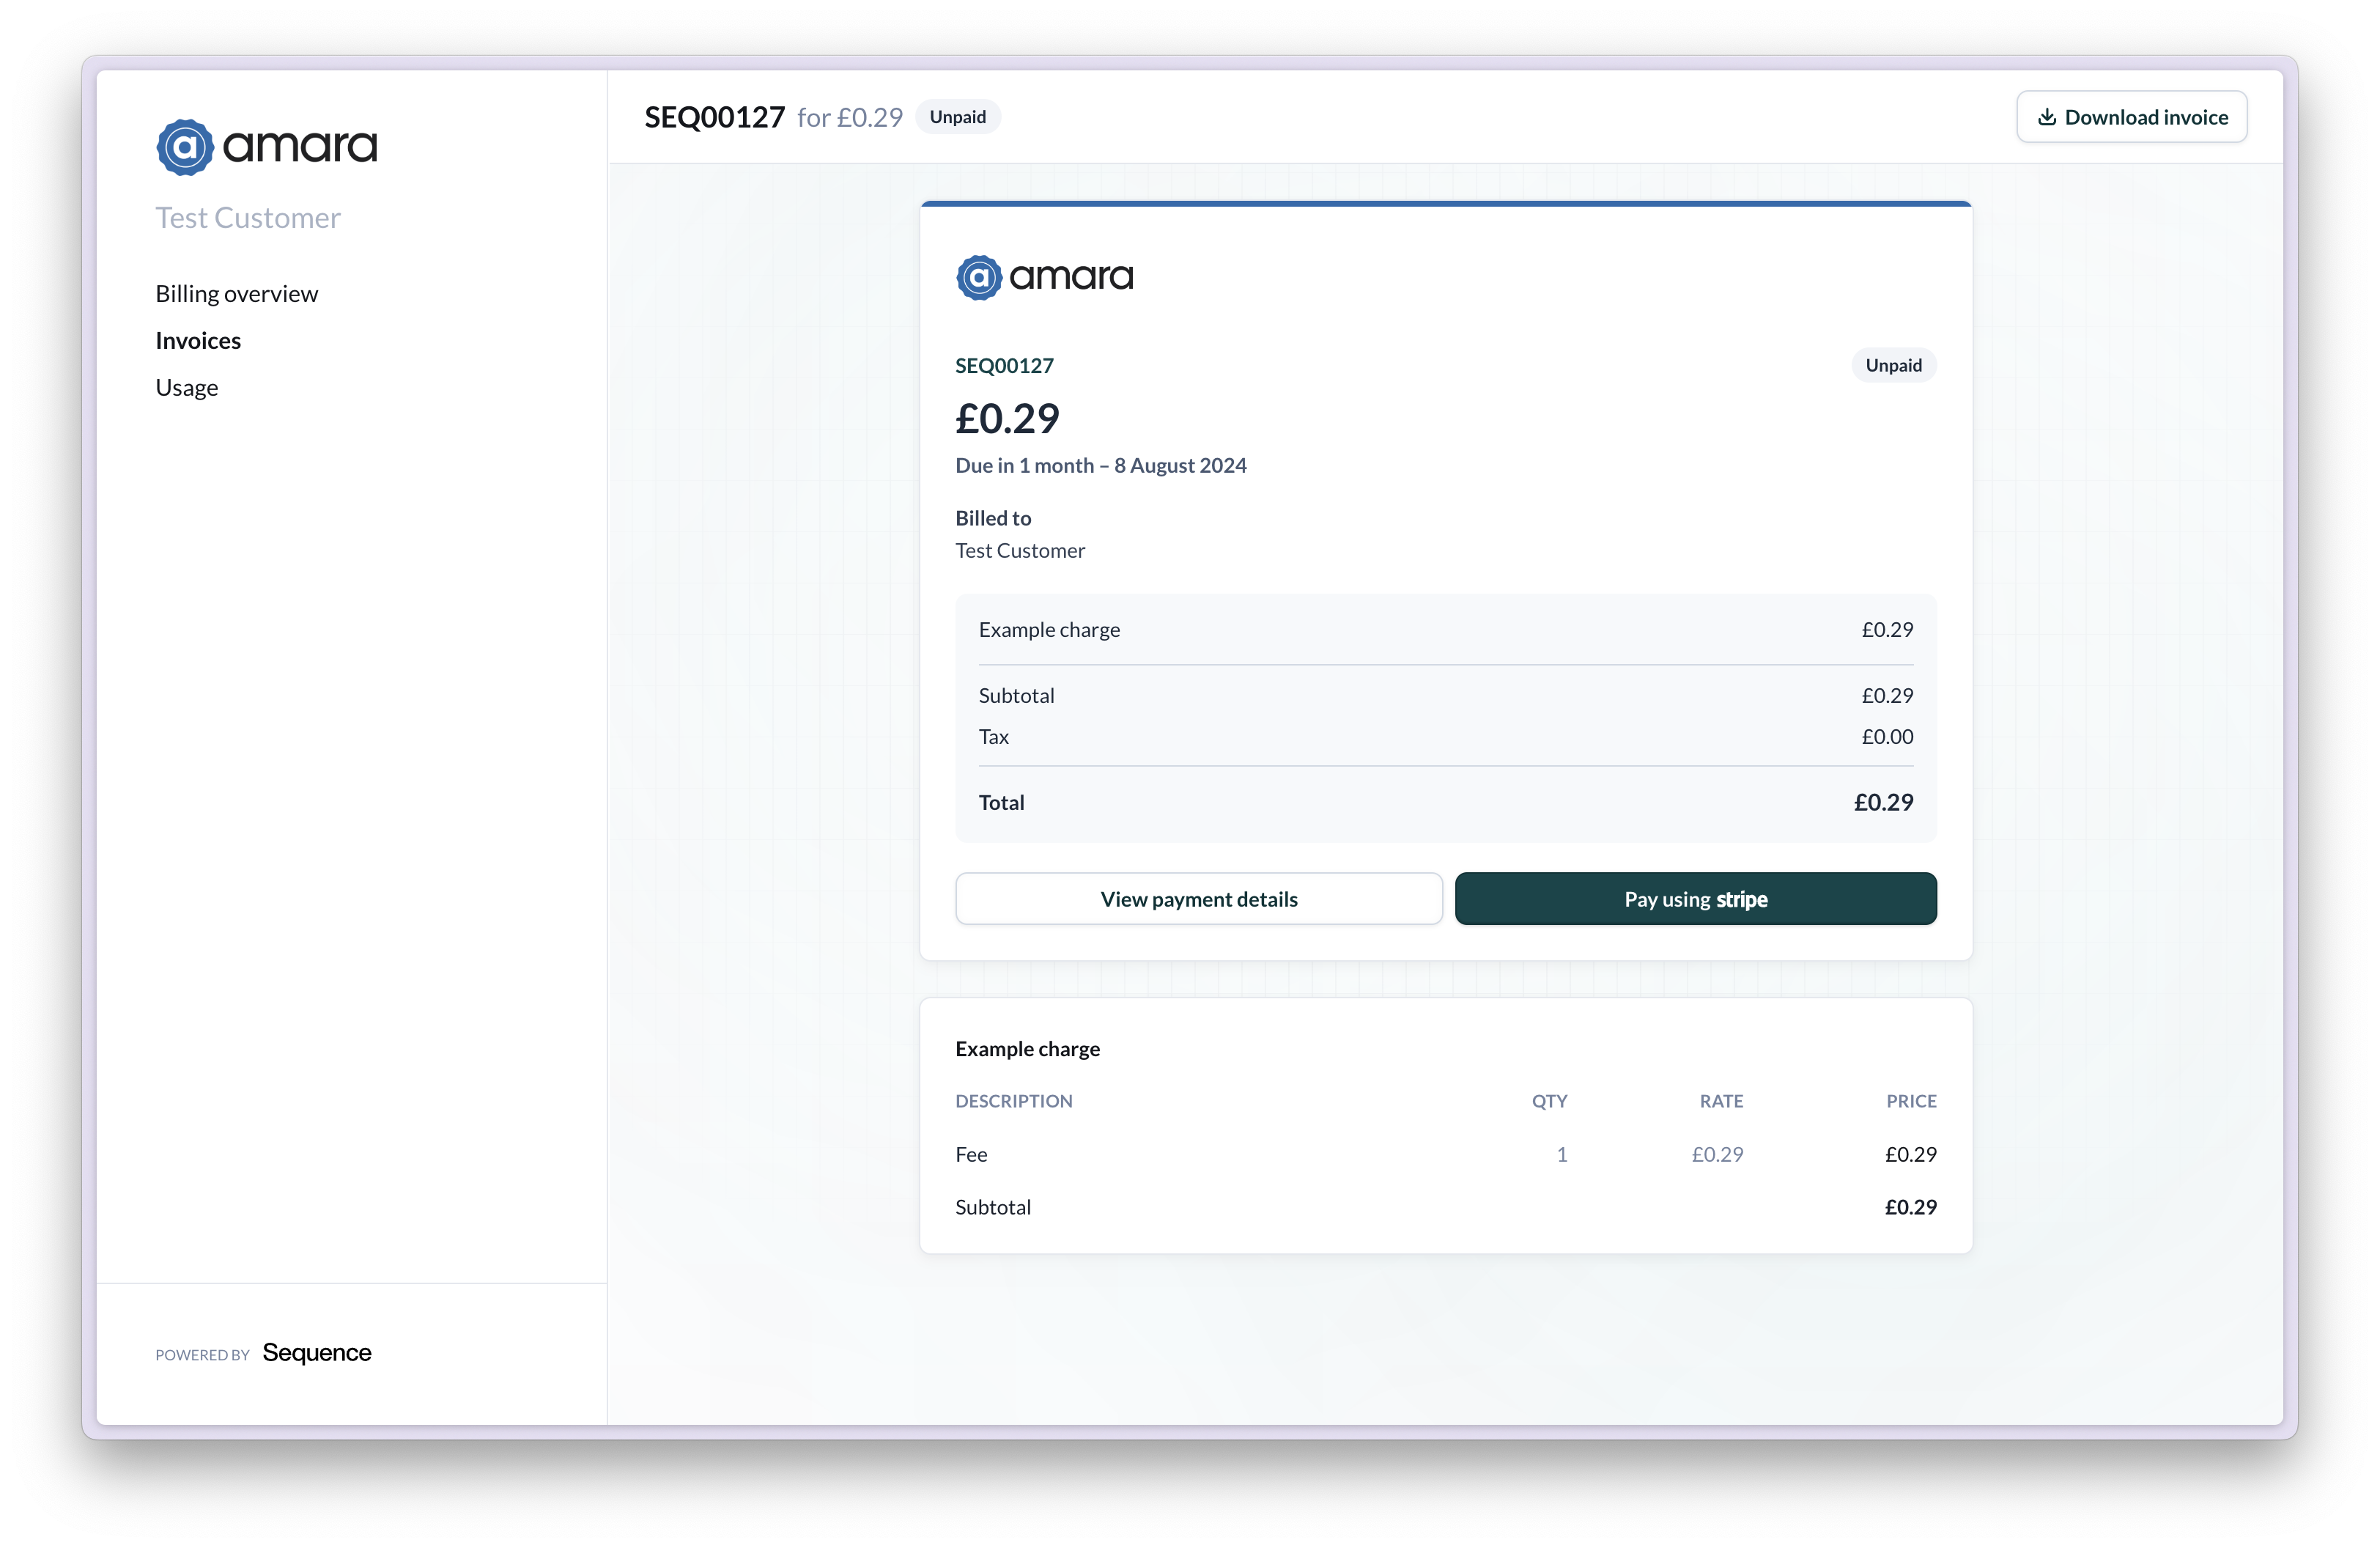
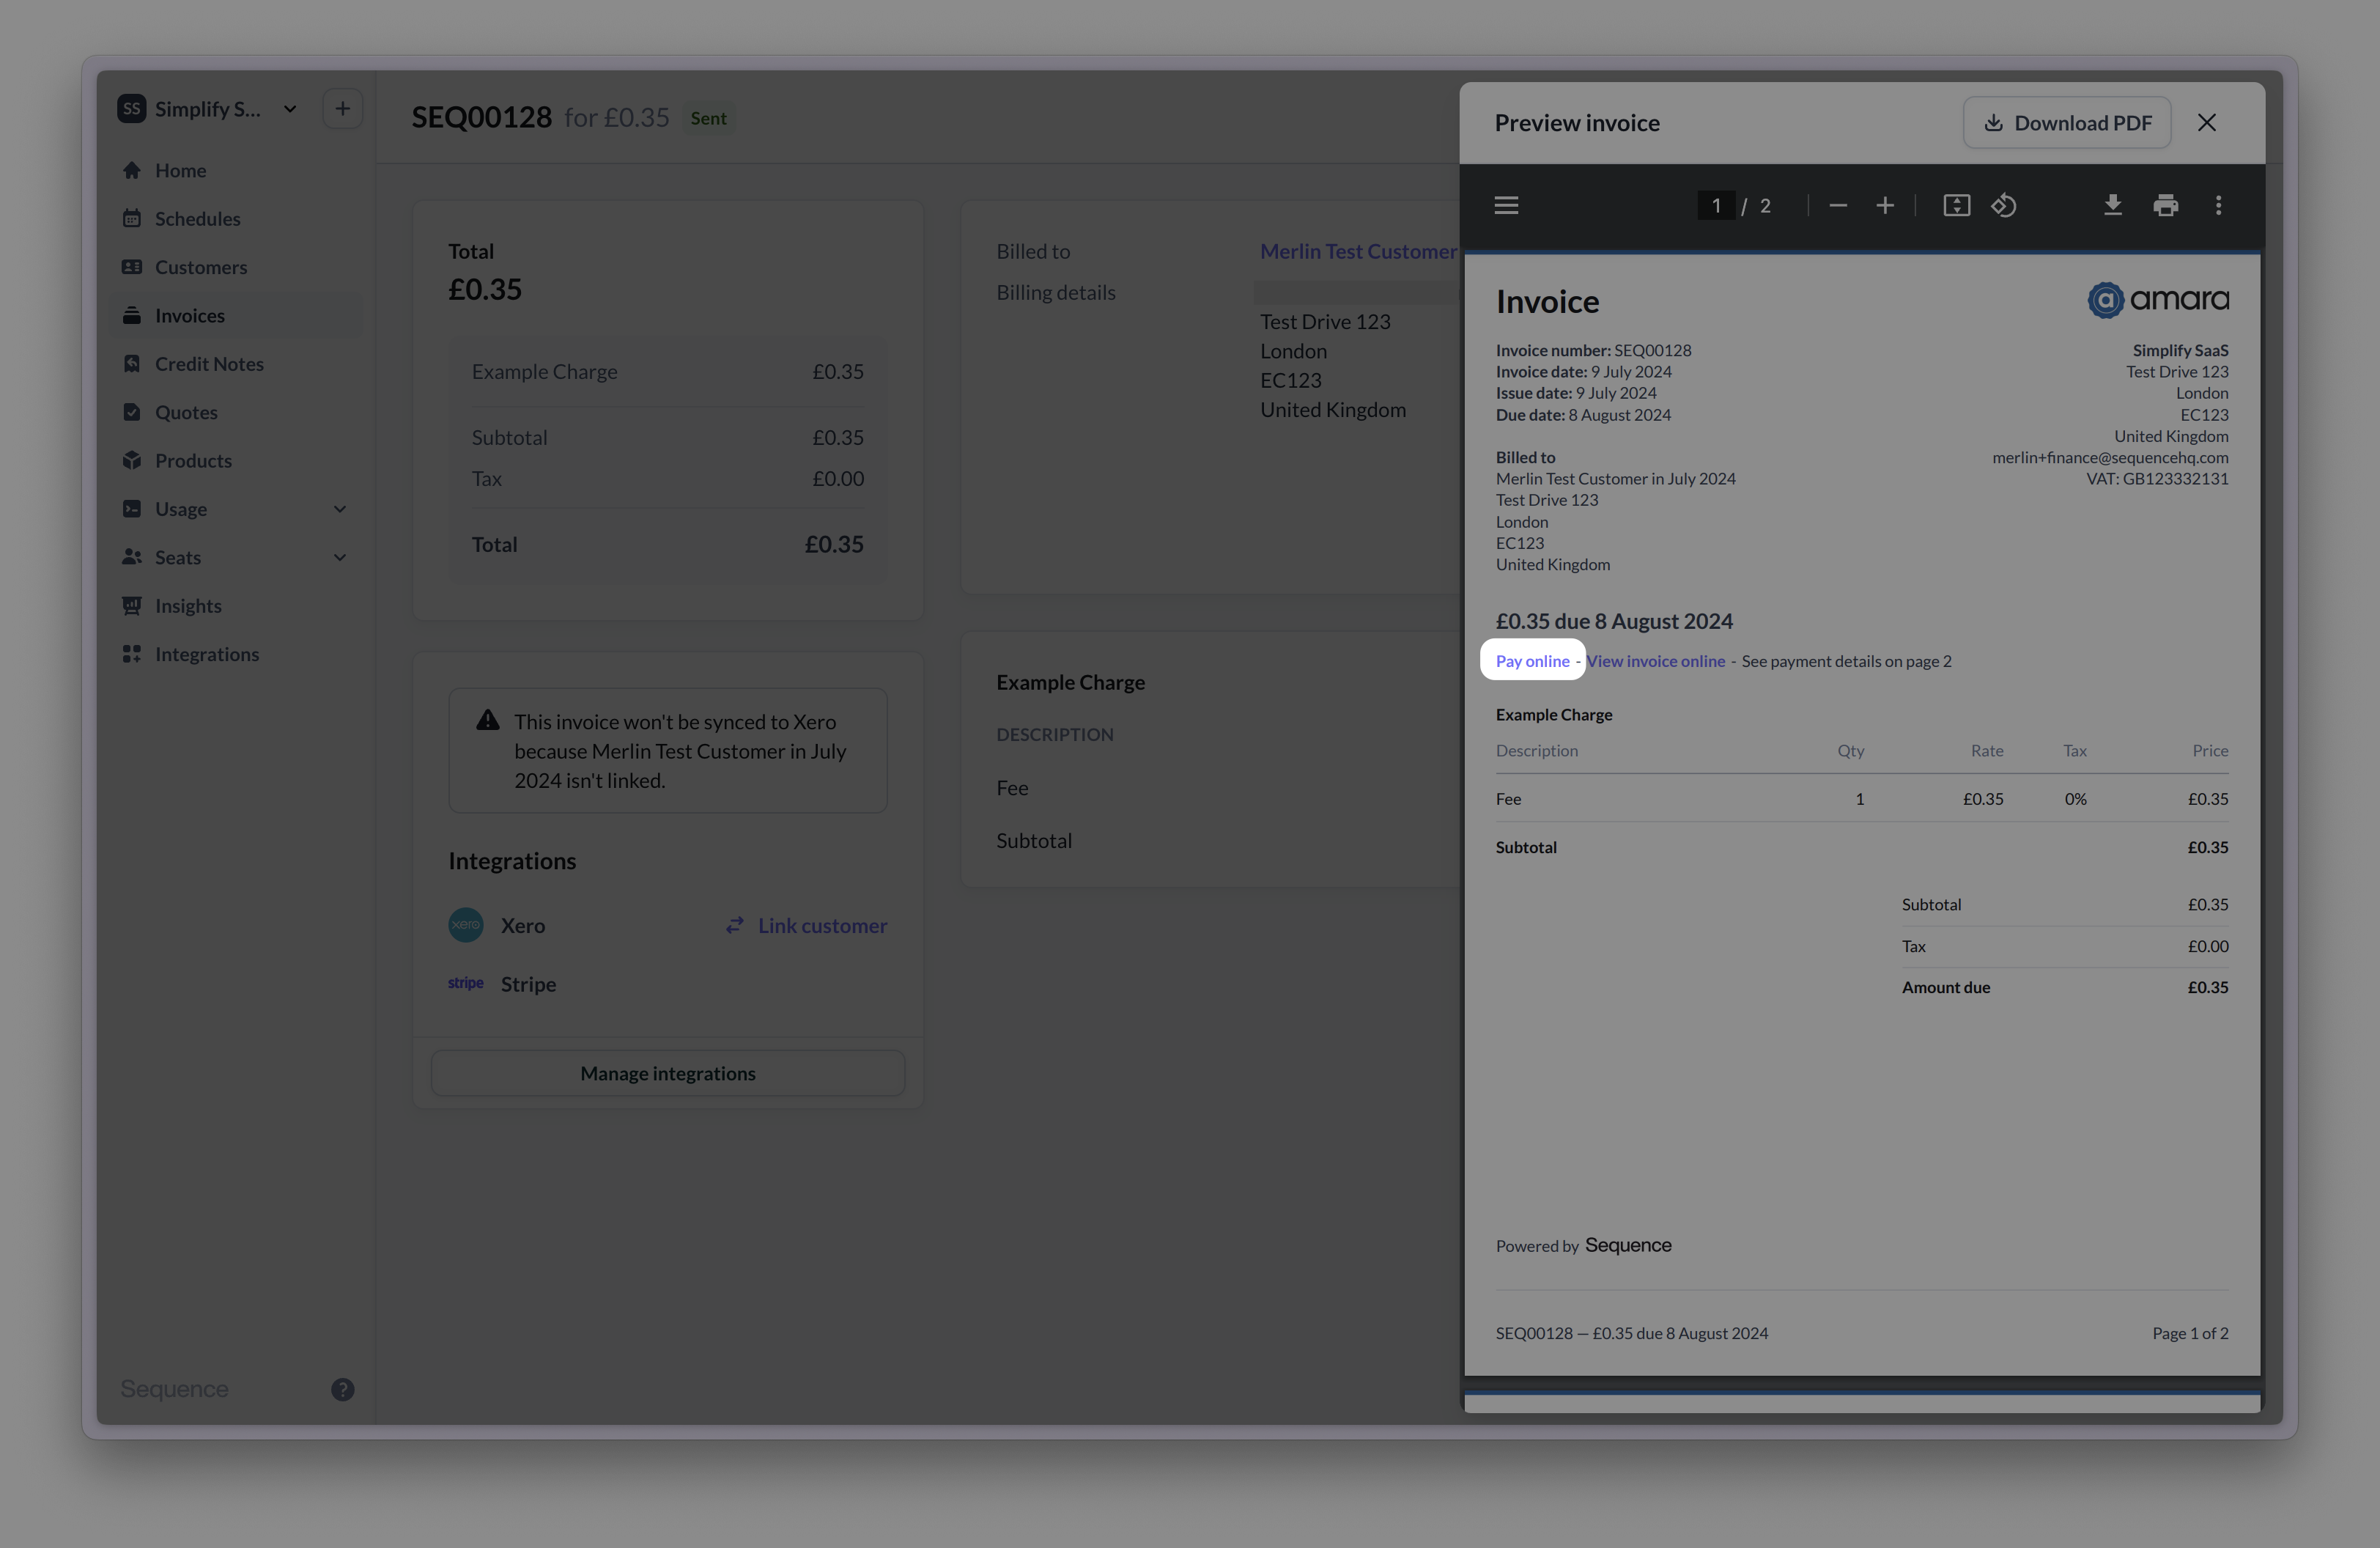
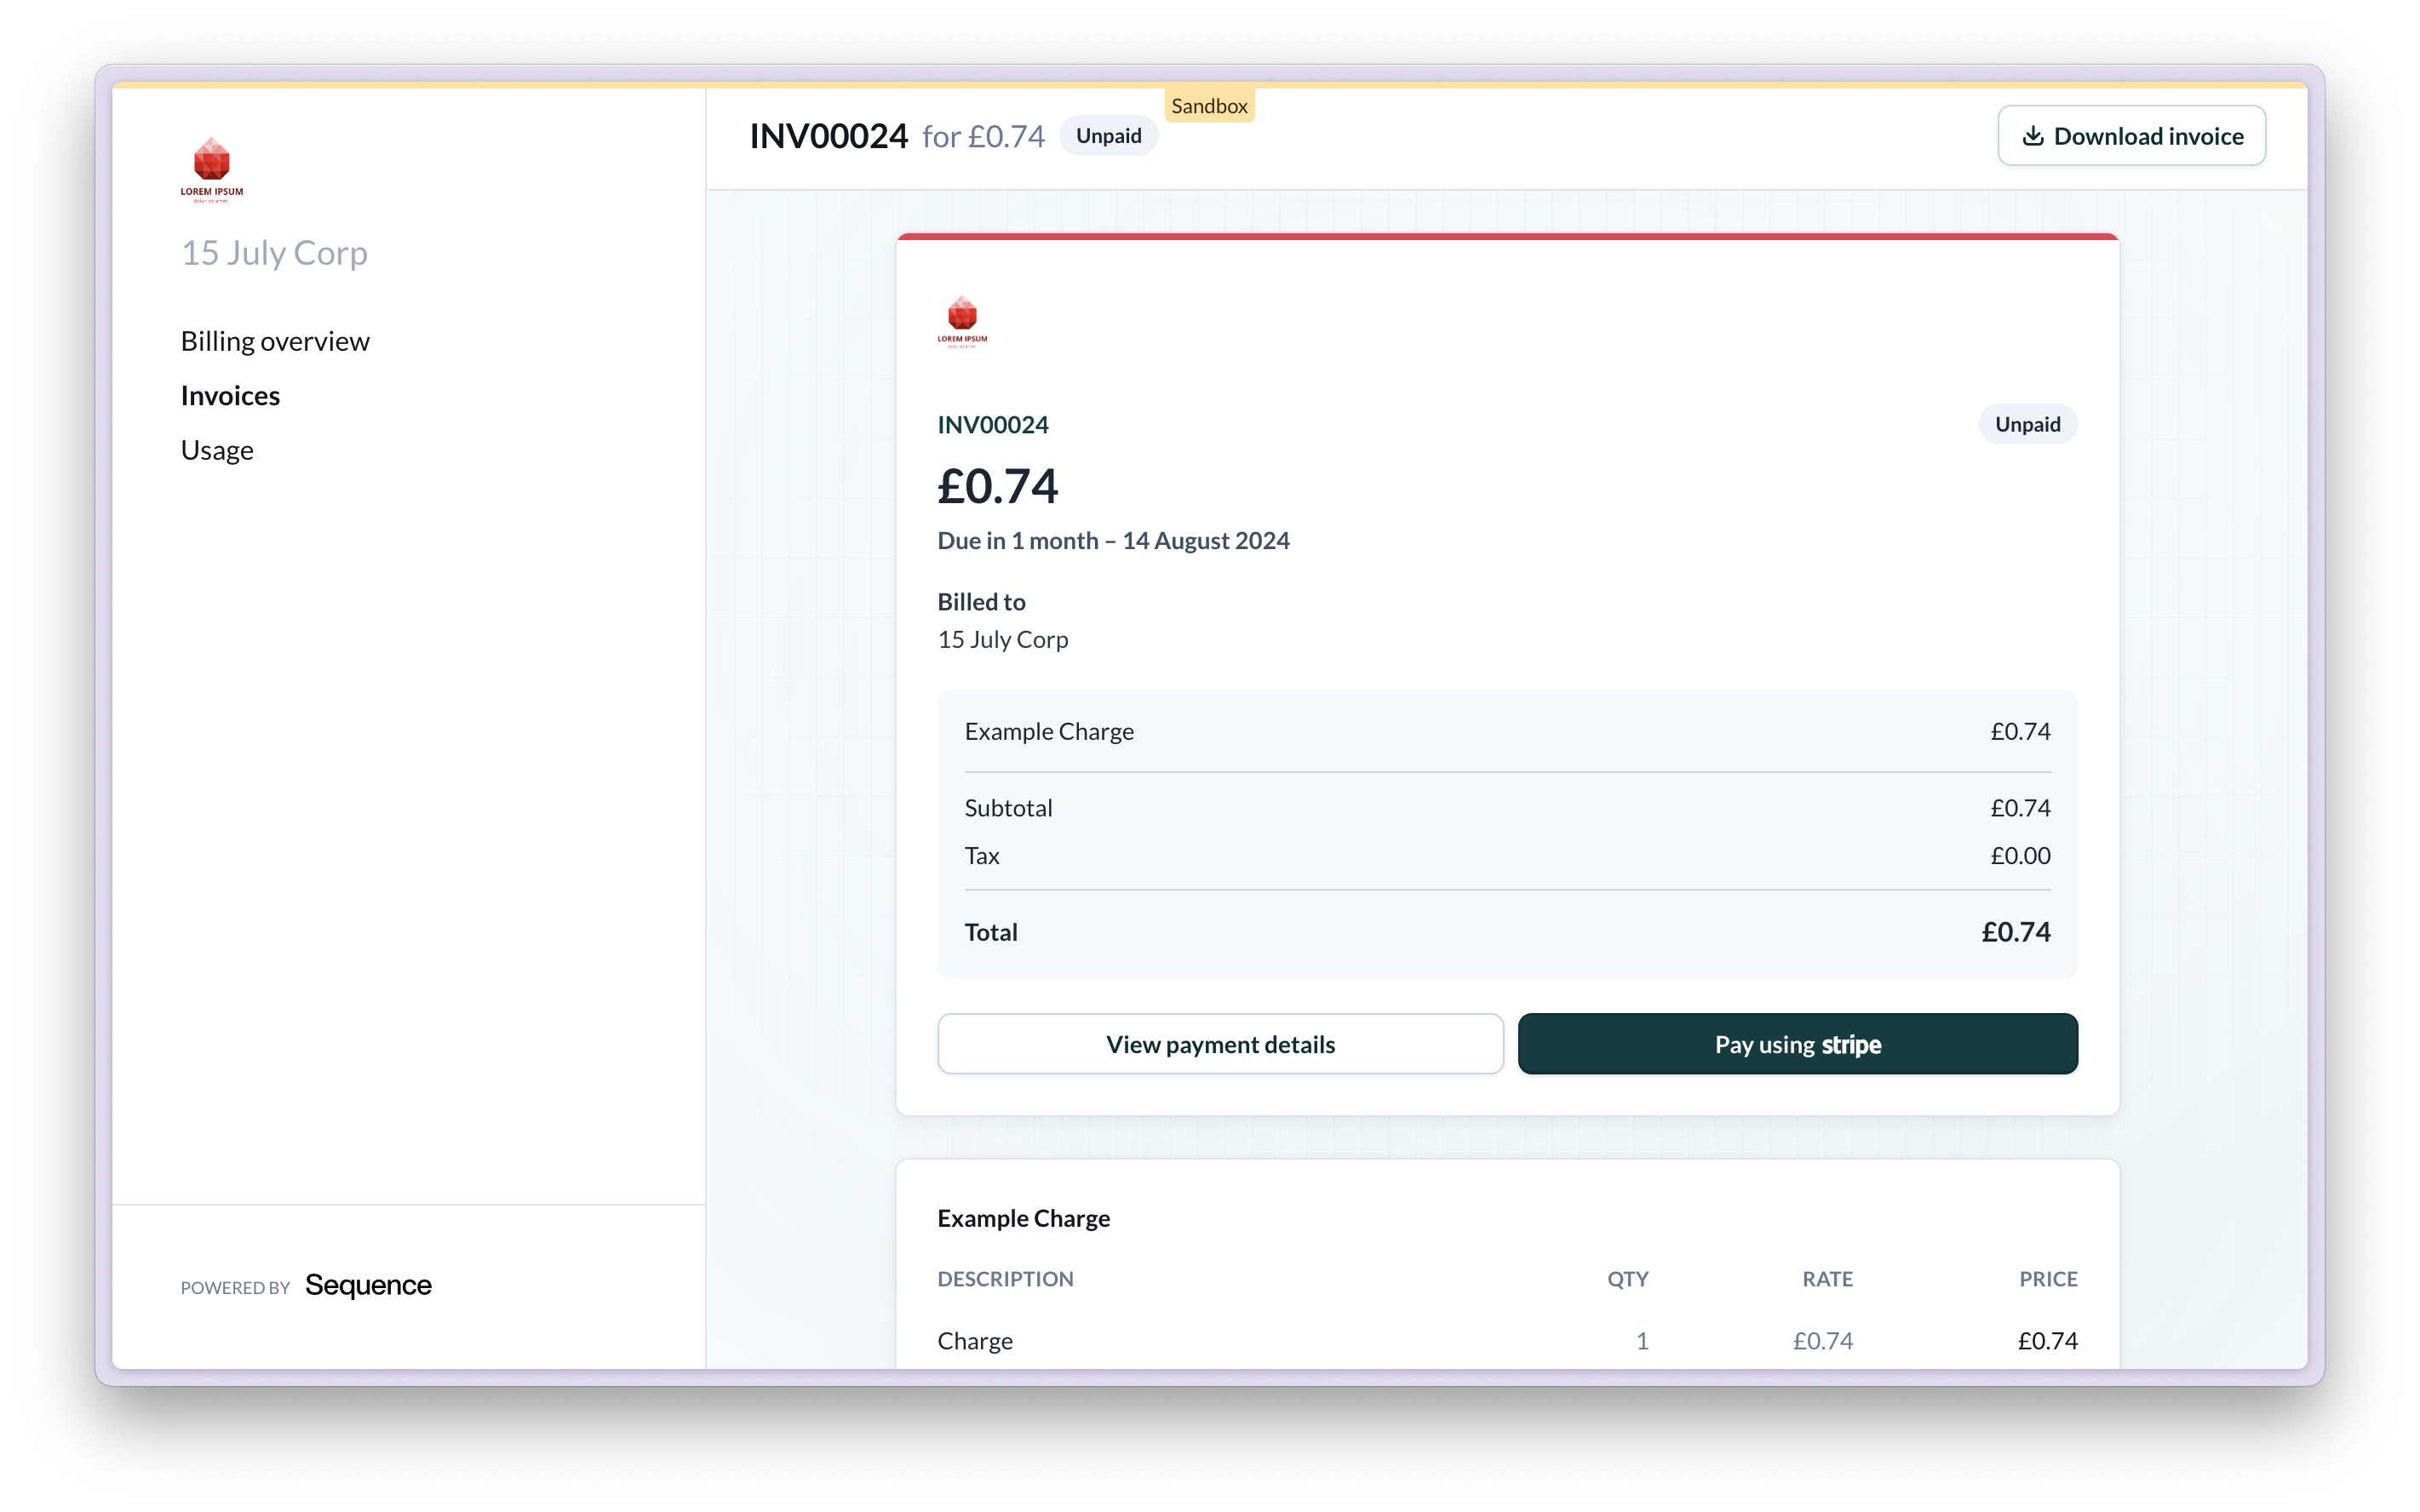
Once an invoice has been sent, there are different options for your customer to view the Stripe checkout page and complete the payment.
The email includes a Stripe checkout link to pay for the invoice. Clicking `View invoice details` will open the hosted invoice. The invoice is also attached as a PDF.
## Example payment flow
When the invoice is finalized and sent to the customer, a Stripe checkout payment link is generated. If a payment method is already on file, the customer is charged automatically. Talk to our team to disable auto-charging for your account.
Once an invoice has been sent, there are different options for your customer to view the Stripe checkout page and complete the payment.
The email includes a Stripe checkout link to pay for the invoice. Clicking `View invoice details` will open the hosted invoice. The invoice is also attached as a PDF.
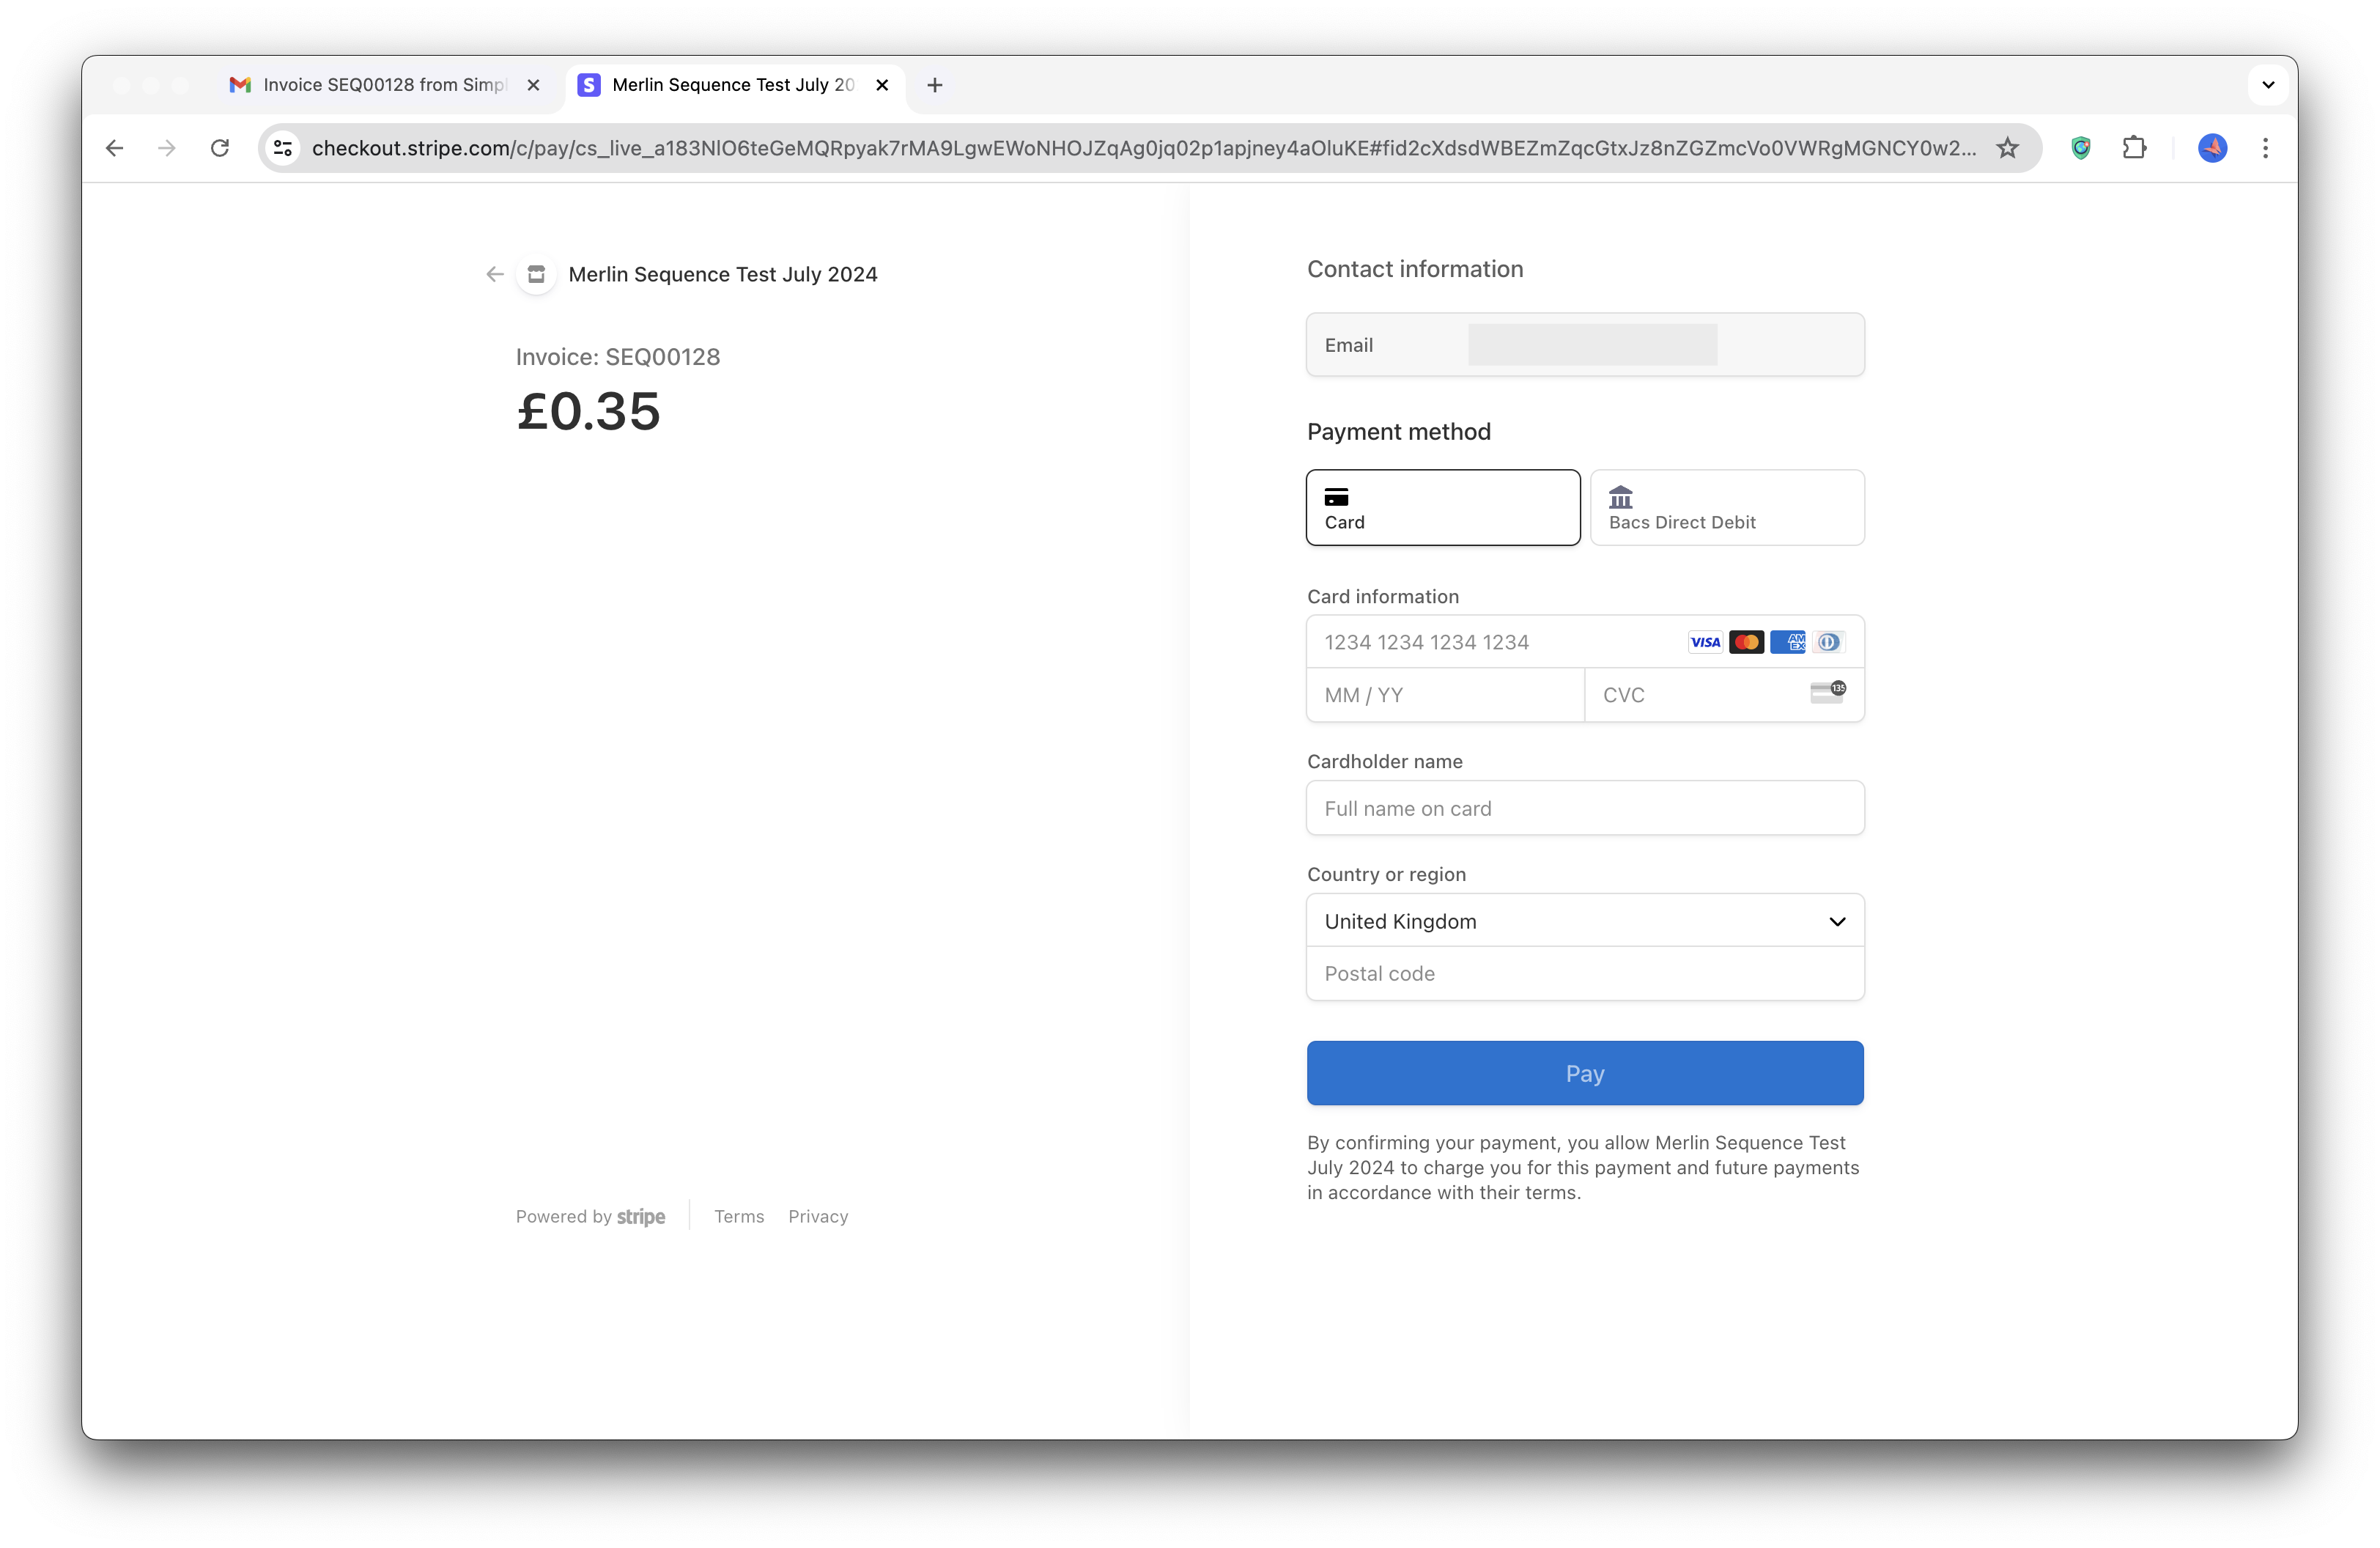
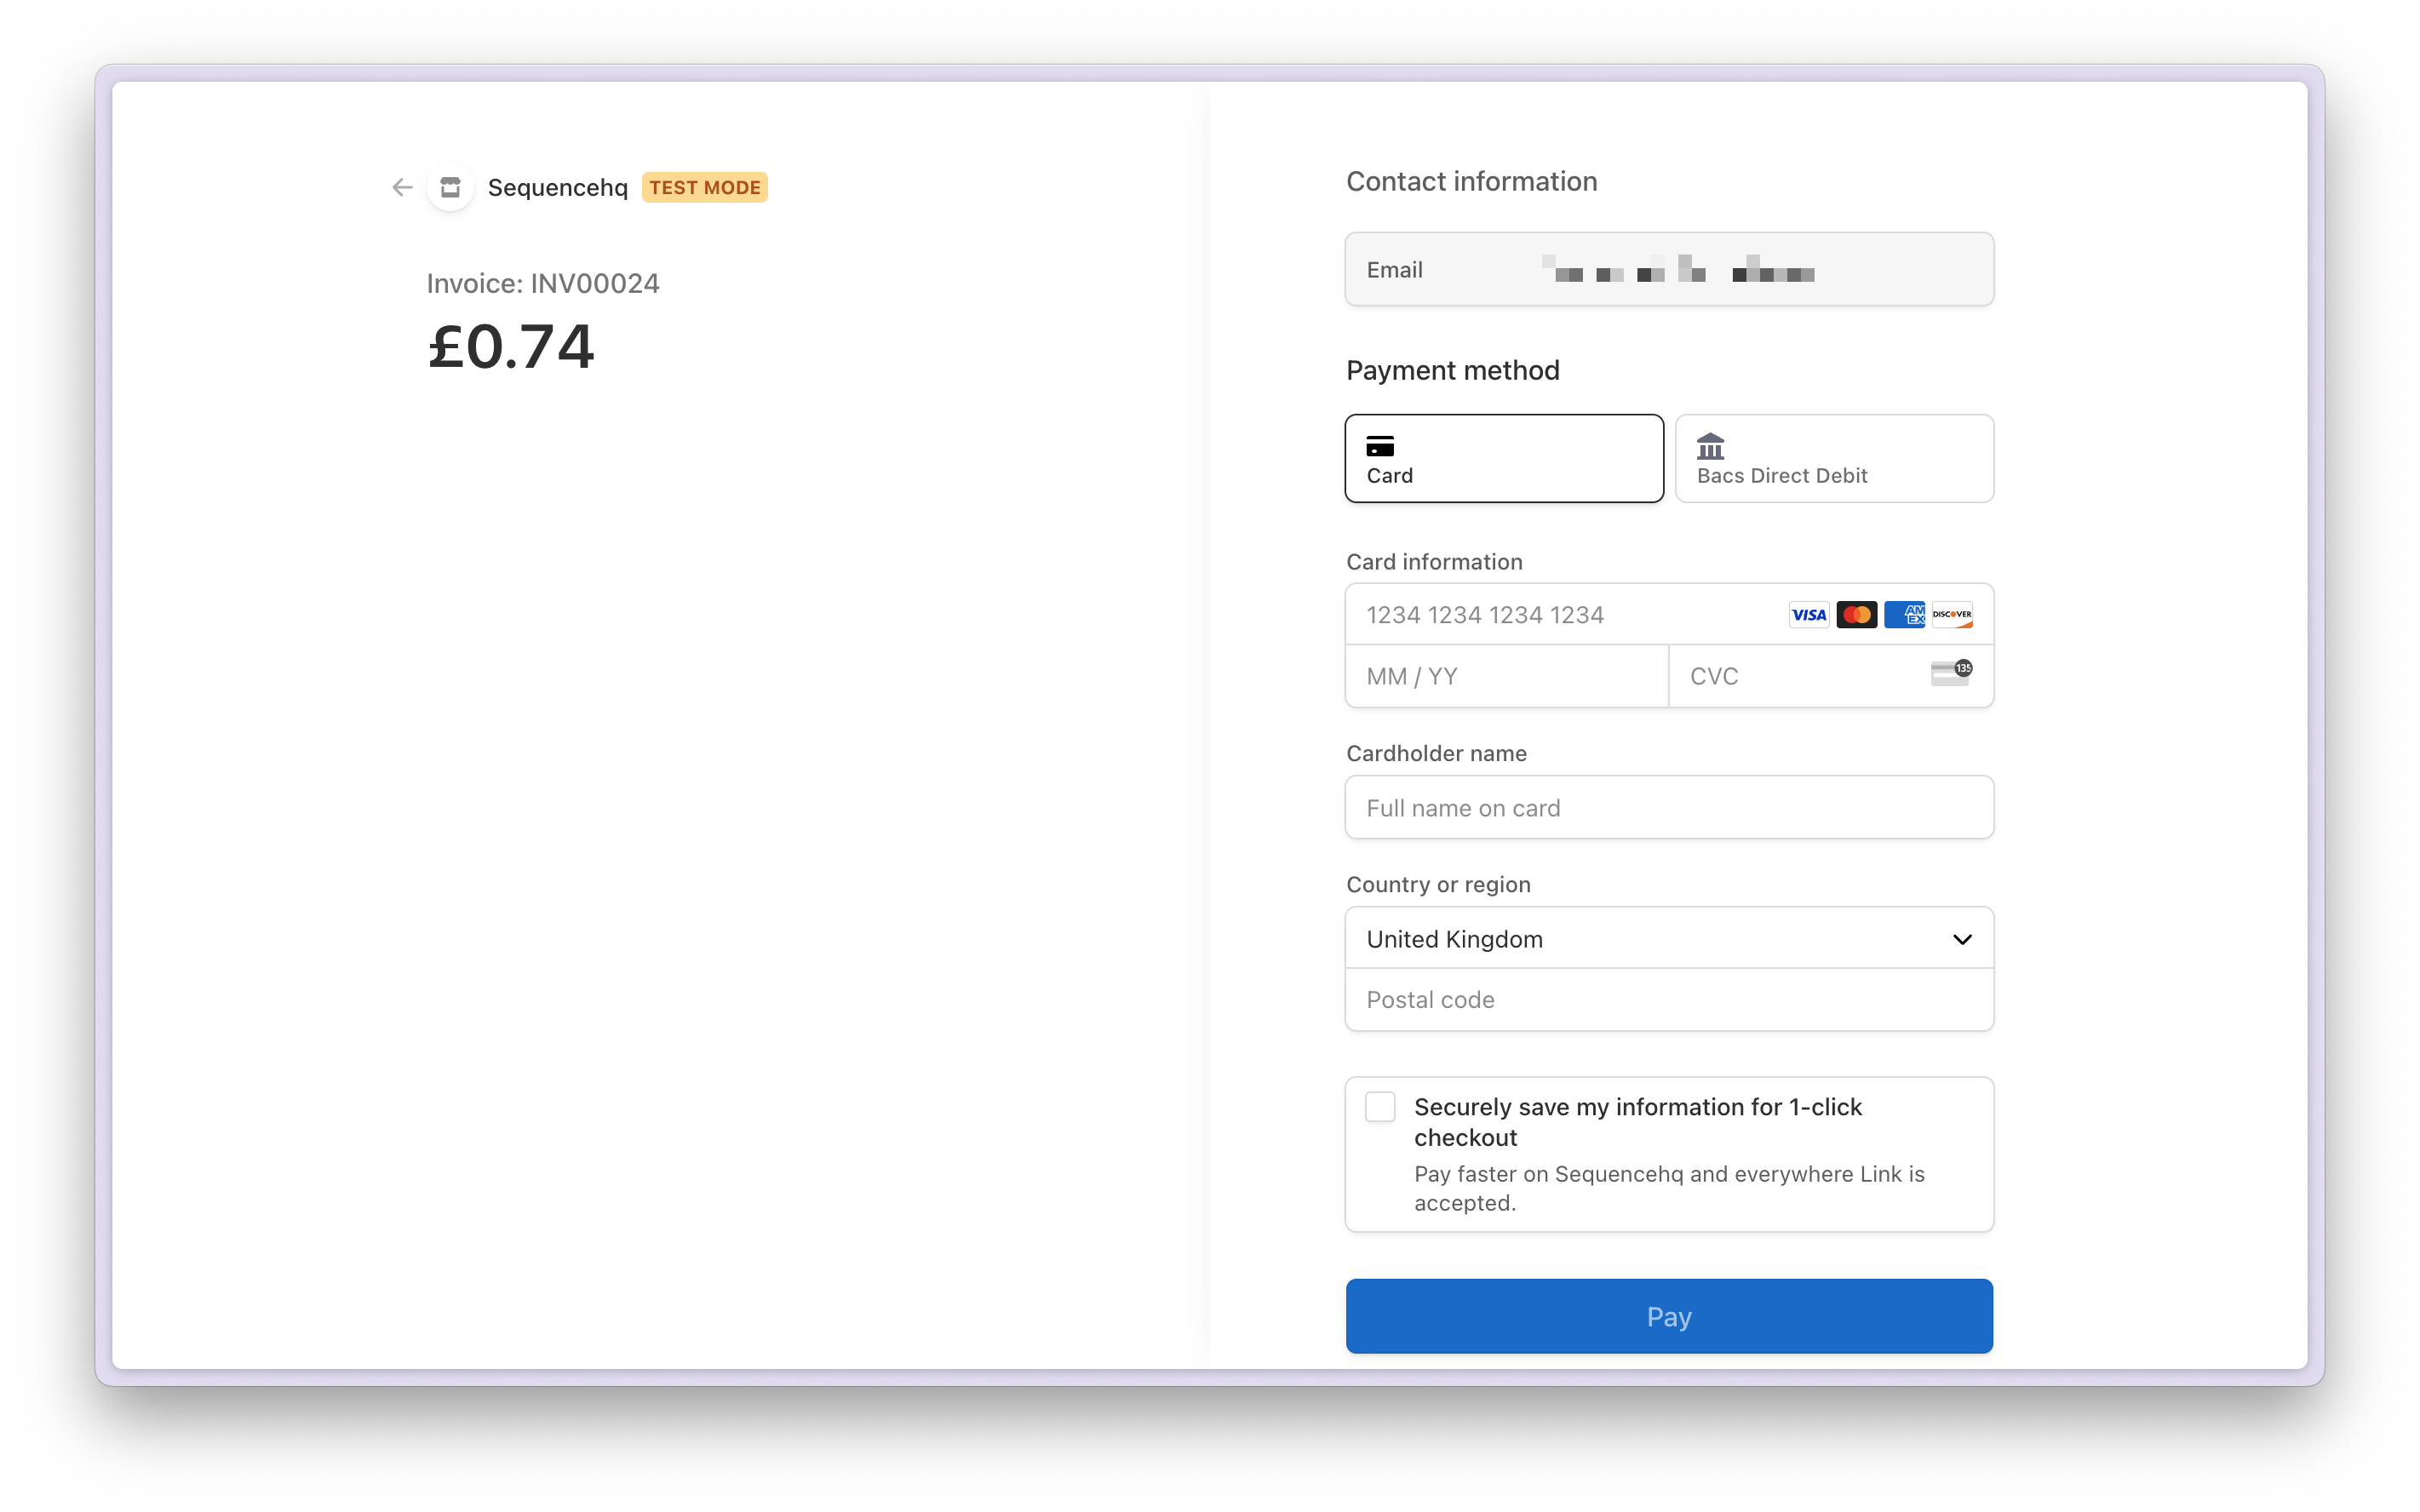
 Clicking `Pay using Stripe` on any of the above touch points will open the Stripe checkout. If this is the first time the customer is paying via Stripe, they will need to enter their payment details as below. If a payment method is on file, the customer is charged automatically and will see a "Payment successful" page.
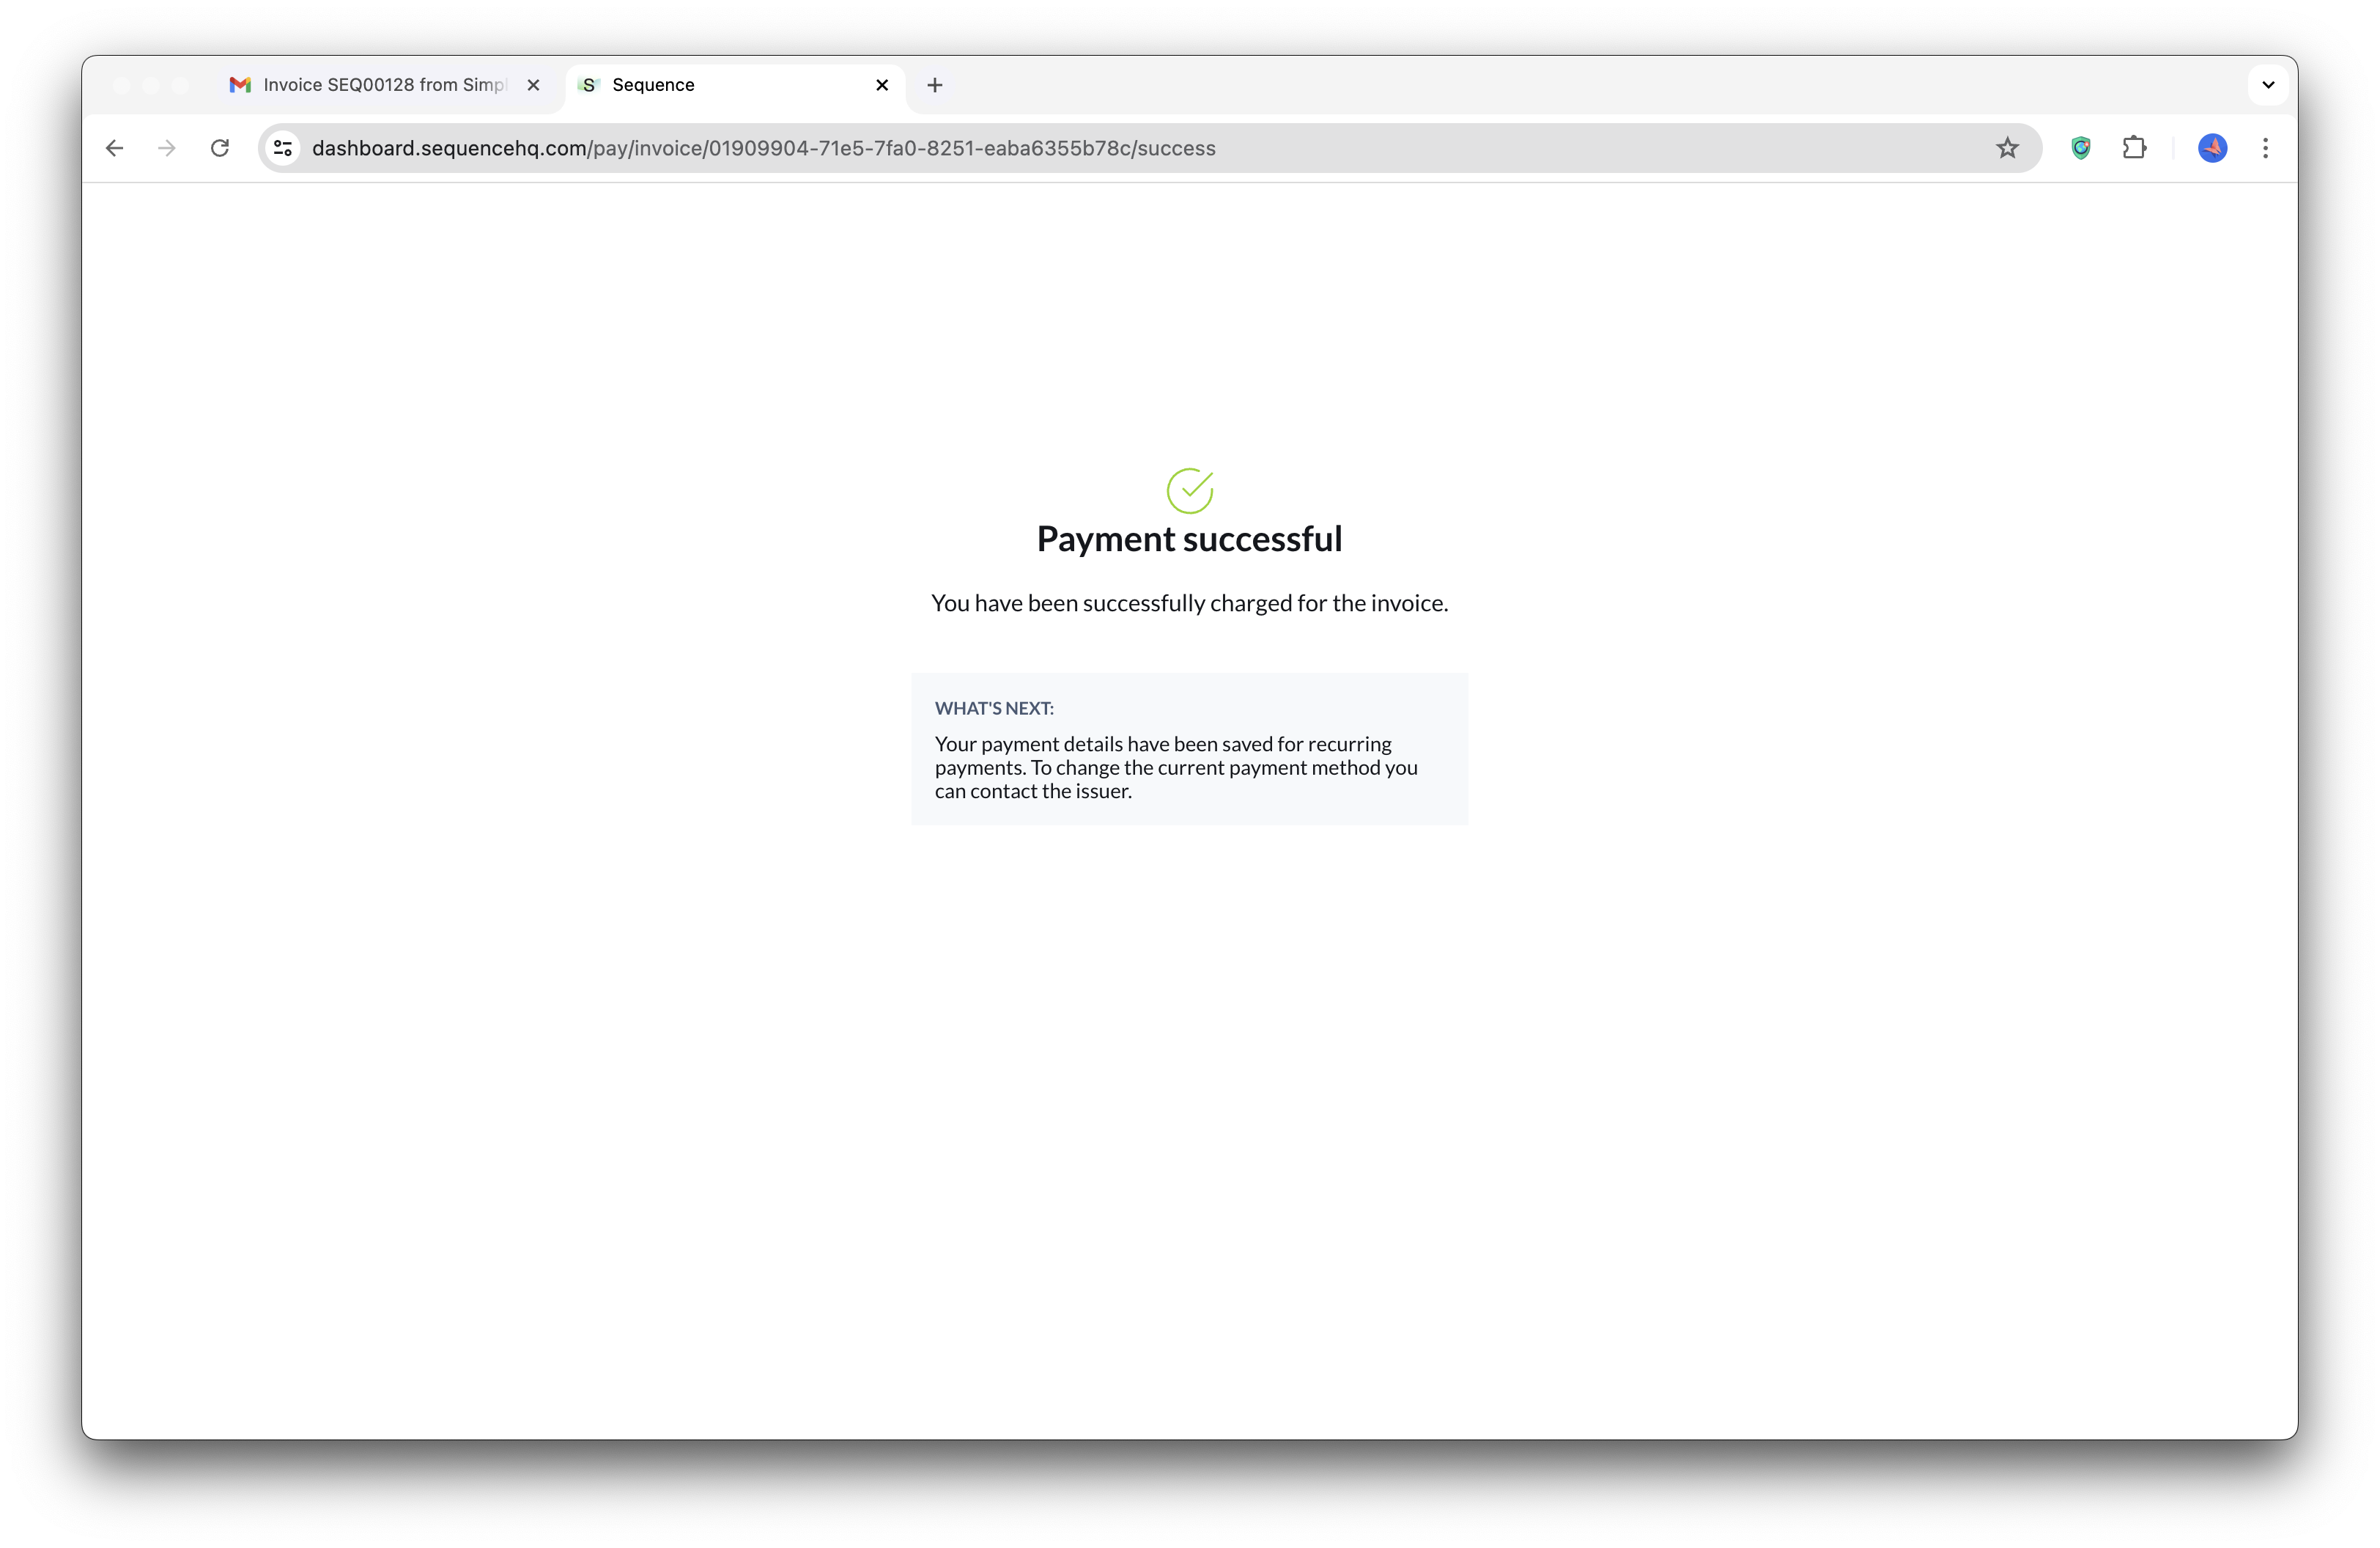
 If the payment succeeds, or if a customer opens the link for an already completed payment, the below page is displayed. In Sequence, the invoice is automatically marked as paid.
 ## Auto-charging customers
Charge customers automatically once a payment method is on file (e.g. card details or a direct debit). Sequence initiates the payment when you **send** the invoice to the customer.
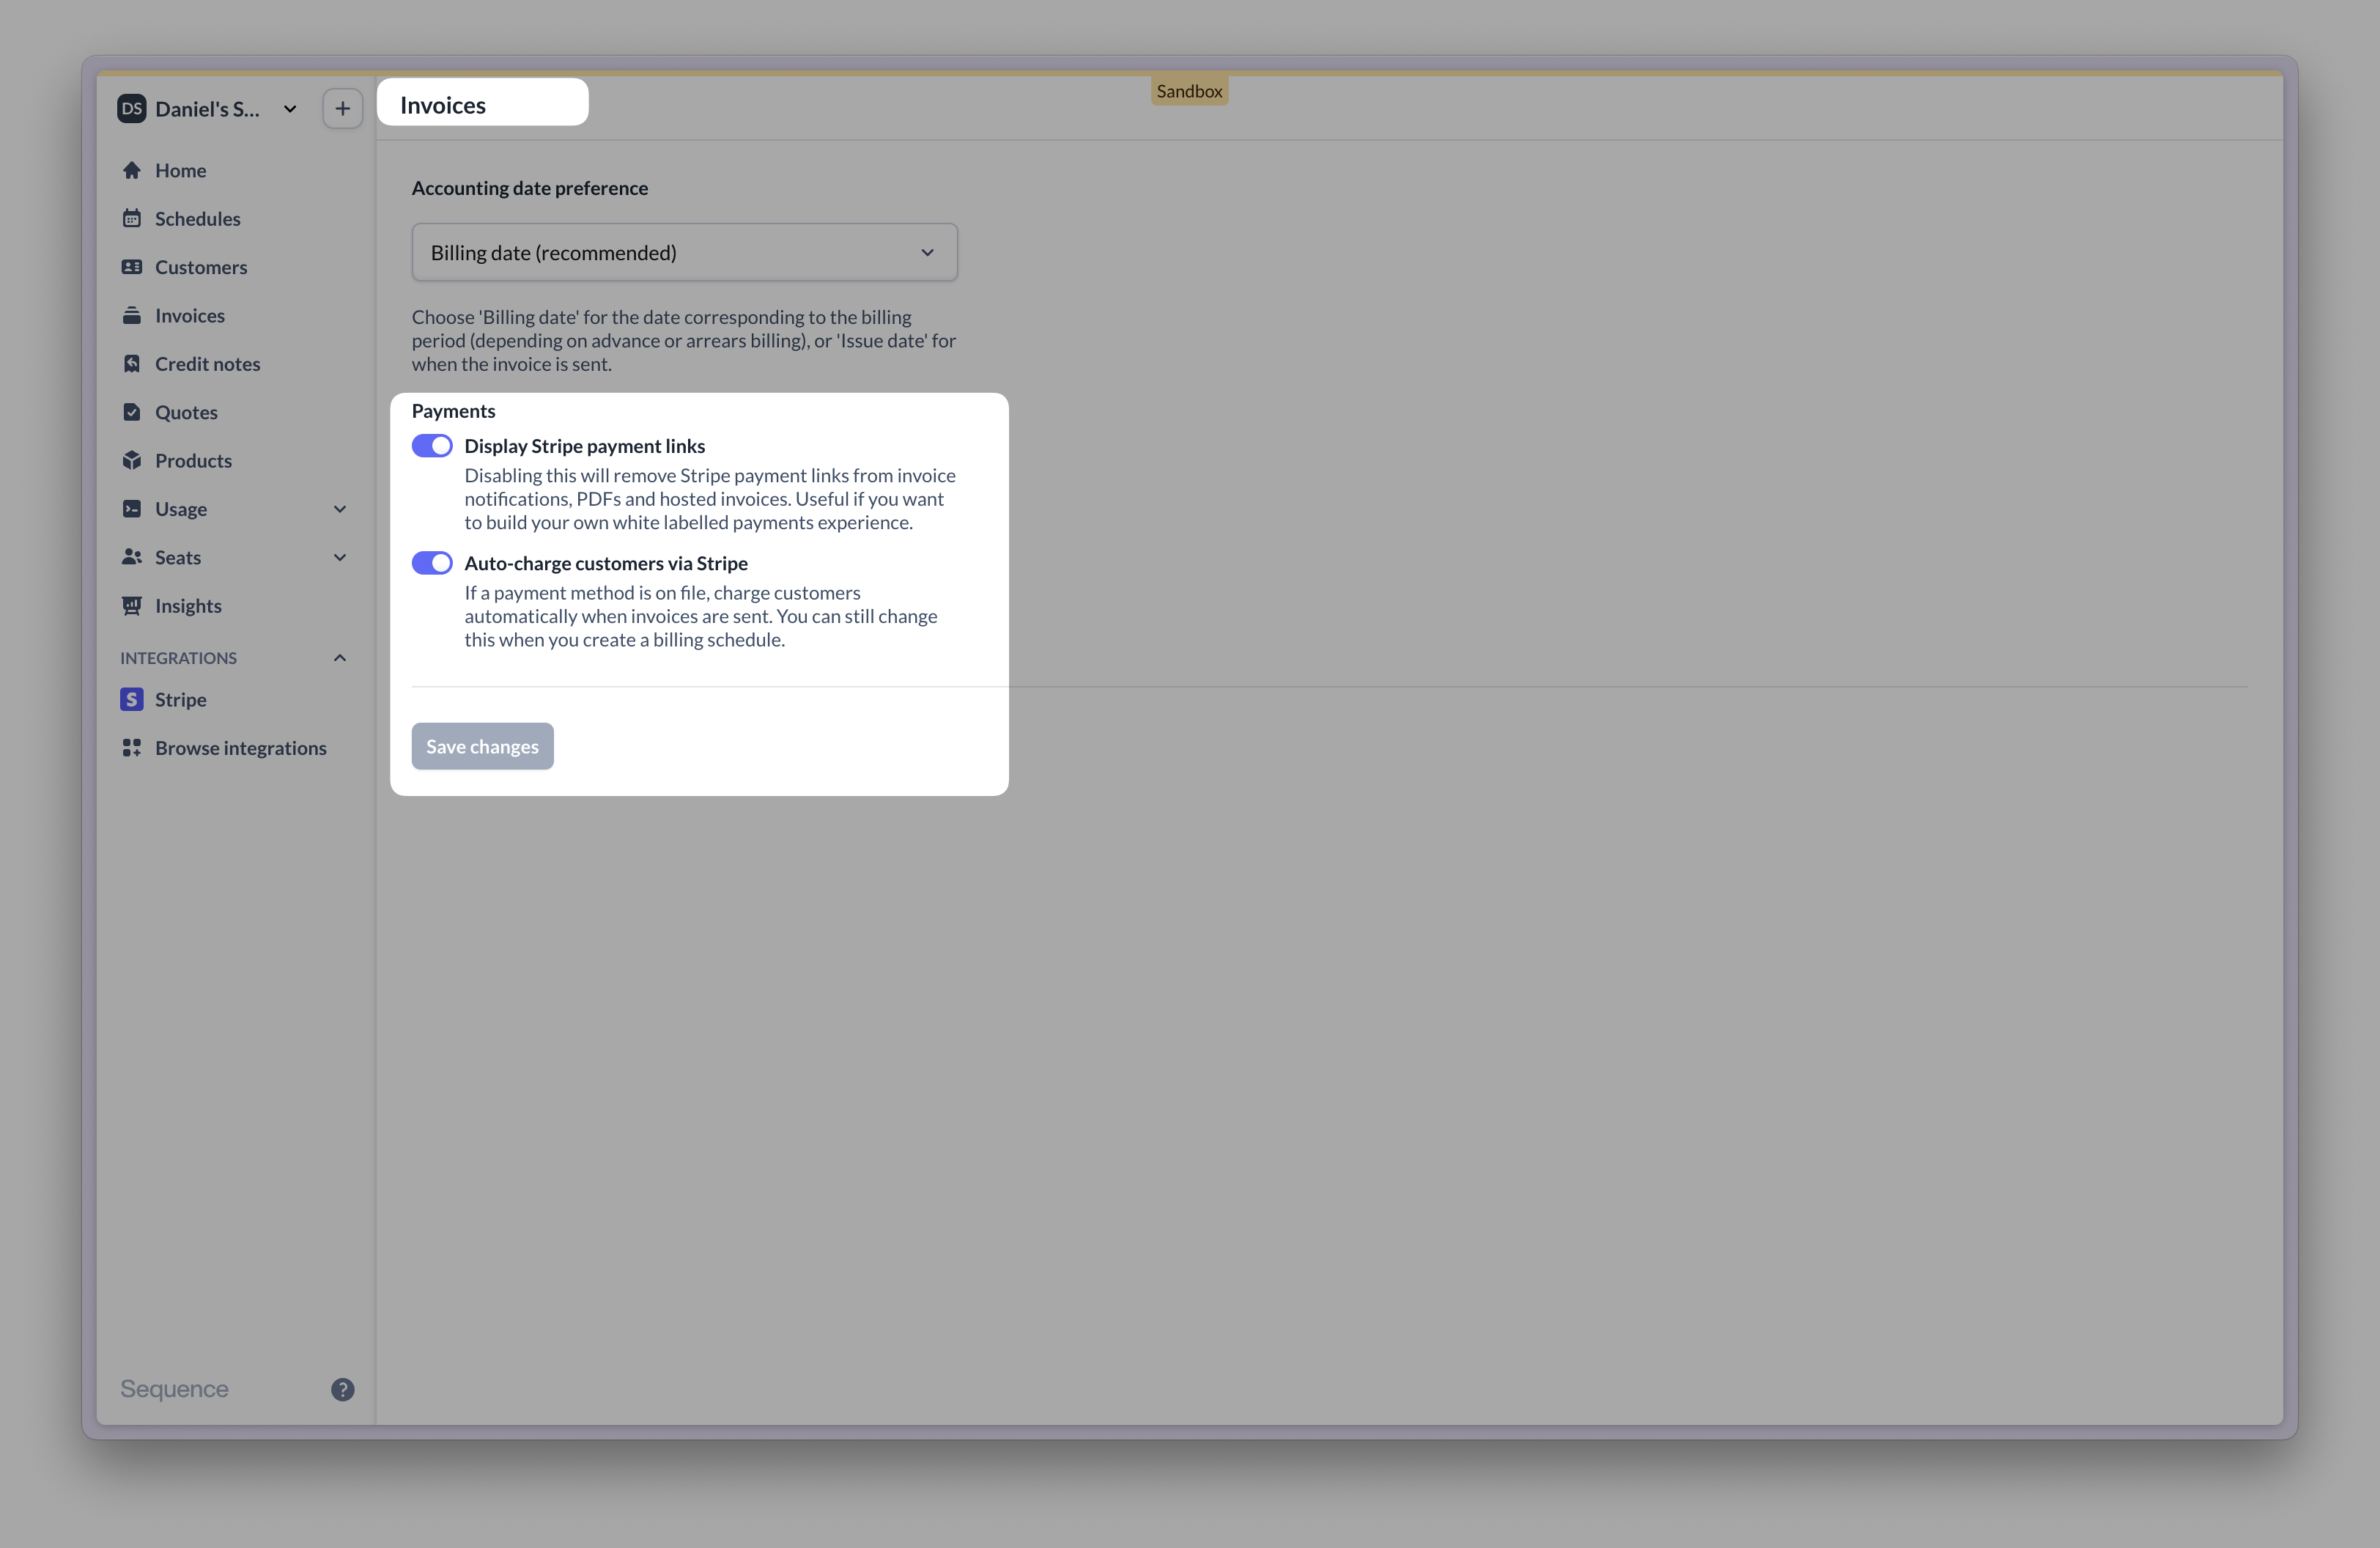
**If auto-charging is enabled**: Once a customer has paid their first Stripe invoice and there is a payment method on file, subsequent invoices will be **charged automatically**. You can disable auto-charging in settings (see below).
You can enable or disable auto-charging in Settings > Invoices. Changes only apply to subsequently created billing schedules and invoices.
## Auto-charging customers
Charge customers automatically once a payment method is on file (e.g. card details or a direct debit). Sequence initiates the payment when you **send** the invoice to the customer.
**If auto-charging is enabled**: Once a customer has paid their first Stripe invoice and there is a payment method on file, subsequent invoices will be **charged automatically**. You can disable auto-charging in settings (see below).
You can enable or disable auto-charging in Settings > Invoices. Changes only apply to subsequently created billing schedules and invoices.
 If you have disabled auto-charging by default, you can still enable auto-charging for selected customers as part of their billing schedule.
 ## Linking Sequence customers to Stripe
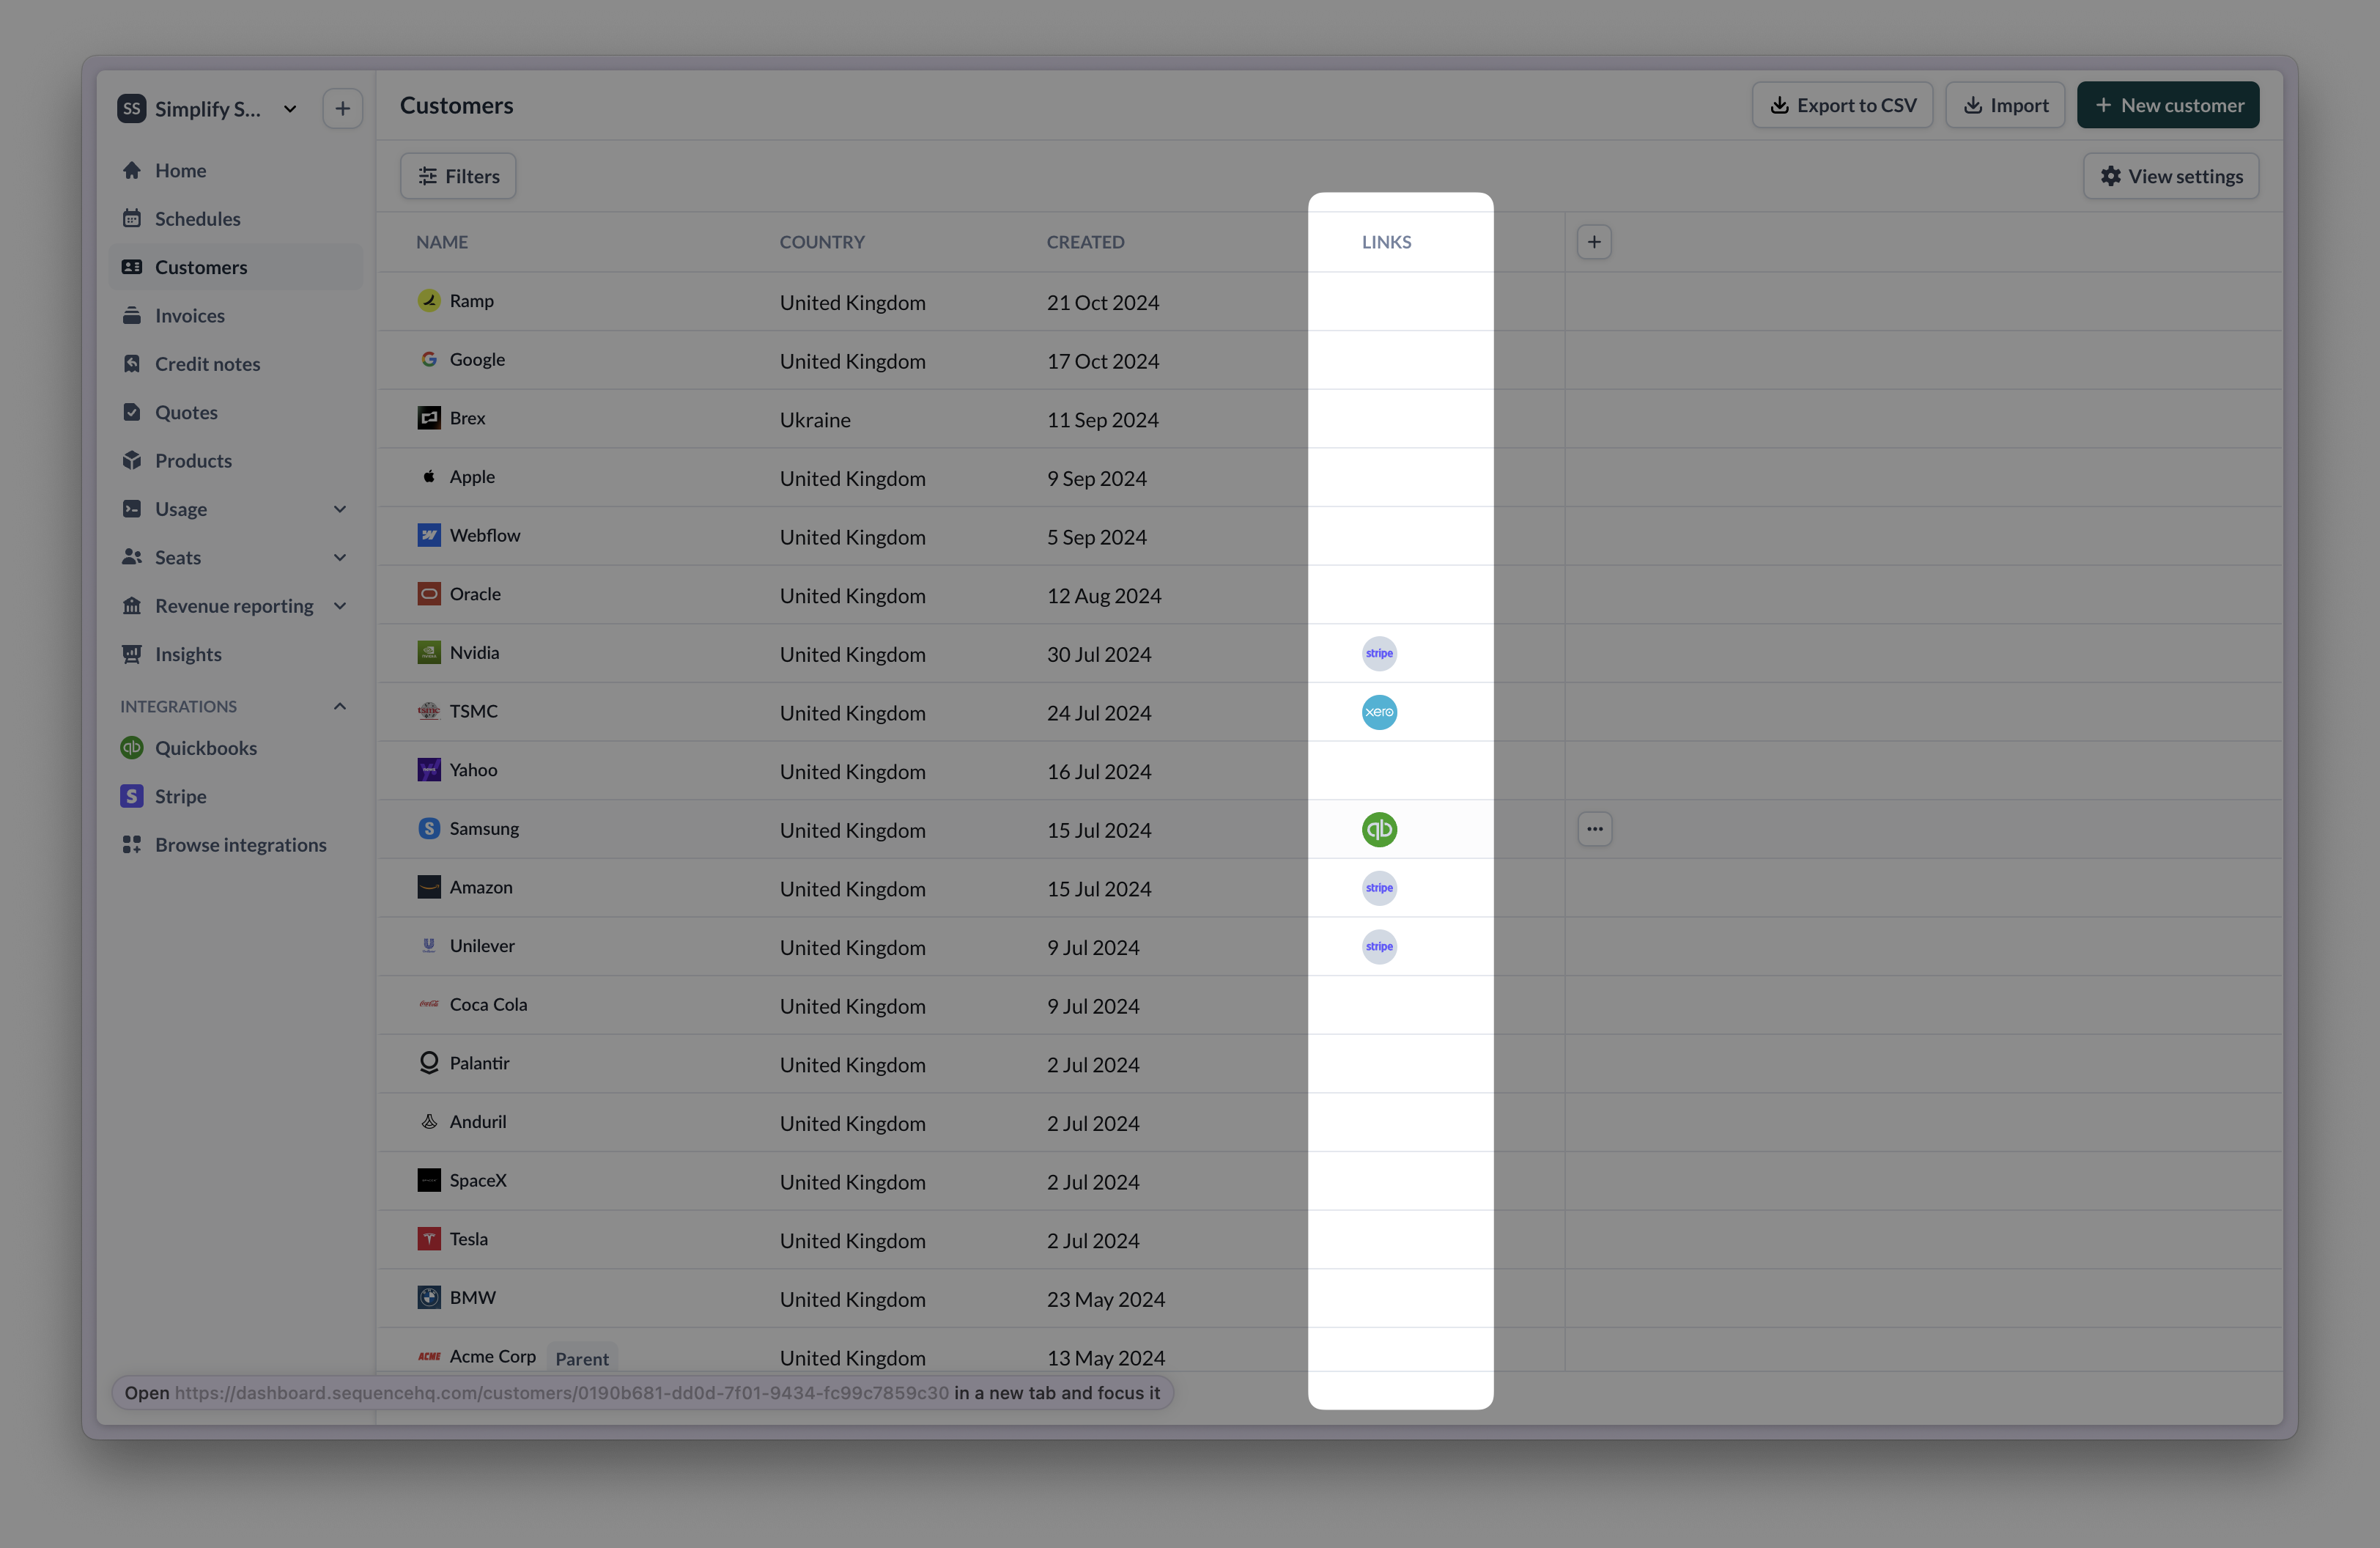
Once integrated with Stripe, Sequence will handle creating customers in Stripe. Customer details are pushed into Stripe when the first payment link is created. Login to your Stripe dashboard to view your customers.
You can unlink Sequence customers from Stripe from the Sequence dashboard.
## Linking Sequence customers to Stripe
Once integrated with Stripe, Sequence will handle creating customers in Stripe. Customer details are pushed into Stripe when the first payment link is created. Login to your Stripe dashboard to view your customers.
You can unlink Sequence customers from Stripe from the Sequence dashboard.
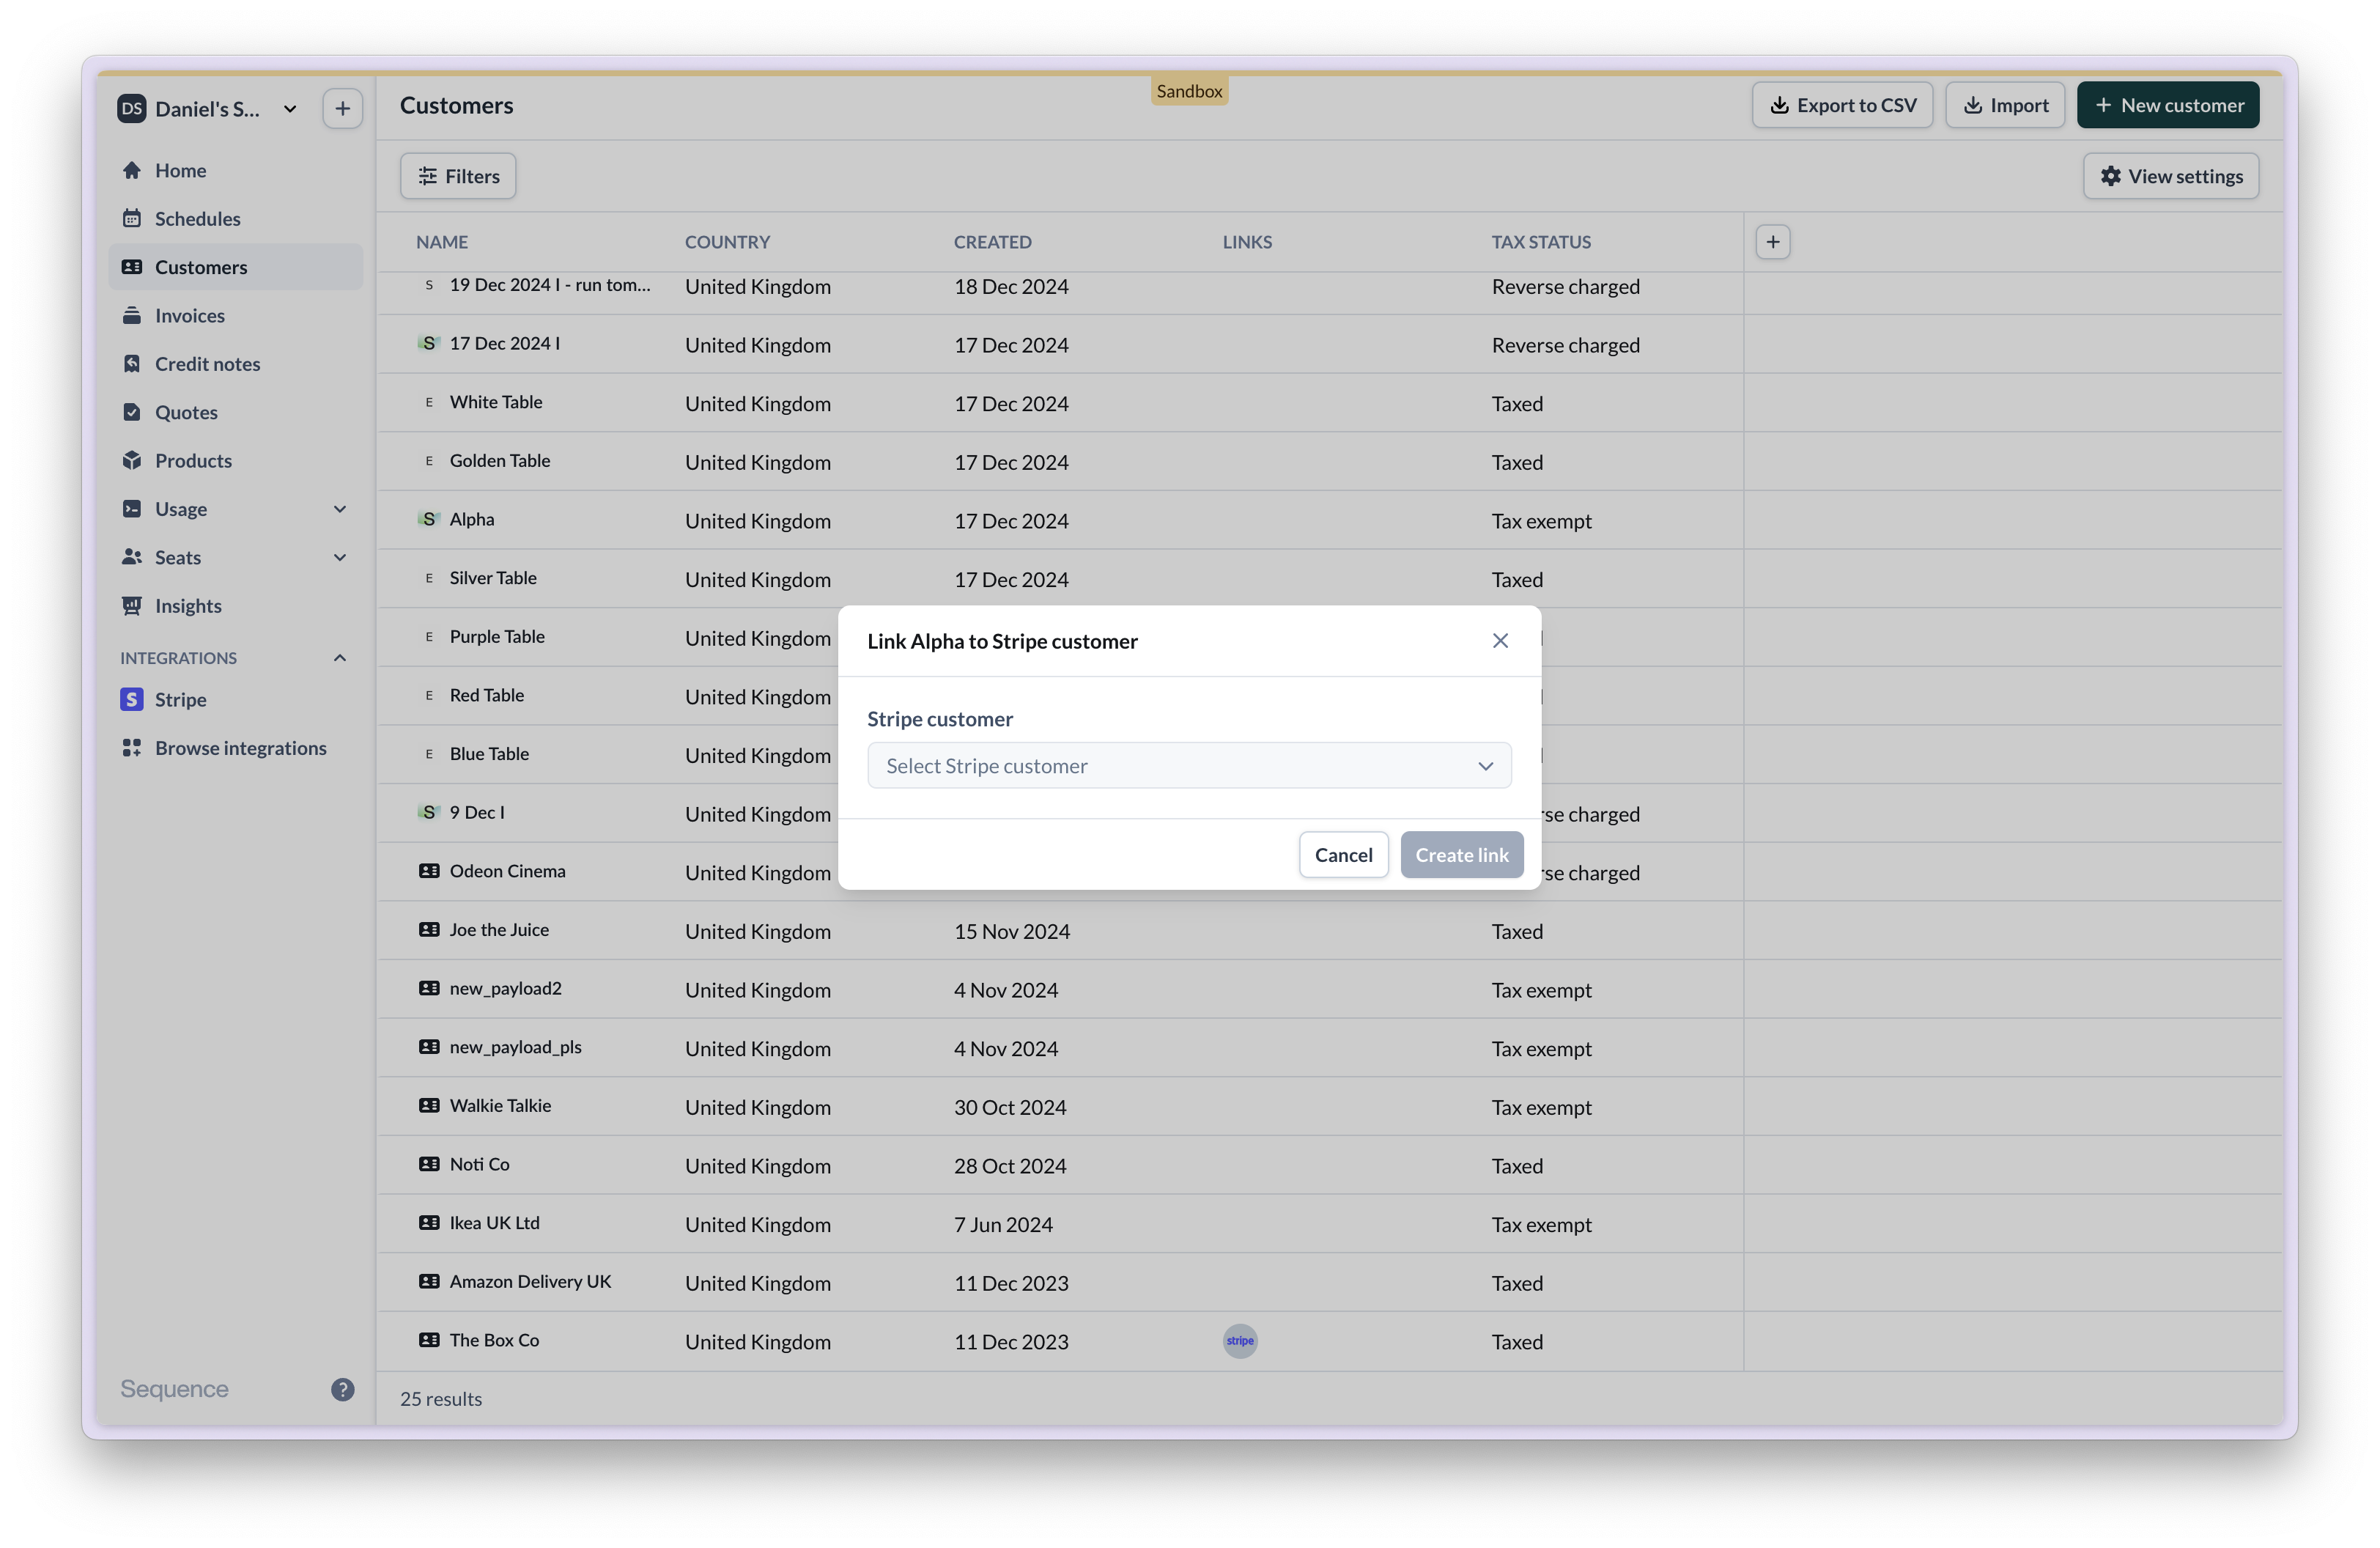
 You can also manually link Sequence customers to Stripe via the dashboard. Click on the kebab menu in the customers table and select `Link to Stripe`.
 ## Reconciling invoices
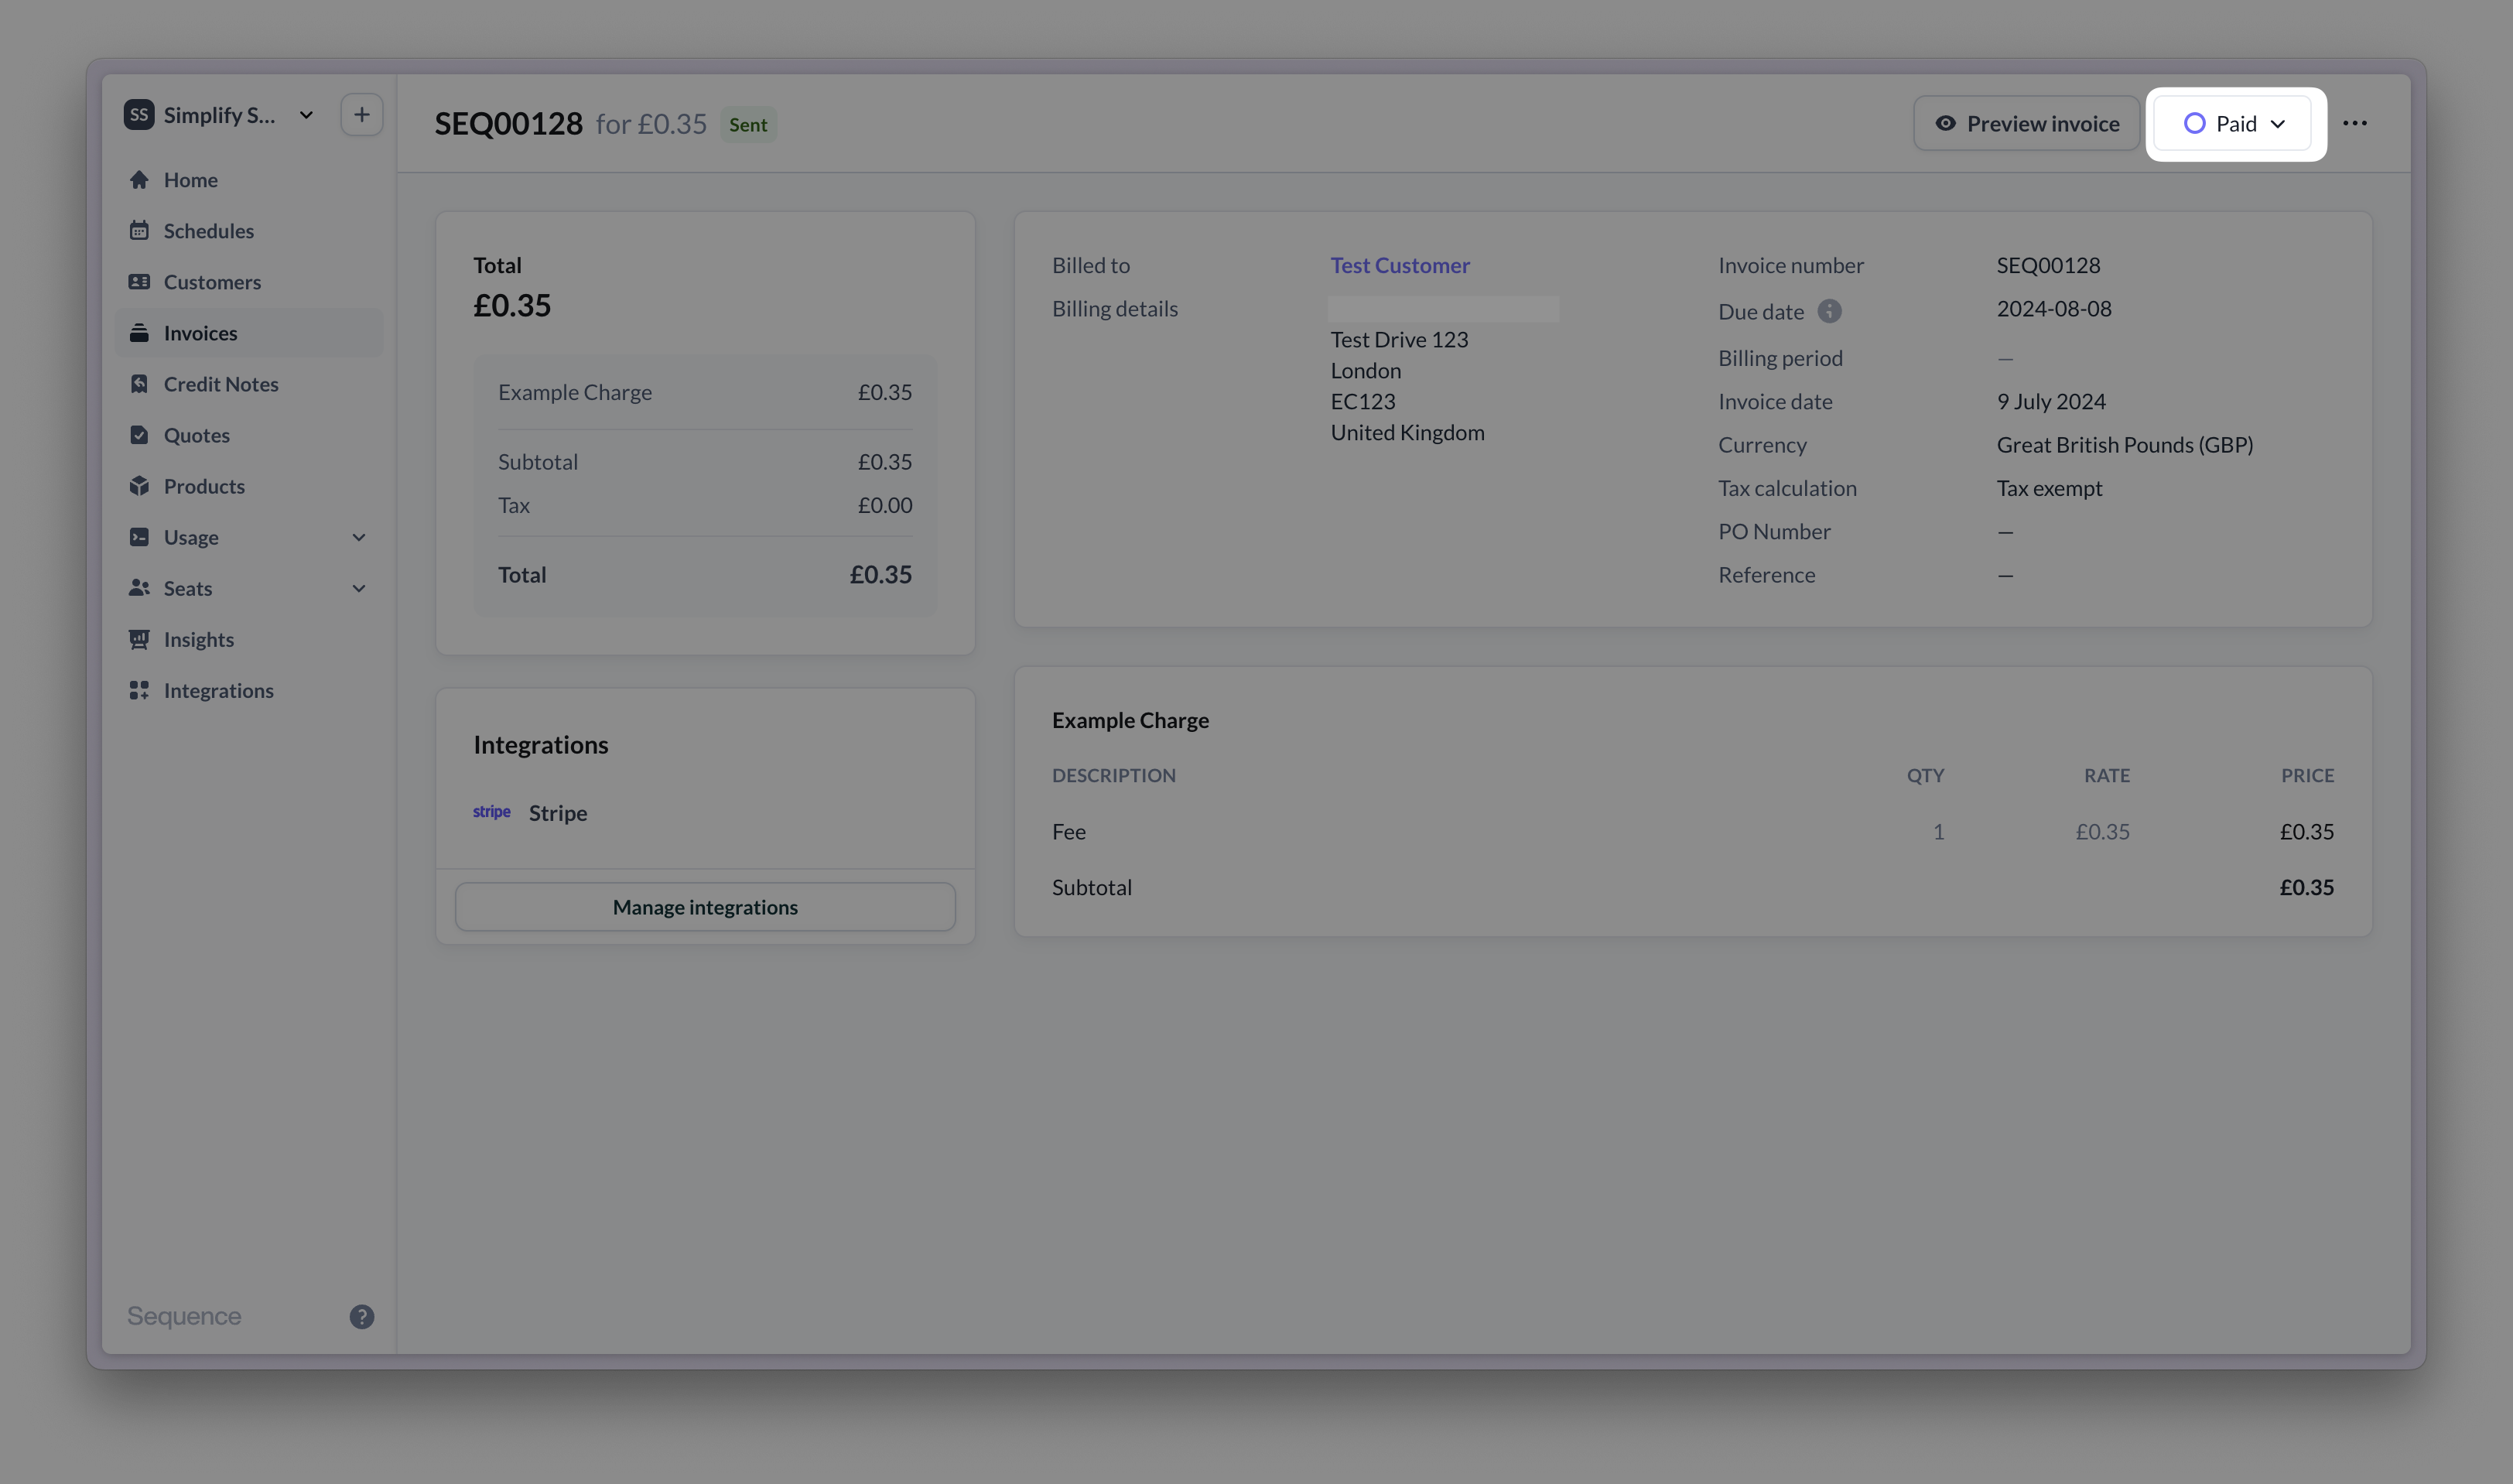
Invoices with Stripe as a payment method are automatically marked as paid in Sequence once the Stripe collection has taken place.
## Reconciling invoices
Invoices with Stripe as a payment method are automatically marked as paid in Sequence once the Stripe collection has taken place.
 Using an Accounting integration with Sequence? For invoices with a Stripe payment link, Sequence does not sync transactions such as Stripe payments with your Accounting system. In this case, you need to reconcile invoices in your Accounting system separately.
To reconcile payments against invoices in your Accounting system or ERP, use one of Stripe's native Accounting or ERP integrations to sync in payment feeds.
## Dealing with failed payments
Sequence automatically charges customers with a payment method on file when you finalize an invoice with Stripe enabled.
Payments fail for a number of reasons, including expired card details and insufficient funds ([learn more](https://docs.stripe.com/declines/codes)).
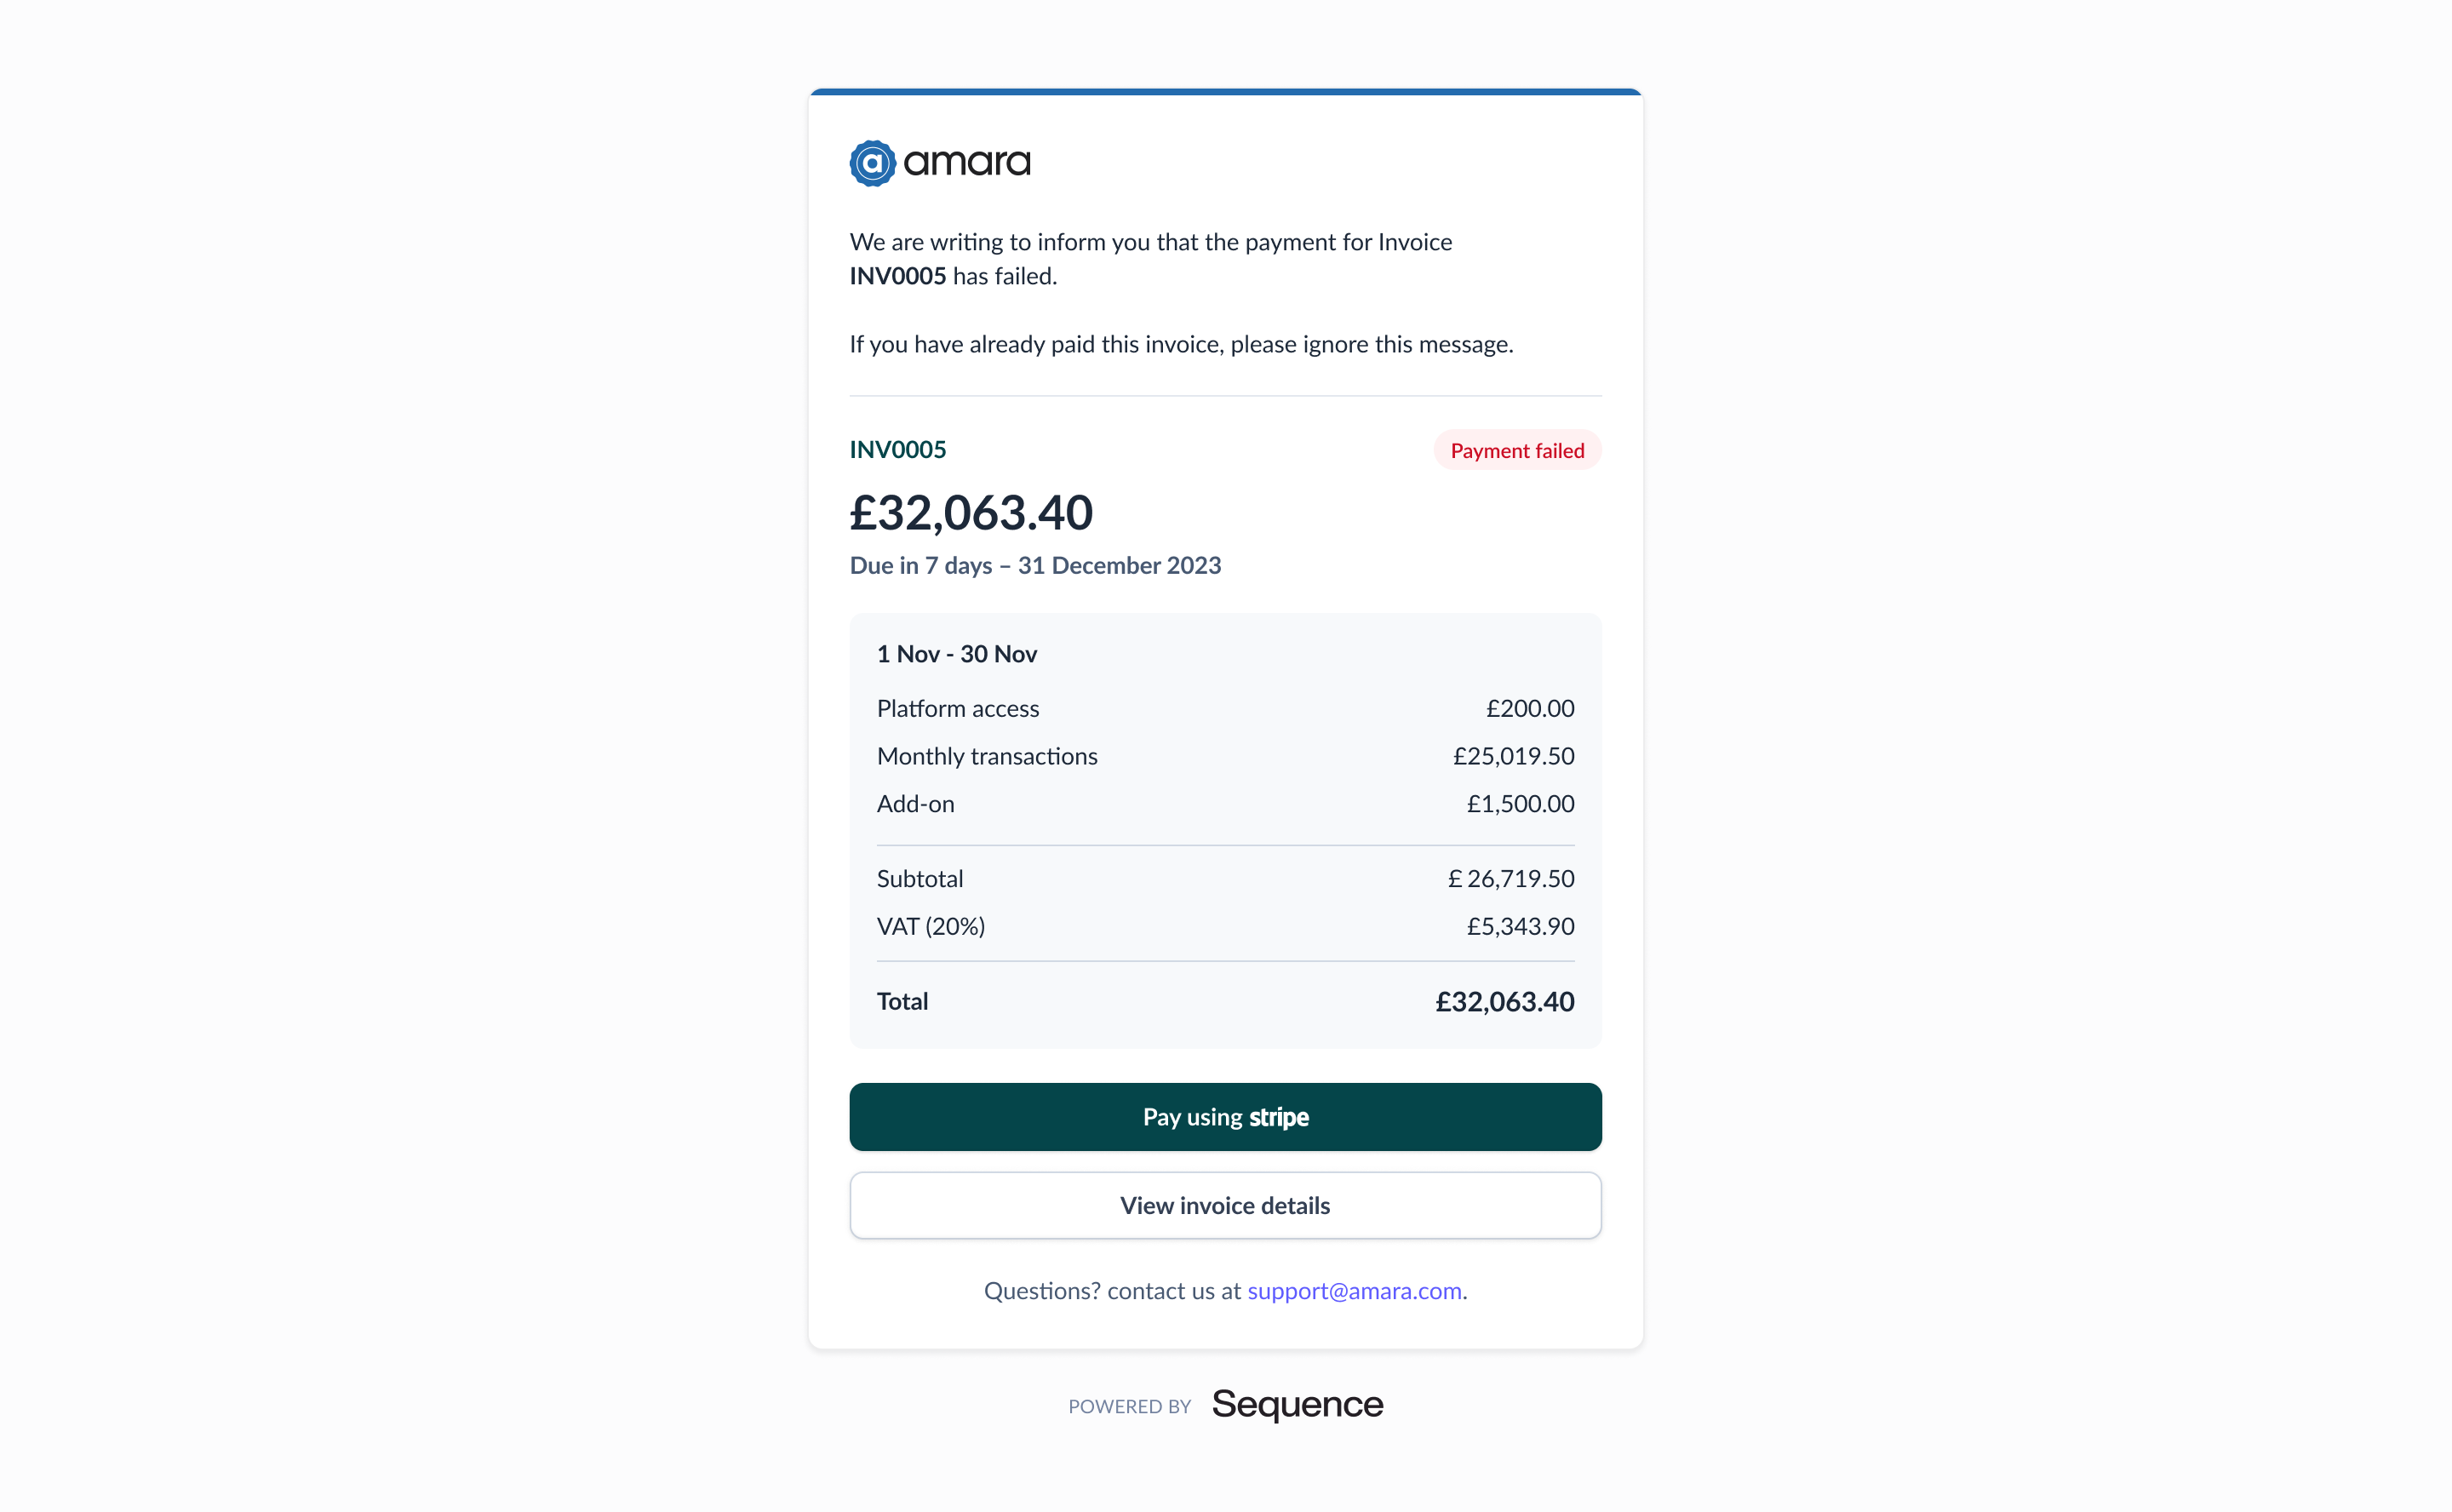
When a payment fails, Sequence notifies you and your customer via email.
To make the payment, your customer needs to provide an updated payment method. Your customer can pay for the invoice by selecting the `Pay using Stripe` link from their invoice email notification or via their customer portal.
When a payment fails, Sequence sends an email to your business and customer.
Using an Accounting integration with Sequence? For invoices with a Stripe payment link, Sequence does not sync transactions such as Stripe payments with your Accounting system. In this case, you need to reconcile invoices in your Accounting system separately.
To reconcile payments against invoices in your Accounting system or ERP, use one of Stripe's native Accounting or ERP integrations to sync in payment feeds.
## Dealing with failed payments
Sequence automatically charges customers with a payment method on file when you finalize an invoice with Stripe enabled.
Payments fail for a number of reasons, including expired card details and insufficient funds ([learn more](https://docs.stripe.com/declines/codes)).
When a payment fails, Sequence notifies you and your customer via email.
To make the payment, your customer needs to provide an updated payment method. Your customer can pay for the invoice by selecting the `Pay using Stripe` link from their invoice email notification or via their customer portal.
When a payment fails, Sequence sends an email to your business and customer.
 To make the payment, your customer needs to visit the Stripe Checkout page related to the invoice.
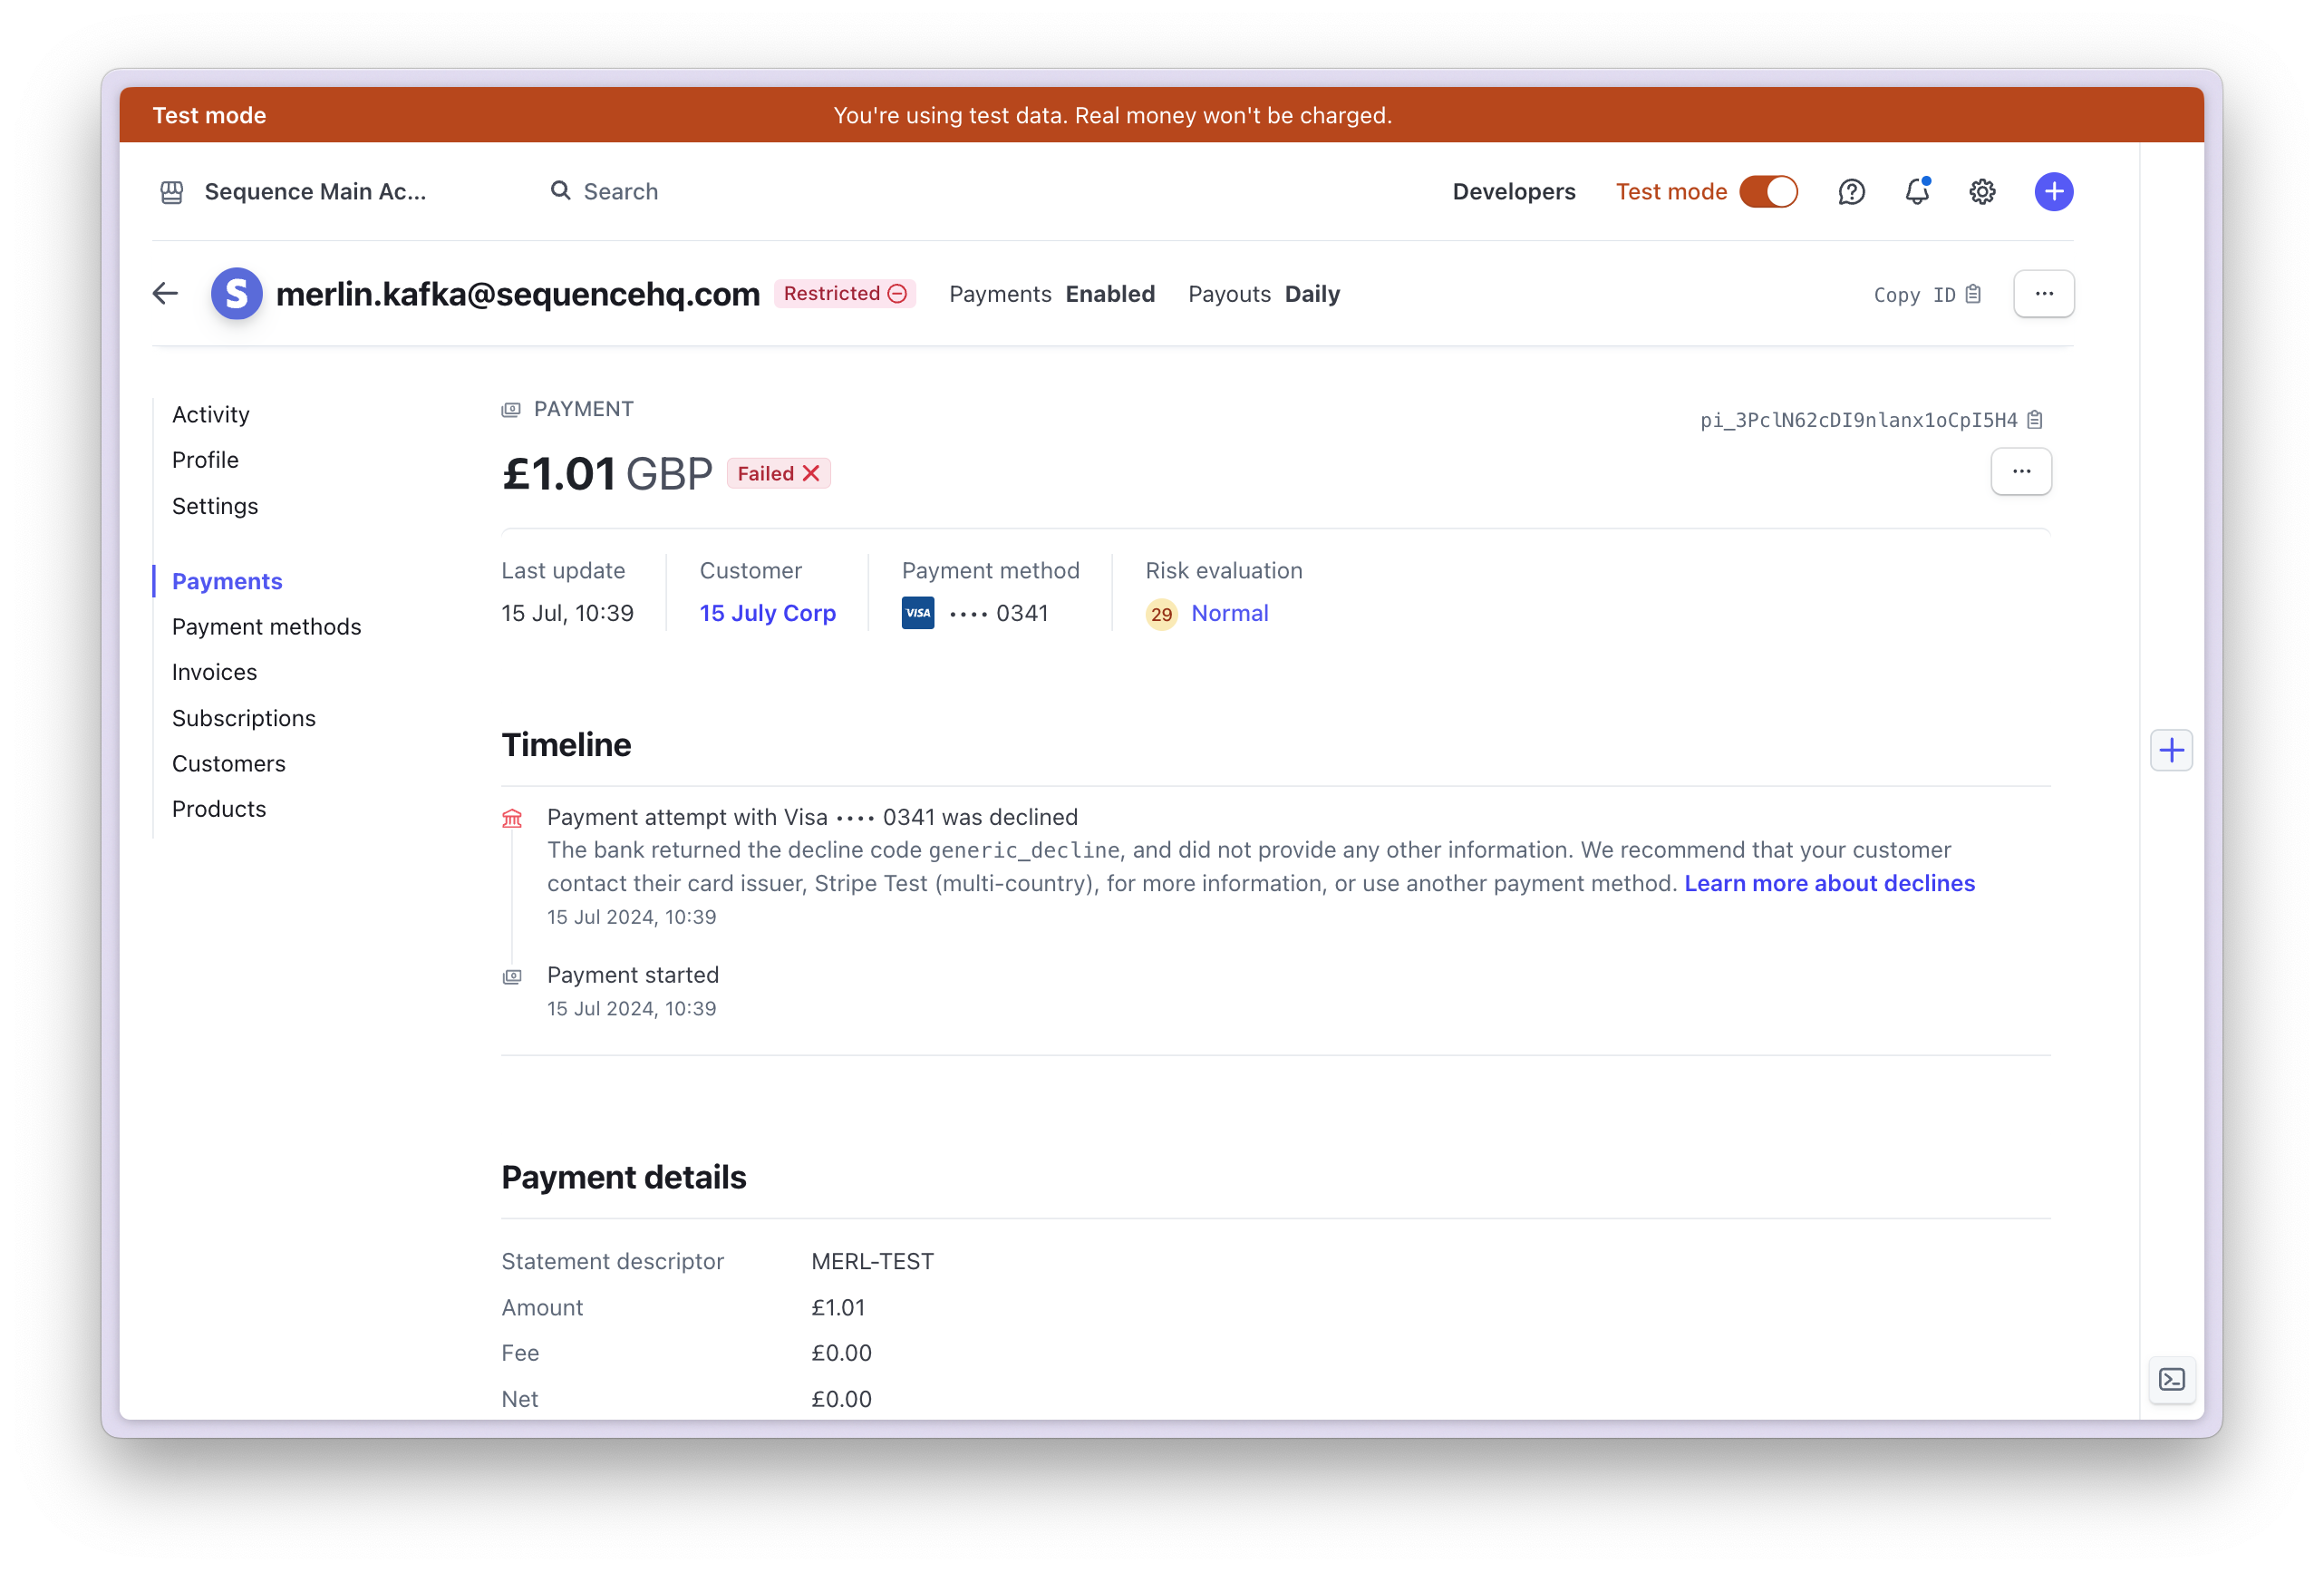
 Log in to your Stripe dashboard and view all successful and failed payments.
 ## Charging self-serve customers
Collect customer payment information as part of your onboarding and charge customers automatically.
Add Stripe customers as part of your onboarding and collect payment details upfront:
1. Implement a Stripe onboarding user flow using the Stripe SDK. Your Sequence Stripe Connect account comes with API keys that you can use.
2. Use the Stripe SDK to collect the payment details of your customers.
3. Going forward Sequence will then use the Stripe customer ID to charge the payment details you have collected during onboarding.
4. You would then use the Stripe SDK to create a Stripe customer and associate the payment details with that Stripe customer. Once you have a Stripe customer ID, you can submit an update customer request to Sequence containing the Stripe customer ID (see below). That request will associate the Stripe customer ID with the Sequence customer ID.
5. Decide whether to show or hide payment links on invoices and whether to issue receipts via Stripe.
[Here](/reference/latest/customer/update-customer) is an example request that contains a Stripe customer ID in our API reference (a PUT request to update the customer and contains the following request body):
```
{
"address": {
"country": "GB",
"line1": "Flat 1",
"line2": "123 Fake Street",
"postcode": "AB1 2EF",
"town": "London"
},
"billingEmails": [
"exampleCorpInvoices@example.com"
],
"contactName": "John Doe",
"customerAliases": [
"b1c87177-088a-40ec-8917-9809343f3f9c"
],
"email": "john@example.com",
"externalIds": [
{
"key": "Xero",
"value": "123456789"
},
{
"key": "Stripe",
"value": "cus_OCtCxqQDgu1uX9"
},
{
"key": "HubSpot",
"value": "123456789"
}
],
"label": "Example customer",
"legalName": "John Doe",
"taxStatus": "TAXED",
"telephone": "02010001000",
"url": "https://example.com/"
}
```
## Copying existing customers into your new Stripe account
Have an existing Stripe account? Copying existing customers is straightforward and only takes a few minutes.
Your new connected Stripe account will receive all of the Stripe Customers and associated stored payment details from your original Stripe account.
A data copy involves two parties: the sender account and the recipient account ([Stripe Docs](https://docs.stripe.com/get-started/data-migrations/pan-copy-self-serve?copy-method=full)):
**Sender account**: The Stripe account currently storing the customer data. This is the account to copy the data from.
**Recipient account**: The Stripe account where you want to store the customer data. This is the account to copy the data to (your new account connected to Sequence).
In your sender account, copy the `accountId` (Example: `acct_1LFi224JxaT26LnINXj`) of your Stripe account. You can find it under Settings > Business > Account details [here](https://dashboard.stripe.com/settings/account).
In your sender account, go to [Customers](https://dashboard.stripe.com/customers) and select the customers you want to copy. Next select copy and enter the `accountId` from step 1. Confirm the copy request.
Go to [Customers](https://dashboard.stripe.com/customers) in your new Sequence-specific Stripe account and accept the copy request. Once confirmed, Stripe will copy your customer details and payment methods into the new account (usually takes less than an hour).
Learn more about copying customer details across counts in the [Stripe docs](https://docs.stripe.com/get-started/data-migrations/pan-copy-self-serve?copy-method=full).
Data copying considerations: Single Euro Payments Area (SEPA), BACs, or ACH records stored as payment method objects cannot be copied over at this time.
## Frequently asked questions
Yes, you can use your existing Stripe account with Sequence.
Sequence uses [Stripe Connect](https://stripe.com/connect) as this is the recommended approach for orchestrating payments on another user's Stripe account.
As part of Stripe Connect, Sequence is required to use a separate sub-account within a user's overall Stripe account.
This follows Stripe's [Legal Entity Sharing](https://support.stripe.com/questions/legal-entity-sharing) model, which ensures that data is segregated between platforms.
If you have existing customers in another sub-account, they can be copied to the one managed by Sequence using Stripe's PAN data copy method. This is documented above.
Some other platforms continue to use a Stripe OAuth flow that does allow connecting to an existing Stripe sub-account. However, Stripe advises that the OAuth flow is considered deprecated.
Check your Stripe account status to confirm there are no outstanding tasks or missing information that may result in a restricted Stripe account.
Stripe provides a wide range of global payment methods. Go to **Settings > Payments > Payment methods**.
Login to your Stripe dashboard, head to settings and disconnect from Sequence.
Connect to Stripe from your Sequence sandbox account. That will create another, test-mode account that is connected to your Sequence Sandbox account.
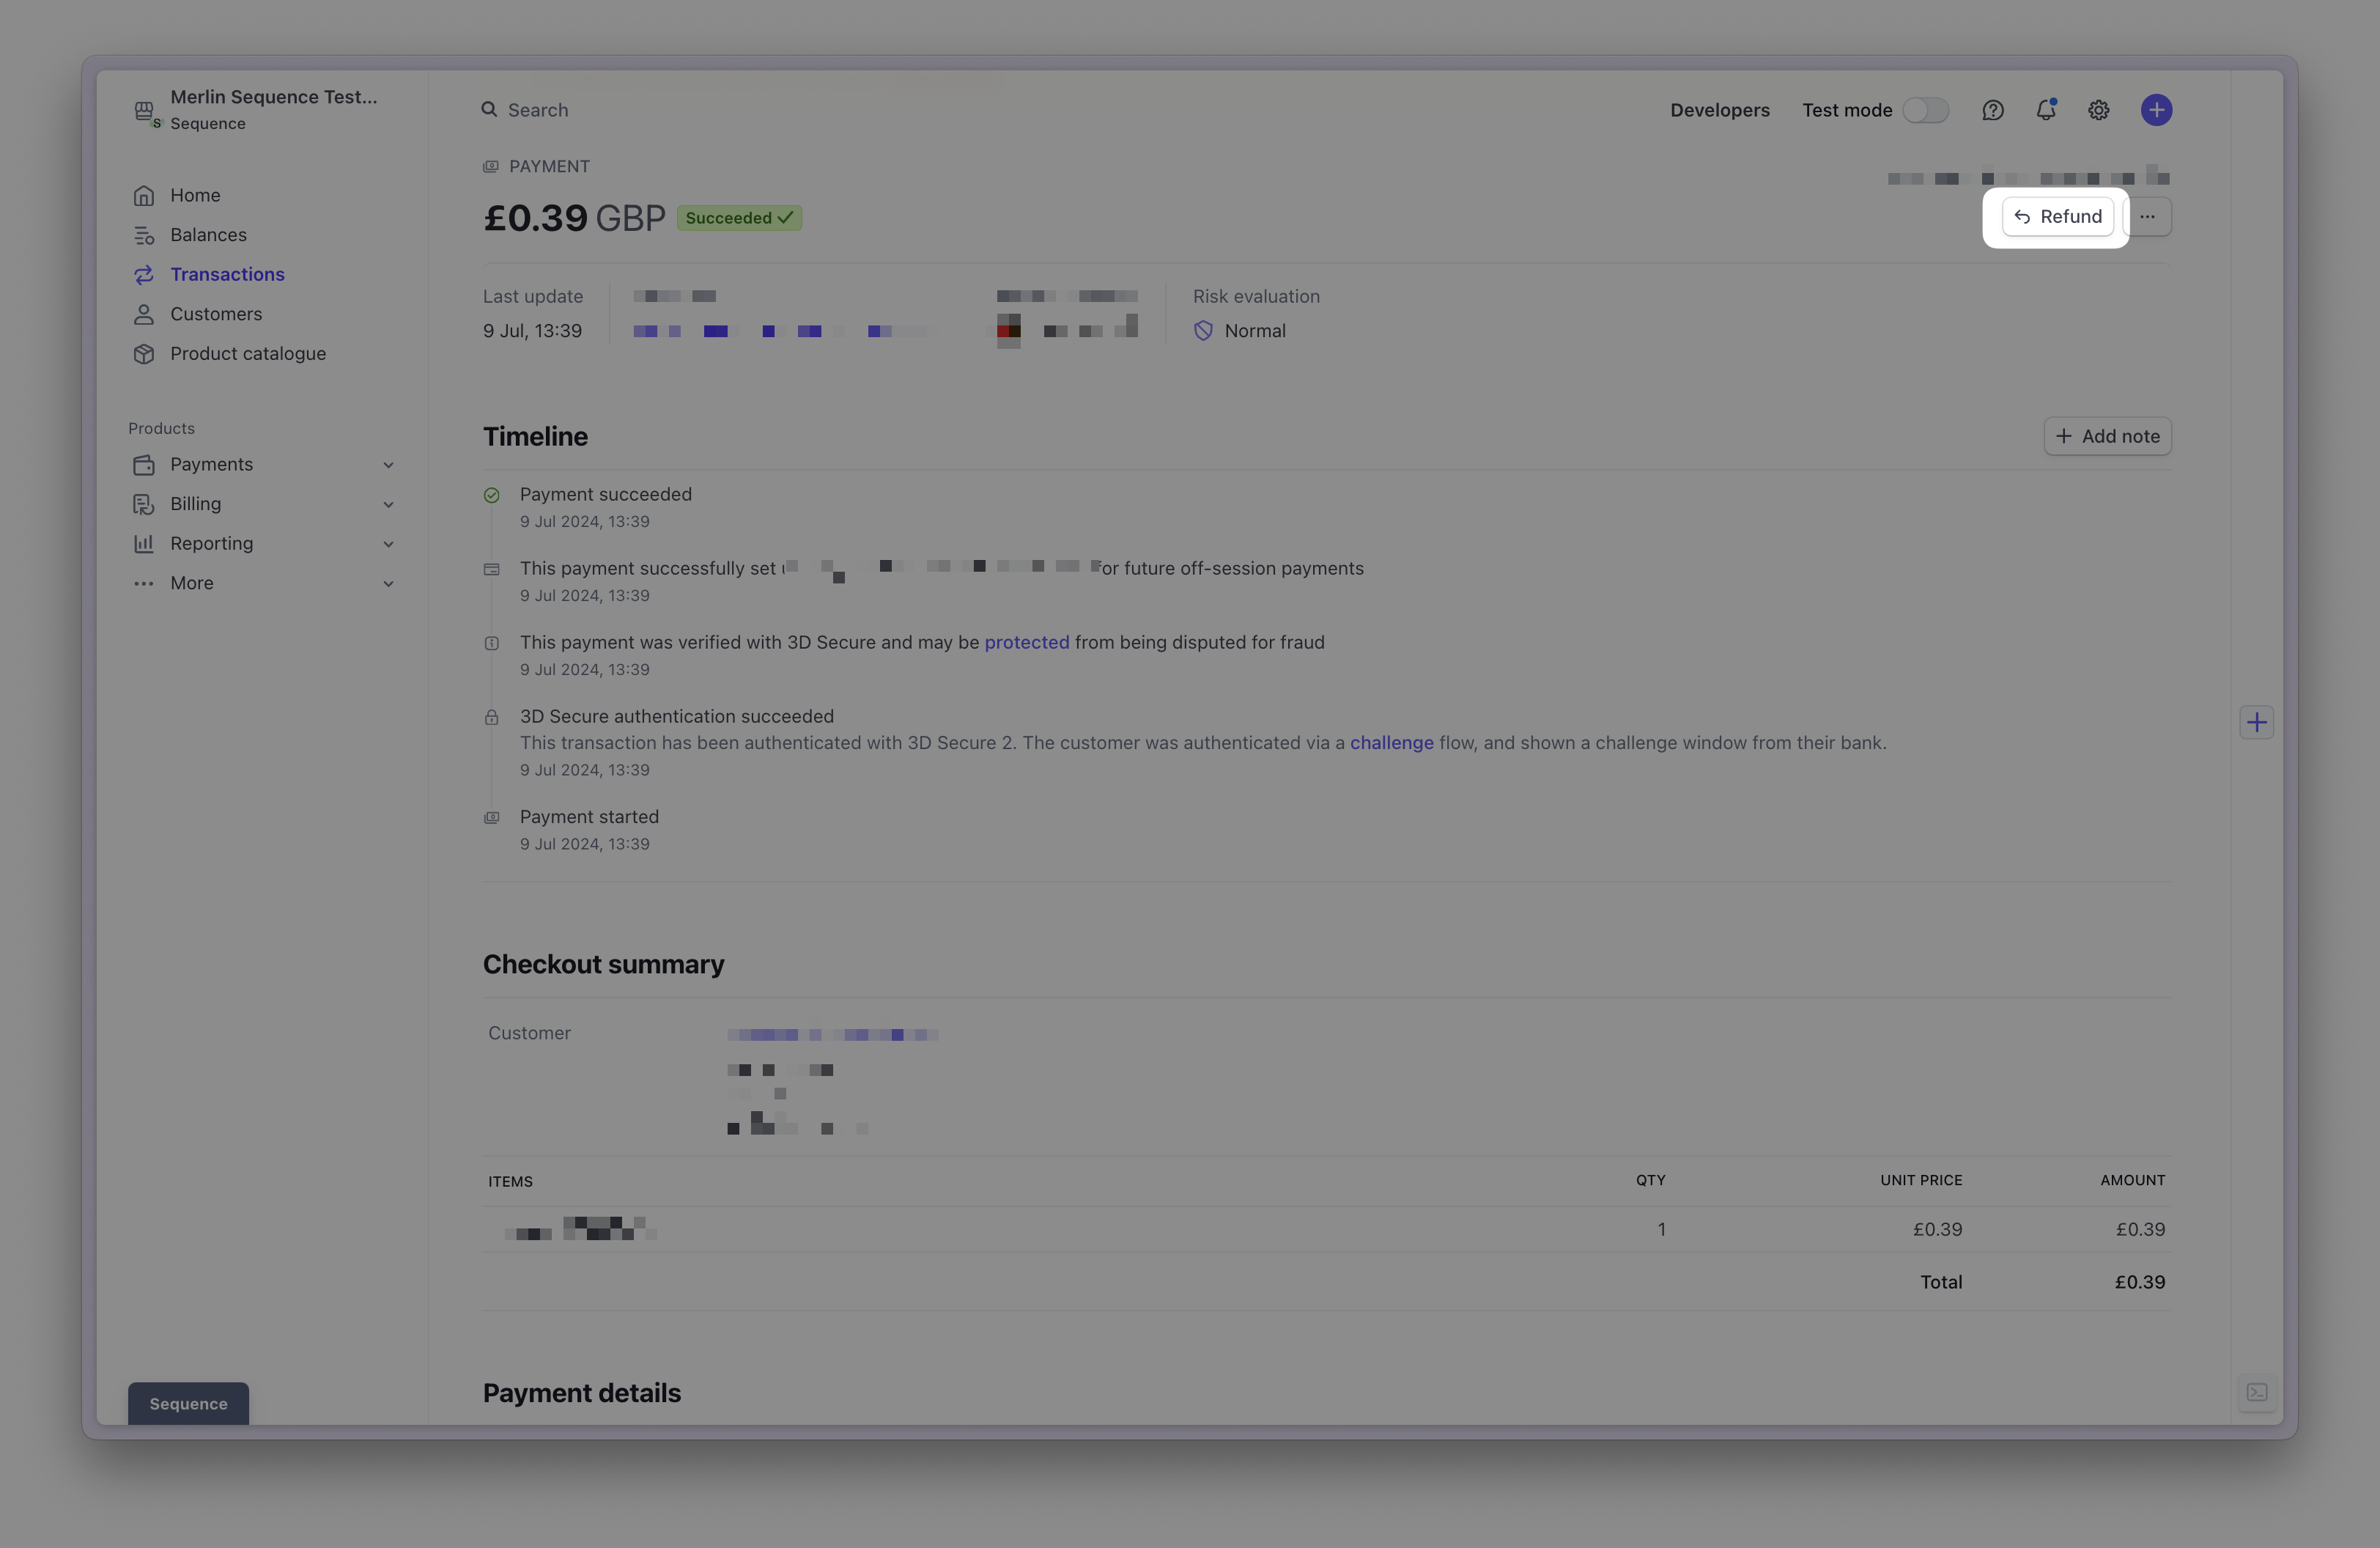
Log in to your Stripe dashboard and locate the payment you want to refund. Next, refund the payment via the button shown below.
## Charging self-serve customers
Collect customer payment information as part of your onboarding and charge customers automatically.
Add Stripe customers as part of your onboarding and collect payment details upfront:
1. Implement a Stripe onboarding user flow using the Stripe SDK. Your Sequence Stripe Connect account comes with API keys that you can use.
2. Use the Stripe SDK to collect the payment details of your customers.
3. Going forward Sequence will then use the Stripe customer ID to charge the payment details you have collected during onboarding.
4. You would then use the Stripe SDK to create a Stripe customer and associate the payment details with that Stripe customer. Once you have a Stripe customer ID, you can submit an update customer request to Sequence containing the Stripe customer ID (see below). That request will associate the Stripe customer ID with the Sequence customer ID.
5. Decide whether to show or hide payment links on invoices and whether to issue receipts via Stripe.
[Here](/reference/latest/customer/update-customer) is an example request that contains a Stripe customer ID in our API reference (a PUT request to update the customer and contains the following request body):
```
{
"address": {
"country": "GB",
"line1": "Flat 1",
"line2": "123 Fake Street",
"postcode": "AB1 2EF",
"town": "London"
},
"billingEmails": [
"exampleCorpInvoices@example.com"
],
"contactName": "John Doe",
"customerAliases": [
"b1c87177-088a-40ec-8917-9809343f3f9c"
],
"email": "john@example.com",
"externalIds": [
{
"key": "Xero",
"value": "123456789"
},
{
"key": "Stripe",
"value": "cus_OCtCxqQDgu1uX9"
},
{
"key": "HubSpot",
"value": "123456789"
}
],
"label": "Example customer",
"legalName": "John Doe",
"taxStatus": "TAXED",
"telephone": "02010001000",
"url": "https://example.com/"
}
```
## Copying existing customers into your new Stripe account
Have an existing Stripe account? Copying existing customers is straightforward and only takes a few minutes.
Your new connected Stripe account will receive all of the Stripe Customers and associated stored payment details from your original Stripe account.
A data copy involves two parties: the sender account and the recipient account ([Stripe Docs](https://docs.stripe.com/get-started/data-migrations/pan-copy-self-serve?copy-method=full)):
**Sender account**: The Stripe account currently storing the customer data. This is the account to copy the data from.
**Recipient account**: The Stripe account where you want to store the customer data. This is the account to copy the data to (your new account connected to Sequence).
In your sender account, copy the `accountId` (Example: `acct_1LFi224JxaT26LnINXj`) of your Stripe account. You can find it under Settings > Business > Account details [here](https://dashboard.stripe.com/settings/account).
In your sender account, go to [Customers](https://dashboard.stripe.com/customers) and select the customers you want to copy. Next select copy and enter the `accountId` from step 1. Confirm the copy request.
Go to [Customers](https://dashboard.stripe.com/customers) in your new Sequence-specific Stripe account and accept the copy request. Once confirmed, Stripe will copy your customer details and payment methods into the new account (usually takes less than an hour).
Learn more about copying customer details across counts in the [Stripe docs](https://docs.stripe.com/get-started/data-migrations/pan-copy-self-serve?copy-method=full).
Data copying considerations: Single Euro Payments Area (SEPA), BACs, or ACH records stored as payment method objects cannot be copied over at this time.
## Frequently asked questions
Yes, you can use your existing Stripe account with Sequence.
Sequence uses [Stripe Connect](https://stripe.com/connect) as this is the recommended approach for orchestrating payments on another user's Stripe account.
As part of Stripe Connect, Sequence is required to use a separate sub-account within a user's overall Stripe account.
This follows Stripe's [Legal Entity Sharing](https://support.stripe.com/questions/legal-entity-sharing) model, which ensures that data is segregated between platforms.
If you have existing customers in another sub-account, they can be copied to the one managed by Sequence using Stripe's PAN data copy method. This is documented above.
Some other platforms continue to use a Stripe OAuth flow that does allow connecting to an existing Stripe sub-account. However, Stripe advises that the OAuth flow is considered deprecated.
Check your Stripe account status to confirm there are no outstanding tasks or missing information that may result in a restricted Stripe account.
Stripe provides a wide range of global payment methods. Go to **Settings > Payments > Payment methods**.
Login to your Stripe dashboard, head to settings and disconnect from Sequence.
Connect to Stripe from your Sequence sandbox account. That will create another, test-mode account that is connected to your Sequence Sandbox account.
Log in to your Stripe dashboard and locate the payment you want to refund. Next, refund the payment via the button shown below.